You may sometimes come across the Fatal system error – c000021A, usually after you have recovered system files from a backup or after drivers have been installed or updated. The main reason behind this BSoD error is, when Windows finds a security breach in the WinLogon or the CSRSS (Client Server Run-Time Subsystem). When these types of processes shut down abruptly, your computer shifts to kernel mode since it cannot function without the WinLogon or the CSRSS. In fact, the error can also arise due to incompatible hard drive files. We have compiled a list of solutions for you that may help you fix the Fatal system error – c000021A on your Windows 10 PC. Let’s see how.
Method 1: By Uninstalling the Problem Software
If you have recently installed or updated a software or an application, that may well be the cause for this error. Therefore, you can uninstall this app or software and see if it works.
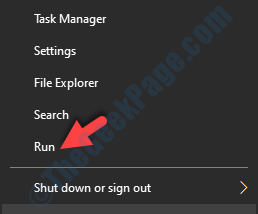
Step 1: Right-click on Start menu and select Run to open the Run command.

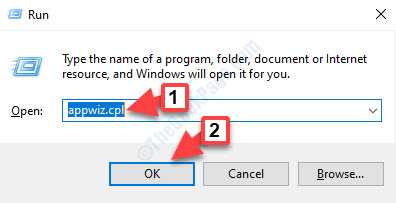
Step 2: In the Run command, type appwiz.cpl in the search field and press OK to open the Programs and features window in Control Panel.

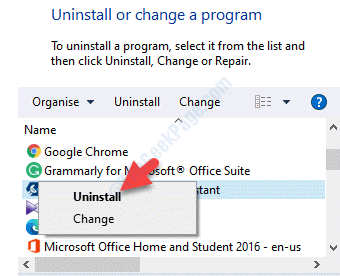
Step 3: In the Programs and Features window, go to the program list below Uninstall or change a program, right-click on the program, and select Uninstall.

Method 2: By Running SFC Scannow Command
Step 1: Boot your system into Safe Mode with Command Prompt using this process.
Step 3: Copy and paste the below command in the Command Prompt window and hit Enter:
sfc scannow

This process takes a while, so wait till it completes. It will detect any corrupt files and fix them automatically.
Method 3: By Running DISM Command
Step 1: Start Command Prompt on your system in safe mode.
Step 2: In the Command Prompt window , run the below command and press Enter:
dism /image:C:\/cleanup-image/revertpendingactions

Let the process complete. It takes a while to identify any issues and repairs them automatically.
Method 4: By Performing System Restore
Firstly create a Restore Point if not yet created. Boot your system into Safe Mode with Command Prompt and then create system restore point using command prompt.
If system restore point is already present, proceed with the below steps.
Step 1: Press Win + X shortcut keys on your keyboard and select Run.

Step 2: Now, type rstrui in the Run command search field and press OK:

Step 3: It opens the System Restore window. Click on Next.

Step 4: Select a Restore Point from the list and click Next.

Step 5: Review the details and press the Finish button to confirm.

Step 6: In the prompt that pops up, click Yes to confirm the system restore process.
The system restore process takes a while, so have patience till it completes. Once completed, you will see a message stating that the “System restore completed successfully“. This indicates that your system has been successfully restored.
Method 5: By Running Cloud Reset
If none of the above method works, the only option left is to perform a cloud reset. Boot your PC into safe mode and proceed with the below steps.
Step 1: Press Win + I hotkey on your keyboard to open Settings.
Step 2: In the Settings window, click on Update & Security.

Step 3: Next, click on Recovery on the left side of the pane.

Step 4: Go to the right side of the pane, and under Reset this PC section, click on Get started.

Step 5: In the next window, under the Choose an option section, select Keep my files or Remove everything based on your requirement.

Step 6: In the next window, select Cloud download.

Step 7: Press Reset to confirm.
Let the process complete.
This method helps you to reset your PC easily without downloading the ISO.