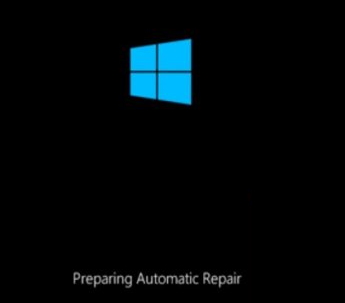
Most of the time, when the user clicks on the Windows Welcome Screen, the Login Screen doesn’t appear. That is, the Windows is stuck on the Welcome Screen. It generally happens after the update. At times, the mouse operation doesn’t wake the system. Weirdly, keyboard operation does.
In this article, let us discuss some easy fixes to overcome the issue to ensure a smooth login to the system.
NOTE: Make sure you follow the steps in the same order as listed below. In Fix 3, we open Safe Mode with Networking and the fixes below are to be executed in the same mode.
Fix 1 – Disconnect from the Internet
Just disconnect from internet. If you are connected to a wifi from a router, just turn off the router and try whether it solves your issue. Some users also suggested, that this problem got resolved when they used Ethernet connection (Connecting directly to the router via cable) instead of wifi.
Fix 2 – Disconnect all USB devices connected to your PC
This issue may occuur as a result of faulty hardware connected to your PC (USB keyboard, Mouse etc.). Just detach all USB devices from the computer and check whether the problem vanish away or not. Do not forget to remove external SD card or hard disk if attached to your system.
Fix 3: Use the keyboard instead of a mouse
If you notice that clicking the mouse doesn’t make any difference, try hitting some keys on the keyboard.
Personally, hitting the Enter key works for me. Many users have reported that holding Ctrl+Shift+Enter has worked for them.
The Steps Given below require you to enter safe mode
How to Enter safe mode via Automatic repair screen
1. Shutdown your PC.
2. Turn On your system using power button once.
As soon as , your Computer will start showing manufacturer logo or something on screen for the first time, press and hold the power button continuously for more than 5 seconds to forcefully turn PC off.

3. Repeat this process (Force shutdown and then starting again) for 3–4 times until you see Automatic repair screen.

4. Then, click on Advanced options in the next screen.

5. Click on Troubleshoot.

6. Choose Advanced options.

7. Select Startup Settings

8. Click on “Restart“.

9. Then, press 4 or F4 from your keyboard to “Enable Safe Mode“.

Fix 4: Disable Credential Manager in Safe Mode.
1. Follow steps 1 to 9 from method given above to enter safe mode
2. Wait for the PC to start in safe mode.
8. Once you are in safe mode, Press Windows+R to open the Run dialog.
9. Enter the command services.msc and press Enter.
10. In the Services window that opens, scroll down and locate the Credential Manager service.
11. Double-click on the Credential Manager service.
12. From the Startup type drop-down menu, choose Disabled.
13. Click on the Stop button, under the Service Status section.
14. Click on Apply and then click on the Ok button.
Check if this fix helps. Restart the system and check if you can log in to the system.
Fix 5 Disable Fast Startup
1. Follow steps 1 to 9 from method given above to enter safe mode
2 – Now, Open run by Jointly pressing Windows and R key
3 -Now, type powercfg.cpl in it and click OK.

4 -Now, Choose what the power buttons do

5 – Click on change settings that are currently unavailable

6 – Uncheck Turn off fast startup option and click on save changes

7 –Restart Computer
Fix 6: Uninstall the latest Updates installed in the system
1. Follow steps 1 to 4 from method given above
2. Now, the screen will show your two options
3. Just, choose Troubleshoot.
4. Now, click on Advanced Options.
5. Click on the Uninstall Updates option as shown below.
6. Now, choose Uninstall latest quality update option.
7. Now, restart the system normally and check if you can log in.
8. If you see the same issue again, repeat steps 1 to 5 and then select the option Uninstall latest feature update.
9. Restart the system normally and check if you can log in.
Check if this helps. If not, try the next fix.
Fix 7: Run the SFC and DISM Scans in the Safe Mode.
1. Open the system in Safe Mode . Follow steps 1 to 9 from the method given above
2. Open Run Dialog holding the keys Windows+R.
3. Enter cmd and press the keys Ctrl+Shift+Enter. This opens Command Prompt in Administrator mode.
4. In the USer Access Control window that shows up, click on Yes.
5. Enter the below commands one after the other. These commands will repair any corrupt files in the system.
sfc /scannow
Dism /Online /Cleanup-Image /ScanHealth
Dism /Online /Cleanup-Image /RestoreHealth
6. After performing both the scans, restart the system.
Check if this helps. Go to the welcome screen and check if you can log in.
Fix 8: Update the Display Driver.
1. Open the Run Window by holding the keys Windows+r.
2. Enter devmgmt.msc, and hit OK.

That’s All.
Fix 9 – Deep Discharge your laptop
1 – Shutdown your Laptop.
2 – Take out the battery
3 –Wait for 5 minutes to get it deeply discharged.
4 – Insert battery again.
5- Start your computer again.
We hope this article has been informative. Kindly comment and let us know the fix that helped you solve the issue.