Whether you are working on a thesis or a dissertation, you may need to add Roman, Arabic and English Page numbers in the same word document. For instance, if it’s a 5 page Word document, you may want to add page Arabic page numbers in the 1st two pages, and Roman page numbers in the next five.
However, this process may be new to many and hence, we will show you how to easily insert the page numbers in Roman, Arabic, and English in the same Word document.
Solved: Insert Roman, Arabic & English Page Numbers In the Same Word File
Step 1: Open the Word Doc you want to edit. We have opened a Word doc with 7 pages. We want to insert page numbers in Roman in the first three pages, and in Arabic in the next four.
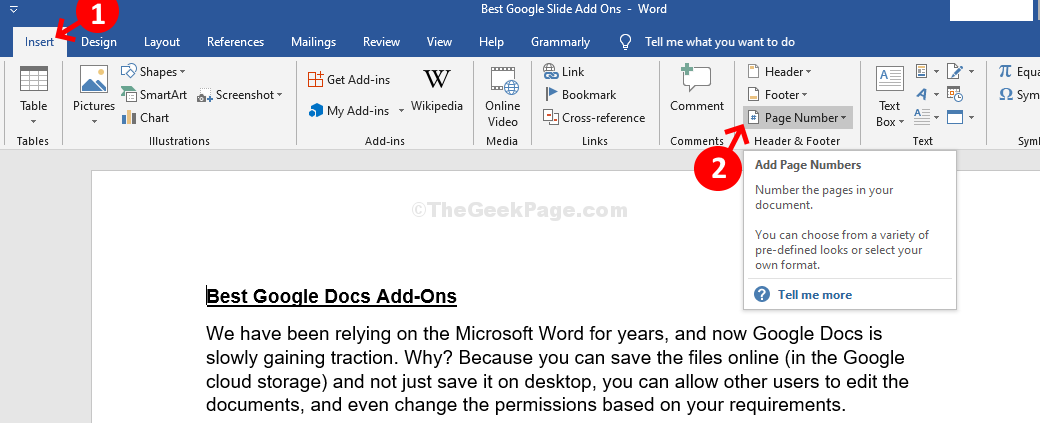
Click on the Insert tab in the Word toolbar on the top left. Click on Page Number.

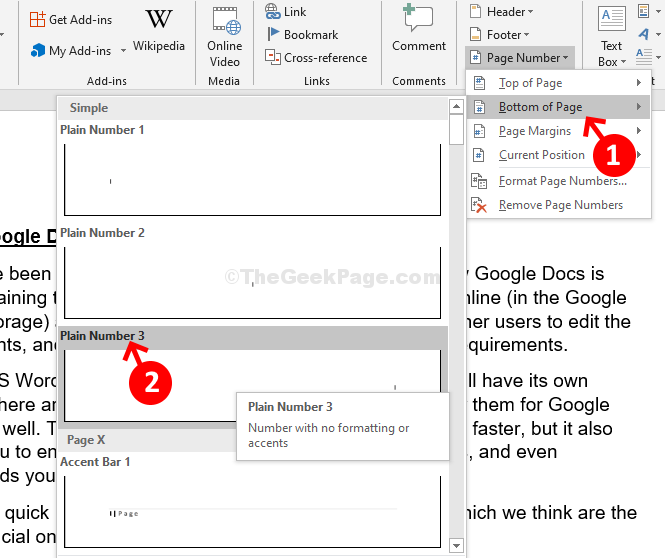
Step 2: Now select Bottom of Page from the menu and select Plain Number 3.

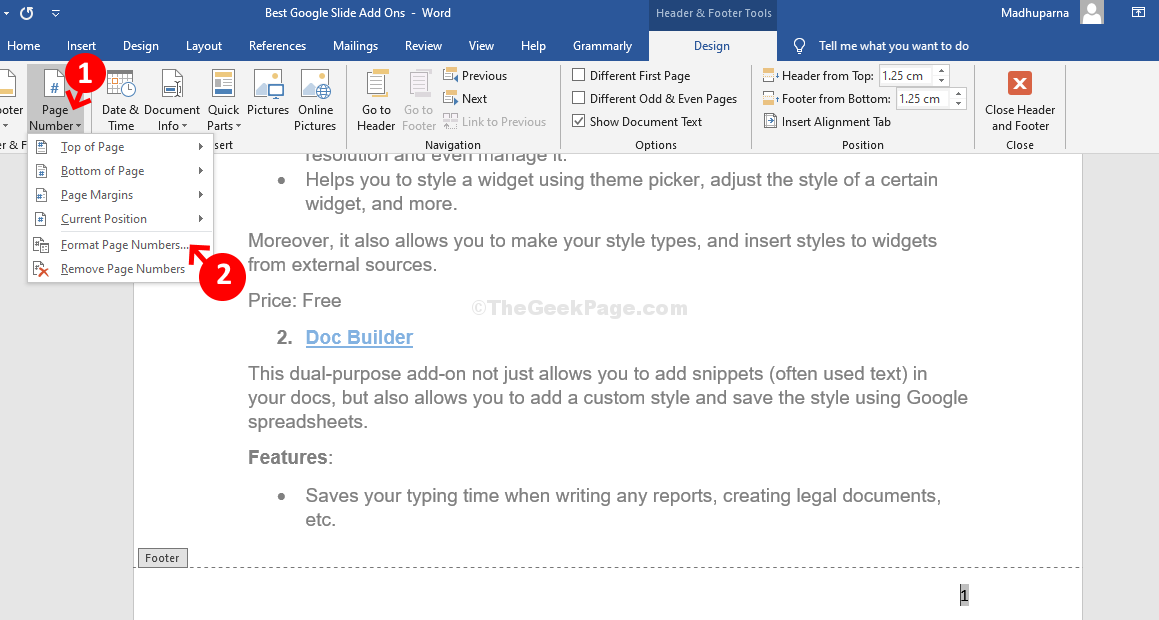
Step 3: Page number is automatically inserted in Arabic format, but, since, we want it in Roman, we will again navigate to Page Number and click on Format Page Numbers.

Step 4: In the Page Number format dialog box, select the Roman number format (I, II, III, …) from the drop-down and press OK.

Step 5: The page numbers in page one, two, and three will now show in Roman. Click on the Close Header an Footer.

Step 6: Next, we want page numbers in Arabic format from the 4th page. So, we will go to the bottom of the 3rd page and place the cursor at the end of the content.
Now, click on Layout tab on the top of the toolbar and click on Page Setup.

Step 7: In the Page Setup dialog box, go to Apply to at the bottom, and select This point forward from the drop-down. Hit OK.

*Note – This will create a big blank space in the 4th page. Use the Delete button to adjust the page back to normal.
Step 8: The page number will still be in Roman. Now, go to the bottom of the 4th page. Click on the page number, go to Page Number option in the toolbar on the upper left, and click on Format Page Numbers.

Step 9: In the Page Number Format dialog box, select the Arabic number format (1, 2, 3, …) from the drop-down, go to Page numbering section, select Start at, and set the number to 1. Press OK.

That’s it! You are done. You can now see the page numbers in Arabic format from the 4th page onward.