While playing around with your network adapters, you may accidentally delete the one and only working network adapter driver from your computer. So, what to do? If you don’t have an external WiFi adapter, you can’t even download the latest network adapter using the internet! So, you have to use another method to sort this out.
Fix 1 – Download the driver using USB tethering
You can use your Android/ iOS internet connectivity to download and install the driver update.
Step 1 – Connect using USB tethering
All these steps you have to enact on your smartphone.
Step 1 – Connect your smartphone to your computer using an USB cable.
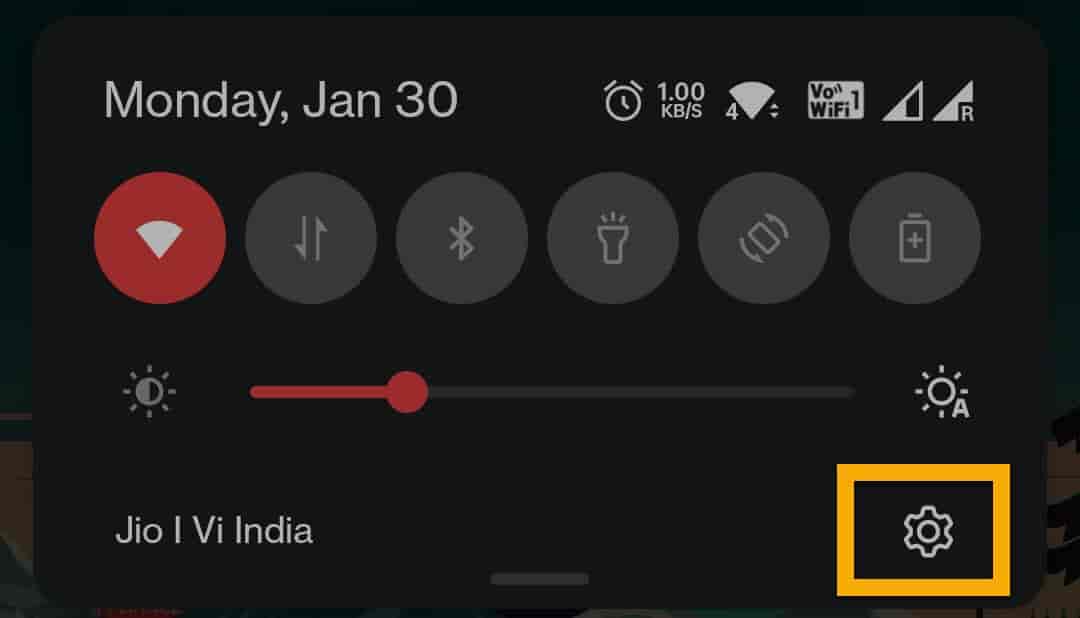
Step 2 – Unlock your mobile and open Settings. Just pull down the notification panel and click on the ⚙️ icon.
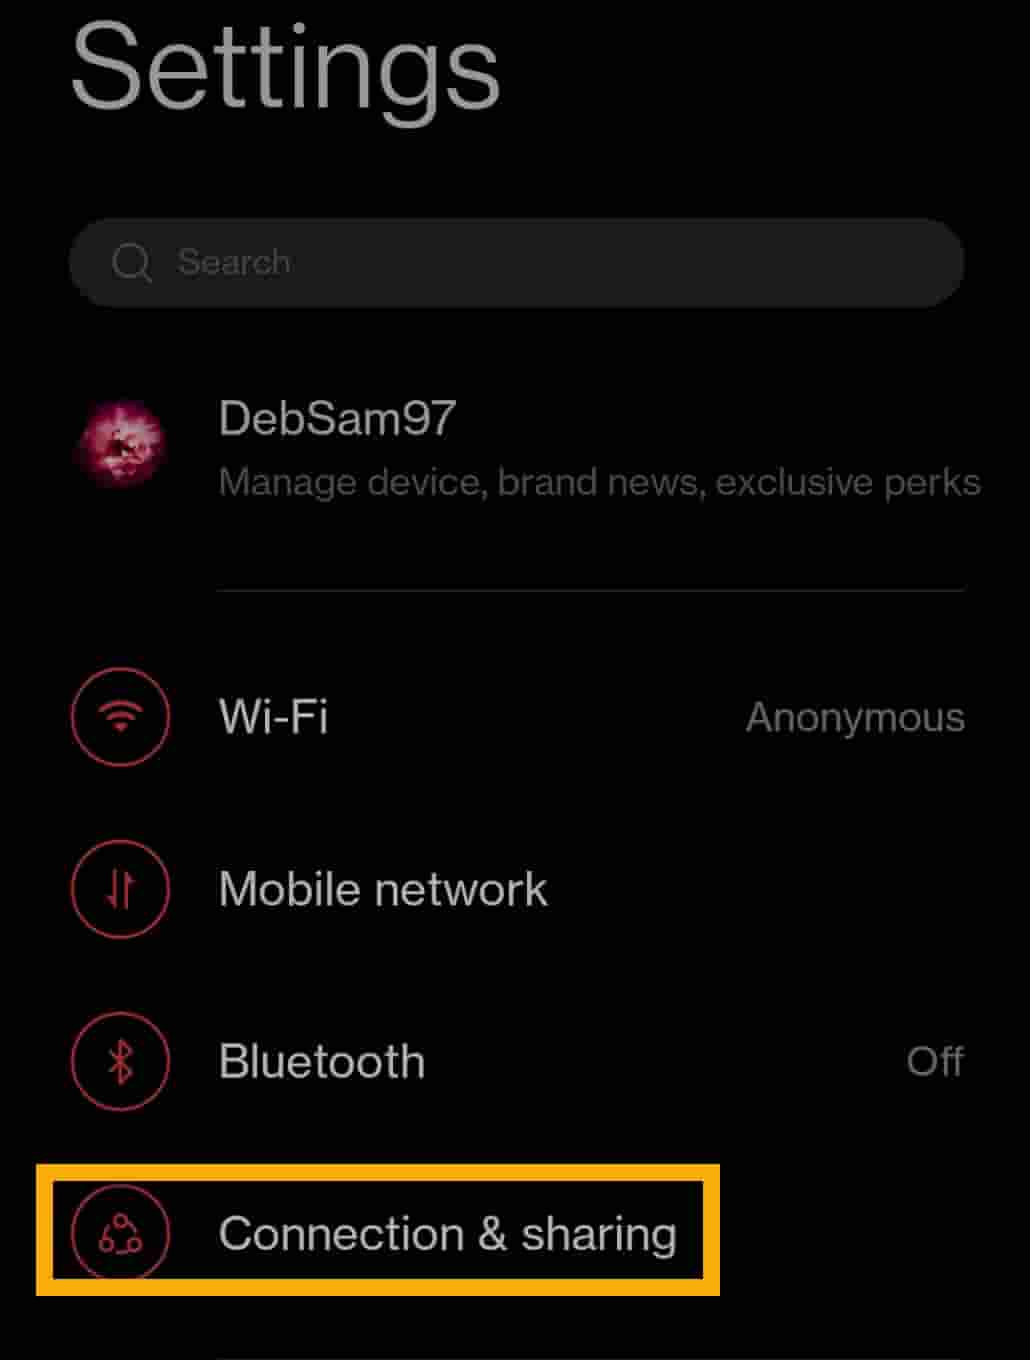
Step 3 – Now, you can use the search bar to find “USB tethering“.
Otherwise, you can just go to the “Connection & sharing” option to open that.
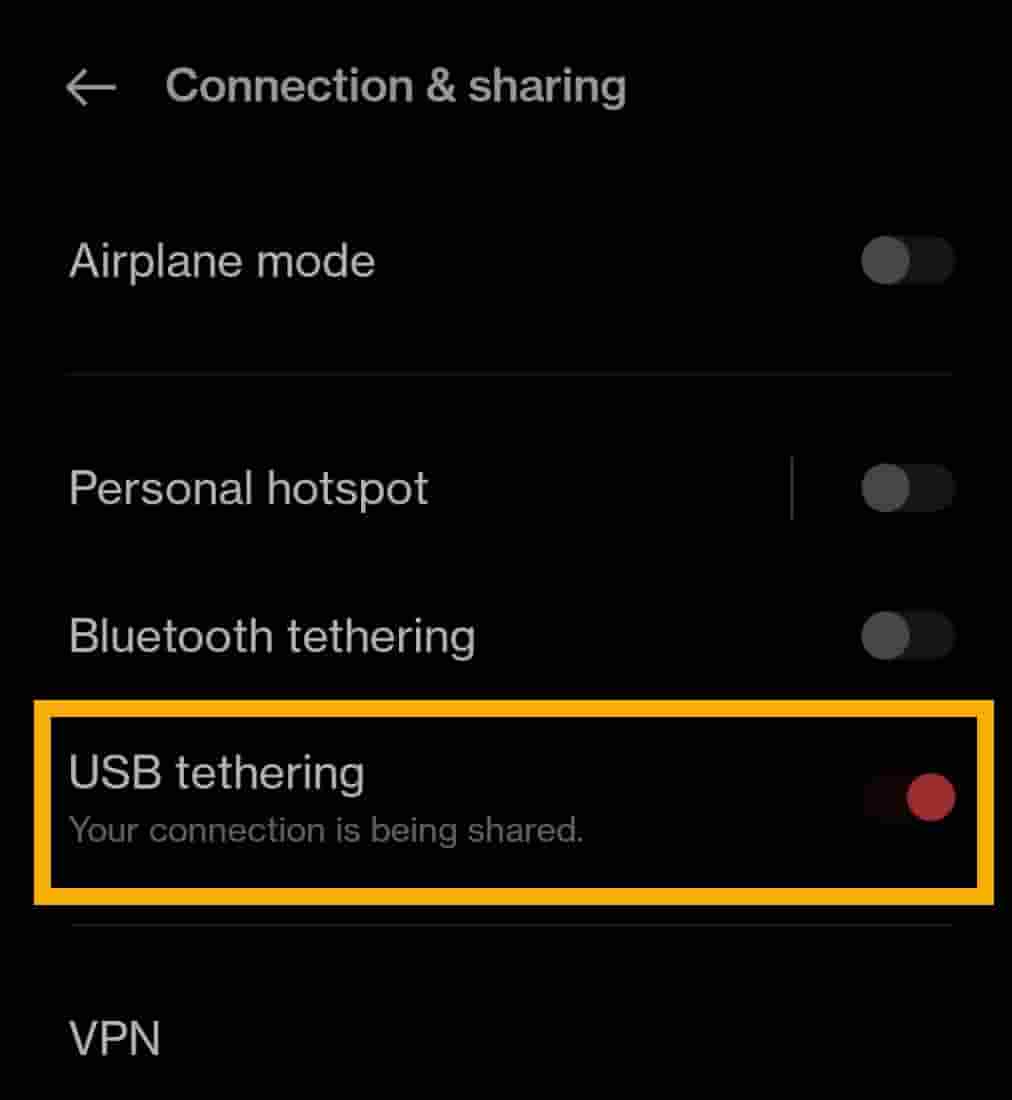
Step 4 – Then, turn the “USB tethering” option to “On” mode.
Now, your computer will automatically configure the network using USB tethering.
You can also check whether this network is enabled or not.
Open a Run box. Press the Win key+R keys together.
2. Then, type this in the box and hit Enter.
ncpa.cpl

3. When the Networking and Sharing Center opens, you will see the Ethernet is connected. For better identification, it should bear the “Remote NDIS based Internet Sharing” tag.
Now you can proceed to the main troubleshooting steps.
Step 2 – Search and download the driver
Step 1 – Open Google Chrome or any browser.
Step 2 – Search for the latest version of the missing network driver.
NOTE – We have shown how to download the latest Intel network driver.
Step 3 – Search “Intel network drivers” in the search box. Or, you can directly go to this
Windows 10 – link.
Windows 11 (WiFi drivers) – link
Step 4 – Once you are on the subordinate page, click on the “Version” drop-down and set it to the latest available driver.
Step 5 – Now, depending on which type of device you are using, click on the “Download” button to download it.
Step 6 – The license agreement page should appear. Select the “I accept the terms in the license agreement” option to accept it and start downloading the driver package on your system.
Step 7 – Once the driver is downloaded, run the setup file and follow the on-screen instructions to install the latest driver.
Additional Note –
There are other ways you can install the driver. You can also visit the manufacturer’s website, input the device specifications and download the latest available driver for your device.
Additionally, almost all the device manufacturer’s have a dedicated app that helps users to download the latest device drivers for their systems. Like –
Dell users – Dell Support Assistant
Intel chipset users – Intel® Driver & Support Assistant (Intel® DSA)
ASUS users – Asus ROG Crate, MyAsus
After installing the subordinate app, just run it once. It will identify your device and all the missing driver updates. The app will automatically download and install those missing driver updates.
This way you can fix the issue of missing the network adapter driver.
Fix 2 – Scan for hardware alterations
After installing the driver updates, if you still can’t see or use the network driver, you can run a hardware change scan to fix this problem.
Step 1 – Simply, right-click the Windows icon and tap “Device Manager“.
Step 2 – When that opens, click on “Action” from the menu bar and click “Scan for hardware changes“.
Windows will now perform the scan for any hardware changes and show it up in the respective section. Check whether you can see the deleted network adapter there or not.
Fix 3 – Using the System Restore
The last resort which is left is to use the System Restore feature. This will restore the system to the point where the network adapter was working just fine.
Step 1 – Open a Run box using the Win key+R.
Step 2 – Then, write this in the box and click “OK“.
sysdm.cpl

Step 3 – Switch to the “System Protection” tab.
Step 4 – There, click “System Restore…” to perform a system restore operation.
A separate System Restore panel should appear.
Step 5 – Click “Next“.
Step 6 – Now, this step is very important. Depending on when you have deleted the driver, select a restore point before that.
Step 7 – Then, click “Select” to proceed.
Step 8 – Finally, click “Finish” to initialize the System Restore process.
Wait for your Windows to start the system restart process. Once the device reboots, you shall have the missing network adapter on your computer.
Fix 4 – Directly download and install the driver
You can directly download the driver specifying the manufacturer’s details and install it.
Step 1 – Identify your device model
If you already know the device model you are using, you can skip these steps.
Step 1 – At first, press the Windows key and the R key. This should bring up the Run box.
Step 2 – Then, input this word and click “OK”.
msinfo32

Step 3 – Now, let the “System Resources” section be selected from the left pane.
Step 4 – Then, check these three system specifications from the opposite pane.
System Manufacturer

System Model

System Type
Once you have identified these items, you can close the window.
Step 2 – Search & download the driver
Now, you can search and download the latest version of the driver specifically for your device.
Step 1 – Open a browser and search this “Device Manufacturer Device Model network adapter driver” in the search bar.
Like – If you are using HP Omen 16, then the search query will be like this – HP Omen 16 network adapter driver.
Step 2 – Now, just click on the manufacturer’s website link in the search result. Download the latest network adapter driver for your computer and install it on your computer.
This way, you can directly download the network adapter package and install it on your computer. Once you have installed it, restart the computer once.
You will have the network adapter driver again on your system.


