Windows can be really pesky at times with untimely errors thrown in when you are trying to do something important on your system. “Application was Unable to Start Correctly” with the error code – 0xc000007b is another annoying error that can come up all of a sudden when you are trying to open a program or a game.
This error apparently arises when you have recently upgraded your Windows from a previous version and certain file or programs go faulty due to the upgrade. However, the good news is, this error can be fixed quite easily. Let’s see how.
Method 1: By Downloading DirectX
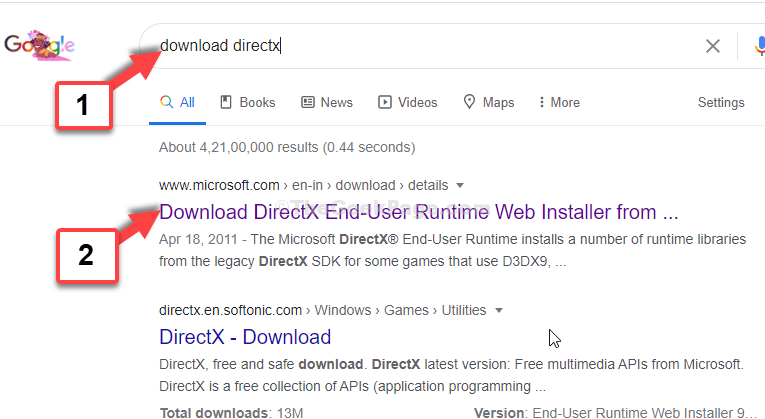
Step 1: Go to Google and search for download directx. Click on the first link, which is the official Microsoft link.

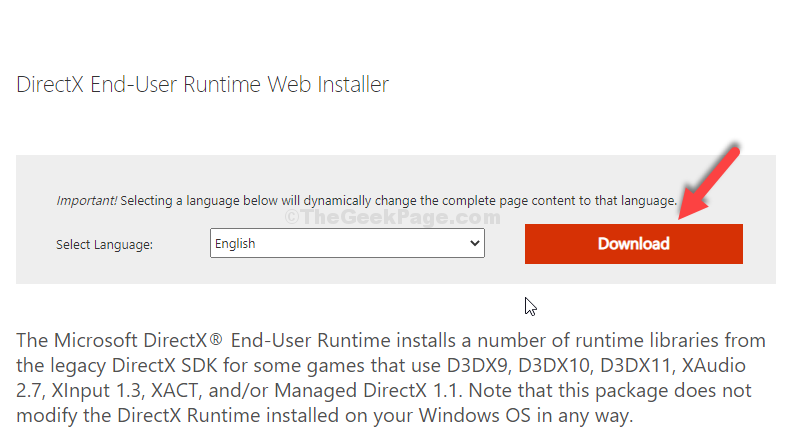
Step 2: On the official download page, click on the Download link in red.

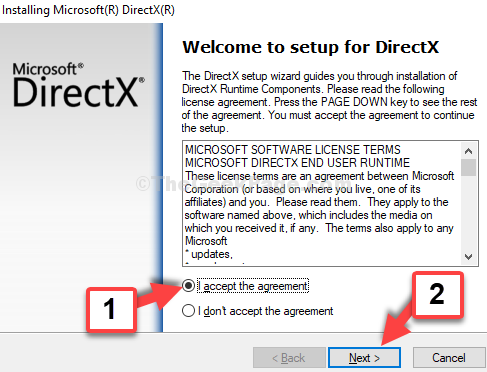
Step 3: Once downloaded, click on the setup file to proceed with the installation. In the installation wizard, select I accept the agreement and click on Next.

Step 4: Next, you can uncheck the Install the Bing Bar option and click Next.

Once the installation is complete, click on the Finish button. This should resolve your problem. However, if problem persists, you can try the 2nd method.
Method 3 – Using Registry editor
1. Press windows key + R key together to open run, write regedit in it and click OK.

2. Go to the following location in the registry editor.
HKEY_LOCAL_MACHINE\SOFTWARE\Microsoft\Windows NT\CurrentVersion\Windows
3. In the right side double click on LoadAppInit_Dll and change the value data to 0.

Method 4 – run the program in compatibility mode
1. Right click on the program and choose properties.
2. Click on compatibility tab.
3. Now, check run as administrator.
4. Now, select run this program in compatibility mode and select windows 8 from the drop-down.
5. click on run compatibility troubleshooter.

6. Now, choose try recommended settings.

Method 2: By Updating The .Net Framework
Step 1: Go to Google and search for .net framework. Click on the 1st result from the official website of Microsoft.

Step 2: The first in the list is always the latest update, so click on the 1st link. Here, we clicked on the 1st link – .NET Framework 4.8 to begin download.

Step 3: Next, click on the box that says, Download .NET Framework 4.8 Runtime and then, click on the set up file to start installing the update.

Now, follow the further instructions and complete the installation process. Once that is complete, you can easily open the games or the programs without any errors.