Among all the other features, AirDrop is the most used feature of all the iOS devices. So, if you get this “Unable to share, there was an error while preparing to share airdrop” message appears in the middle of sending some images, documents, it can be distracting. But, just like other issues on the iPhone, there are some things you can do to fix this issue and complete the process quickly.
Fix 1 – Share the image with All photos data
If you are facing this problem while sharing images over the AirDrop, you must enable the option to share the images with its information.
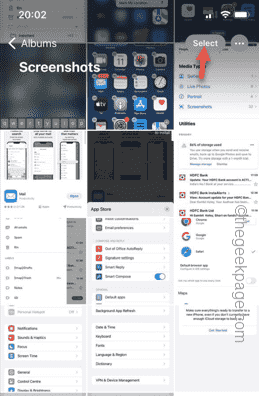
Step 1 – Open the Photos app, if you have closed it already.
Step 2 – Look for the photos that you want to share.
Step 3 – If there are multiple photos you want to transfer, tap the “Select” option.
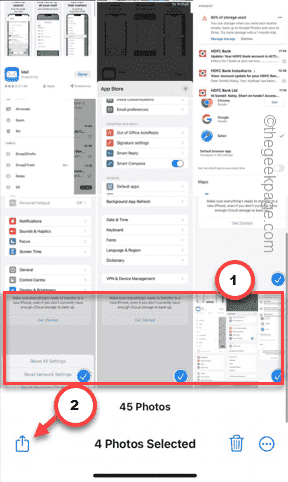
Step 4 – Select the images that you are sharing
Step 5 – Then, tap the “Share” icon.
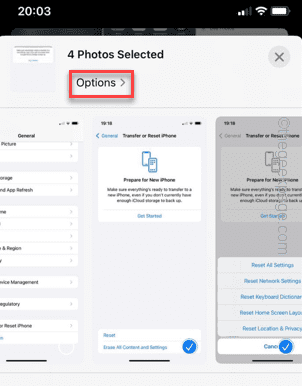
Step 6 – Later, tap the “Options” tab.
Step 7 – Swipe down a bit and go to the ‘AIRDROP & ICLOUD LINKS ONLY‘ section.
Step 8 – Enable the “All Photos Data” option.
Try to use the AirDrop to share the photos once more and test.
Fix 2 – Send the screenshot/ captured video
Take a screenshot of the image that you want to share and transfer that file in the place of the original one. Though this is a workaround, it should fix your problem.
Step 1 – Open the image that you want to share.
Step 2 – Next, press the Volume up button and hit the Power button together to take a screenshot of the image.
Step 3 – Tap the screenshot image hovering on your iPhone screen.
Step 4 – Now adjust the borders of the screenshot to make it exactly as the same as the original image.
Step 5 – Now, click the share button at the top to share the image directly from here.
Now, try to airdrop the image and check.
For users who are trying to share a video, you can use the screen recorder to record the video and share. These instructions should be helpful –
Step 1 – Minimize the Photos folder or wherever you are sharing the video from.
Step 2 – Next, touch this “⚙️” icon to open the Settings.
Step 3 – Open the “Control Center” settings.
Step 4 – Find the “Screen Recording” item after swiping down a little bit.
Step 5 – Touch the “➕” button next to it to add the Screen Recording feature to Control Center.
Step 6 – Return to the video file.
Step 7 – Swipe down and tap the “Screen Recorder” to begin the screen recording of the video.
The screen recorder counts starts a count from 3 to 1. So, use that to get back to the main video and play it and record the entire length of it.
Step 8 – Tap the screen recorder icon on the top or on the dynamic island to disable the screen recording function.
Step 9 – Touch the “Stop” button.
Step 10 – You may edit the captured video to trim any unnecessary part.
Step 11 – Afterward, you can share this copy of screen recorded video via Airdrop in place of the original one.
Check if this works.


