If you are Using a Windows 10 Laptop and your WiFi Keeps disconnecting automatically then this problem is affecting many users and you are not the only one facing this problem. In this post, we will Fix your Problem by using simple methods.
Fix 1 – Switch Network from Public to Private
For security reasons, Windows 10 keeps disconnecting after certain time period. So, switching your network from public to private does the trick. Here is how to change Network from Public to private
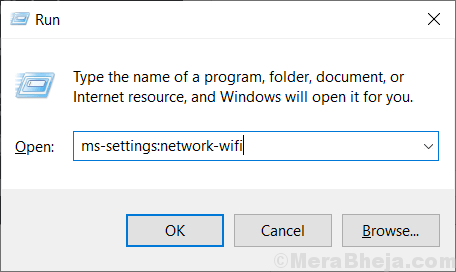
1. Press Windows Key + R together at once to open run command box.
2. Copy and paste the location given below to open WiFi settings.
ms-settings:network-wifi

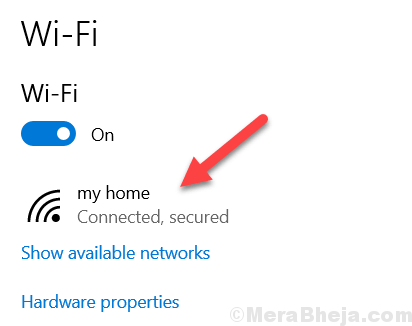
3. Click on your Connected WiFi Network which shows.

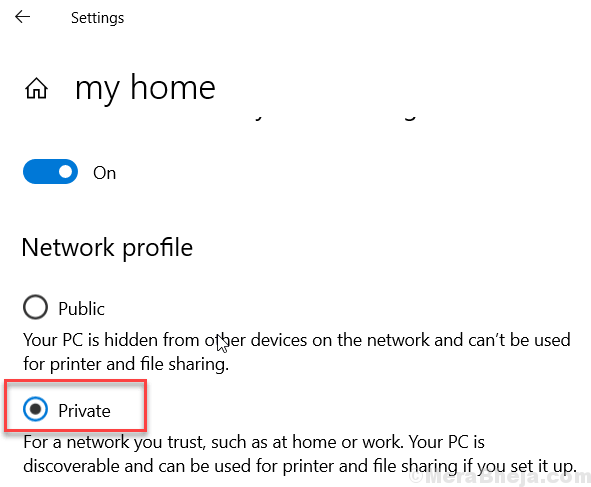
4. Now, select Private radio option as your Network Option on Next page

Fix 2 – Configure Power management
1. Press Windows key + R together to Open run.
2. Write ncpa.cpl in it and click OK.

3. Right click on your WiFi Adapter and Choose Properties.

4. Click on Configure.

5. Click on Power Management Tab.
6. Now, Uncheck Option saying Allow the computer to turn off this device to save power

7. Click on OK.
Fix 3 – Edit Power plan
1 – Search Edit Power Plan in the search box and click on it

2 – Click on Change advanced power settings

3 – Click on Wireless Adapter settings
4 – Expand Power saving mode
5 – Choose Maximum performance (For both On battery and plugged in)

Fix 4- Reset TCP/IP configuration
1. Search cmd in Windows 10 Search box.
2. Right click on Command prompt icon and run as administrator.
3. Now, Run the following command given below one by one in command prompt.
netsh winsock reset

netsh int ip reset c:\resetlog.txt
Fix 5 – Use Google DNS settings
Using a standard DNS settings should fix this issue on your computer.
1. Search for the “Network Connections“.
2. Then you need to click on the “Network Connections“.

3. Once you are in, you will notice the list of available networks on the list.
4. When you see the network you are connected to, right-click on it and then click on “Properties“.

5. Next you need to double click on “Internet Protocol Version 4 (TCP/IPv4)“.

6. Now, select “Use the following DNS server settings:”
7. Then you need to input these following DNS servers settings-
Preferred DNS server: 1.1.1.1
Alternate DNS server: 1.0.0.1
8. Then, click on “OK“.

Close the Network Connections window. This should work out.
Fix 6 – Set WLAN AutoConfig to Auto
1 – Open run by pressing jointly Windows and R key
2 -Type services.msc in it and click OK

3 – Now, Locate and double click on WLAN AutoConfig service
4 -Set startup type to Automatic and click on Apply

If Everything Fails Try this
If everything fails, you should consider replacing your Router.
If you are able to connect other devices with the router correctly without losing connection frequently (It shows your Router may be OK), then your inbuilt WiFi adapter may be faulty. You can buy a new USB type WiFi Adapter and disable the inbuilt One.