In public networks it is recommended that you set the network locations to private. So, if you do not know that what is your network location settings (Is your PC allowed to be discoverable? ) just follow the instruction below to view it. If you feel that you do not need this PC to be discoverable by other PC connected on the network, you should change the network location to be private in windows 10. Follow the steps below to change that.
Case 1 – When using WiFi
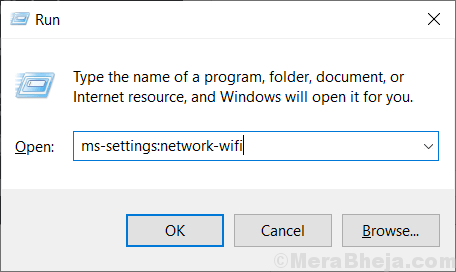
1. Press Windows Key + R together to open run.
2. Copy and paste the location given below to open WiFi settings.
ms-settings:network-wifi

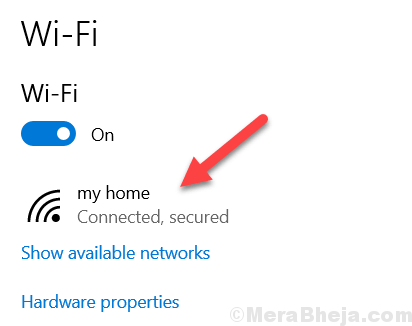
3. Click on your Connected WiFi Network

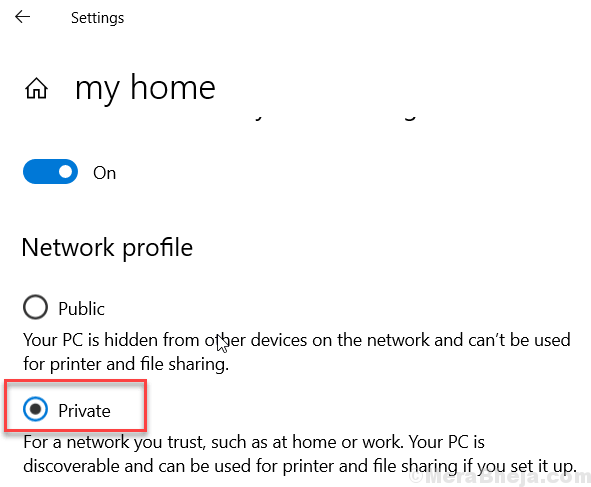
4. Now, Choose Private as your Network Option on Next page

Case 2 – When Using Ethernet
1. Press Windows key + R key together to Open run.
2. Write the location given below in the run command box.
ms-settings:network-ethernet
3. Click on ethernet from the left menu and then click the icon which says connected in the right as shown below.

Step 4 – In the next screen, Choose Private Option as shown.

You can turn it on again, if you wish but it is strictly recommended to turn it on in private networks like home or work only.