Like all other virtual computing softwares, VirtualBox is not either completely error free. Sometimes while loading up a new virtual machine, you may not even find the “64-bit OS” option in the drop-down option. Luckily, there are some solutions that you can try to fix the issue in Virtual Box. So, follow the below-mentioned steps so that you can load the new virtual disk.
Fix 1 – Make sure the Virtualization is turned ON
Virtualization is the basic requirement for the VirtualBox to behave normally. Make sure to turn it from the BIOS page.
Step 1 – Restart your system.
Step 2 – While the system does boot up, just press the “Delete” key from your keyboard to open the bios setup on your computer.
The key binded to the BIOS may be different on your system.
Pressing the allocated key will bring up the BIOS screen on your computer.

Step 3 – When the BIOS setup opens up, go to the “Advanced” or “Perfomance” section. Look whether you can find the “Virtualization” from the list.
Step 4 – Switch it to “Enabled” mode.
In some BIOS pages, you might see the Intel Virtual Technology or SVM Mode. All these are the same.

Make sure to save the settings and quit the BIOS page.
Let your system restart normally. Open the VirtualBox and test whether you can see the 64-bit OS in the drop-down list.
Fix 2 – Turn off the Hyper-V
Disable the Hypervisor feature on your machine.
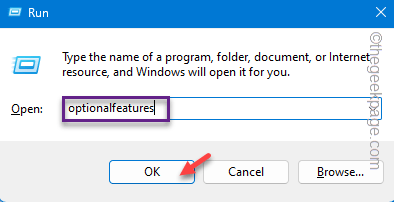
Step 1 – Using the Win+R bring up the Run box.
Step 2 – Next, type this and hit Enter.
optionalfeatures
Step 3 – Find the “Hyper-V” and uncheck it.
Step 4 – Click “OK” so that you can save the modification.
Windows will remove the Hyper-V components from your system.
Once the process is complete, system will ask you to restart the system.
Fix 3 – Remove VirtualBox and reinstall it
If the first two solutions have helped, uninstall the VirtualBox and reinstall the same to fix the issue.
Step 1 – Directly right-tap the Windows icon. A context menu will pop up.
Step 2 – Choose the “Installed apps” to open that settings.
Step 3 – On the right-hand pane of the Settings page, type “Virtual” in the search box.
Step 4 – Click the three-dot button beside the “Oracle VM VirtualBox“. Choose the “Uninstall” option to uninstall it from your computer.
Just follow the steps on VirtualBox uninstaller to uninstall it completely.
Now, download the latest version of the VirtualBox and install it on your system. This should mitigate the OS build issue.

