While connecting to the remote computer in your workgroup or the network location, you may be stalled with an annoying error message stating ‘Transmit Error: code 1231″. This problem either occurs due to network connectivity issues or if the conflicting machine uses complicated terminology in its name. Follow these easy fixes to solve the problem on your computer.
Problem A – Bad name of the system
These solutions will help if the root cause of the problem is the bad name of the system.
Fix 1 – Reset IP
You can reset the IP configuration to solve the problem.
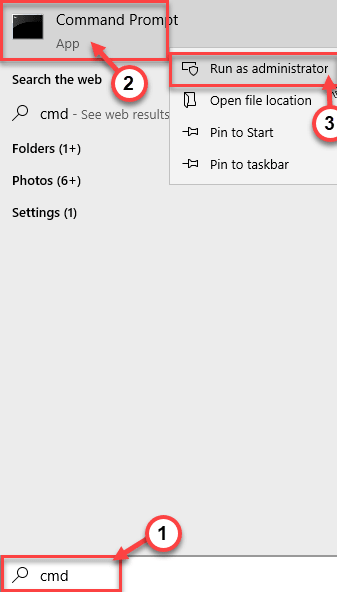
1. You have to write “cmd” in the search bar.
2. Next, right-click on “Command Prompt” on the elevated search result, and then click on “Run as administrator“.

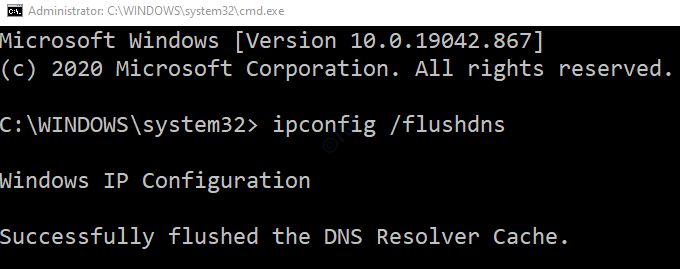
3. To reset the TCP/IP configuration, type these commands one by one and hit Enter to execute these codes.
ipconfig /flushdns
nbtstat -R
nbtstat -RR
netsh int reset all
netsh int ip reset
netsh winsock reset

After executing these commands, close the Command Prompt terminal.
Check if this works out.
Fix 2 – Change the name of the conflicting machine
If the problem is occurring as you have a conflicting name, this should fix it.
1. Right-click on the Windows icon on the taskbar of the conflicting computer.
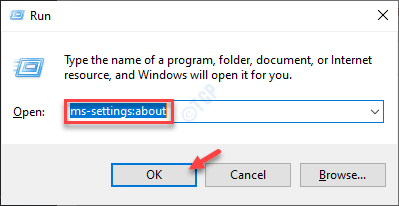
2. Then, click on the “Run” window to access it.
3. Type this shortcut and hit Enter.
ms-settings:about

4. Once the Settings window opens up, click on the “Rename this PC” to modify the name.

5. A box will appear on your screen.
6. Then, type a new name of your computer that only contains the upper-case letters.
(Like MYPC or SYSTEM)
7. Finally, click on “Next” to proceed further.

Now, you have to wait for this naming process to be complete. At last, click on “Restart Now” to restart the computer to use the new name.
Now, try to connect to the system with the new name. Check if this works.
Alternative way–
If you face any problem while altering the name of the system, you can do this –
1. At first, right-click on the Windows key and click on the “Run“.
2. Next, write this command and then hit Enter to access the System Properties.
sysdm.cpl

3. Once the System Properties appear, go to the “Computer Name” tab.
4. To change the name of the computer, click on “Change…“.

5. Then, set a new name for the computer in the ‘Computer name:’. Keep it simple and the name should contain only upper case letters.
6. Click on “OK” to rename the machine.

Reboot your computer to complete the process.
Problem B – Issue with the network connectivity
If the problem is happening because of the network connectivity issue, follow these solutions.
Fix 3 – Re-install the network adapter
Re-installing the network adapter on your computer should resolve the problem.
1. You have to press Windows key+R.
2. Then type “ncpa.cpl” in the Run window and then hit Enter.

3. Here, simply note down the name of the adapter you are using on your computer.

4. Again open a Run window.
5. Then, write “devmgmt.msc” and click on “OK“.

6. Then, expand the “Network adapters” section.
7. Now, in order to uninstall the particular adapter, right-click on the problematic adapter and then click on the “Uninstall device“.

Now, the network adapter driver will be uninstalled from your system. You will be disconnected from your network.
Reinstall the network driver-
Method 1 –
Simply reboot your computer once. While the system is rebooting,
Method 2 –
1. Open the Device Manager,
2. Then, click on “Action” which you will found at the menu bar.
3. After that, click on “Scan for hardware changes“.

Now, try to connect to that particular system again. Check if this is working or not.
Fix 4 – Turn on the network discovery
You won’t be able to identify the machine with tracert if the network discovery is turned off.
1. Press the Windows key+R keys together.
2. Then, write this command and click on “OK“.
control.exe /name Microsoft.NetworkAndSharingCenter

3. Once the Control Panel appears on your screen, click on the “Change Advanced sharing settings“.

Here, you will see 3 distinct types of network connections.
4. At first, click on the drop-down of “Private network“.
5. Click on the radio button beside the option “Turn on network discovery” and tick the “Turn on automatic setup of network-connected devices.”
6. In case of ‘File and Printer sharing settings’, click on “Turn on file and printer sharing“.

7. After doing that, you have to click on “All Networks” to expand it.
8. In the ‘Password protected sharing’ settings, simply check the “Turn off password protected sharing” setting.
9. Finally, click on “Save changes” to save these changes.

Once you have done all these, close the Control Panel window.
Now try to trace the machine again.
Fix 5 – Create a new executable batch file
Create a new batch file and run it to fix the problem on the problematic machine.
1. First of all, open the Notepad on your machine.
2. Once the Notepad opens up, copy-paste this script.
sc.exe config lanmanworkstation depend= bowser/mrxsmb10/nsi
sc.exe config mrxsmb20 start= disabled
3. After pasting the script, click on “File” and click on “Save as“.

4. Set the ‘File type’ to “All files“.
5. Name the file as “newscript.bat” and click on “OK” to save it in a location of your choice.

Close the Notepad window.
Go to the location where you have saved the file.
6. Right-click on the “newscript.bat” file and click on “Run as administrator“.

Once you have run the script, reboot your computer.
This should have solved the problem.