Many Office 365 users have reported seeing the following error in their system.
“Cannot start Microsoft Outlook. Cannot open the Outlook Window.
The set of folders cannot be opened.”
The error would be accompanied by a line with details on the error. Like, The attempt to log on to Microsoft Exchange has failed or The Operation has failed or The OST file is corrupt.
This error pops up out of the blue, and we see it in all the versions of Outlook. Although there is no specific trigger for this issue, we suspect that the corrupt outlook files might cause this error.
We have gathered some working fixes to help you solve this error.
Fix 1: Start Outlook in Safe mode
1 – Open Run by pressing Windows key and R key
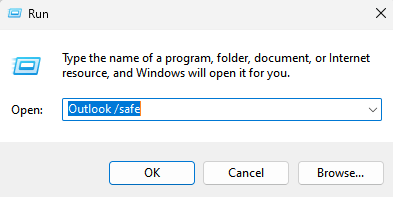
2 -Now, Type Outlook /safe in the Text field of Run and click OK

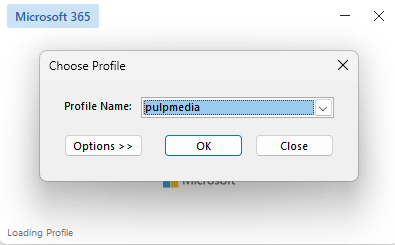
2 – Now, select your outlook profile and click OK.

Now, If the Outlook works fine in safe mode, it means you must disable all add ins. Here is how you can disable add ins in outlook.
In safe mode Just do this: –
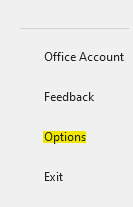
3 – Click on File and then click on Options from left menu.

4 – Click on Add ins from left menu.
5 – Now, Click on Go button to the right of Manage COM Add-ins

6 – Now, Uncheck all the add ins (Make sure Not a single add ins is selected) and click OK.

Fix 2: Create a New Outlook Profile
1. Open the Run Dialog.
2. Enter control and press the Ok button.

3. Type Mail in the search bar located at the top right corner of the Control Panel window.
4. Click on the Mail(Microsoft Outlook).

4. In the Mail Setup window that opens, press the Show Profiles button.

5. Click on the Add button.
NOTE: Please DO NOT Copy or Remove the existing profile until the new profile is working.
6. In the New Profile window that opens, enter a suitable name, and press OK.
7. Tick on Always use this profile.
8. From the drop-down, choose the newly created profile. For example, Test.
9. Click on Apply and then on the OK.
10. In the Add Account window that opens, enter your email credentials and click on Next.
11. Follow the instructions and complete the process.
12. Open the MS Outlook application and click on File Menu Option.
13. In the Info tab, press the Add account button.
14. Enter your Email address and press the Connect button. Follow the instructions shown to re-add the account.

It will take some time to finish the configuration settings.
15. Click on Finish.
Fix 3: Rename the Existing Outlook Directory and Relaunch Outlook
1. Close the Outlook Application.
2. Open Run Dialog with the keys Windows+R.
3. Type the below command and hit Enter.
%localappdata%\Microsoft
4. Scroll down and locate the file named Outlook.
5. Rename the folder. Say, Outlook_old. To rename the folder, press on the folder and then press the F2 button or Fn+F2.
6. Now, relaunch Outlook.
Fix 4: Create a Registry Key and Relaunch Outlook in a New Profile.
If none of the two fixes have helped, then try out this fi. It has helped a lot of users using Enterprise Edition Office 365 Applications.
1. Open the Run Dialog.
2. Type regedit and press Enter.
3. In the UAC window, click on the Yes button.
4. In the opening window, copy-paste the below location in the search bar as shown below.
HKEY_CURRENT_USER\SOFTWARE\Microsoft\Office\16.0\Outlook\AutoDiscover
5. On the right-hand side, right-click on the empty area.
6. Choose New > DWORD (32-bit) Value.
7. Name the newly created key as ExcludeScpLookup.
8. Double-click on the ExcludeScpLookup key.
9. In the Edit DWORD window, set the value to 1 and press OK.
10. Rename the Outlook folder in the Appdata folder. Follow the steps from Fix 1.
11. Restart the system.
12. Create a New Profile using the steps from Fix 2.
That’s All Guys!
We hope this article has been informative.