When there are any problems with the system related to the internet connection, the users execute the command to flush the DNS cache memory or stop the DNS. Some other users also flush the DNS cache if it gets corrupted or if any kind of DNS settings issues in the system.
Many Windows users have reported lately that when they tried executing the command for stopping the DNS client service, it threw an error message that said “The requested pause, continue or stop is not valid for this service” and the command did not get executed.
Since they were not able to execute this command, the issues related to DNS remained in the system without getting resolved.
Whereas the flush DNS cache command executes perfectly for some users. But after a recent windows 11 upgrade and Windows 10 21H1 version, no users are allowed to stop the DNS client service using the command net stop dnscache.
In this article, we are going to show you how to resolve this issue so that the users can stop the DNS client service.
How to Check if the DNS client service is running or not
Here are the steps on how to check the DNS client service in the Windows system.
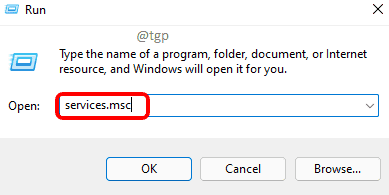
Step 1: Press the Windows + R keys together to open the run command box.
Step 2: Once the run command box opens, type services.msc in the textbox and press Enter key.

Step 3: This opens the Services app window on your system.
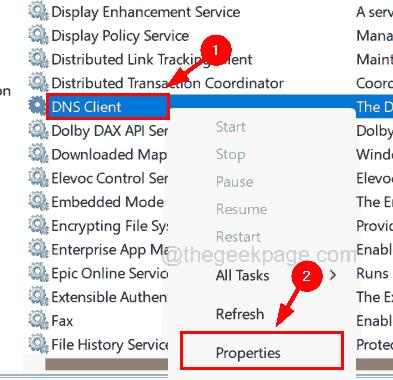
Step 4: In the services window, locate the service called DNS Client service from the list of services as shown below.
Step 5: Right-click on the DNS Client service and select Properties from the context menu.

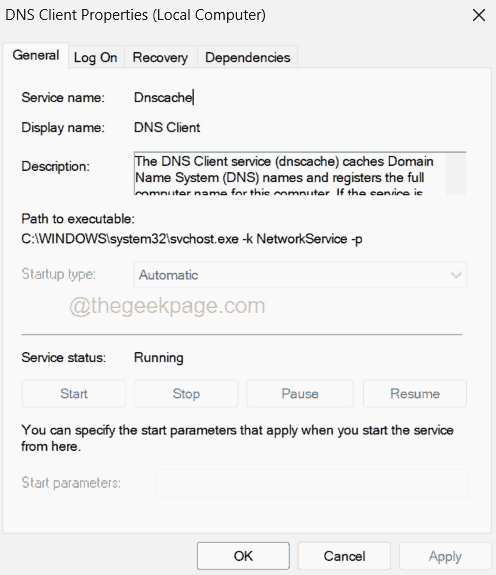
Step 6: In the Properties window, you can see that the Startup type, which is already set as Automatic, and the Start and Stop buttons are disabled.

Step 7: This is for all the user accounts in the Windows 11,10 systems and for the administrator accounts as well.
How to Clear DNS Client Cache Automatically using the Registry Editor
Before continuing with this method, you need to export the registry file on your system so that it can be reverted back in case the registry file gets damaged while editing since the registry file is very crucial for any system.
Follow the steps below on how to edit the registry file for fixing this issue.
Step 1: Press the Windows + R keys together on the keyboard to open the Run box.
Step 2: Next, type regedit in the textbox and press Enter key.

Step 3: Accept the UAC prompt on the screen to continue by clicking Yes.
Step 4: Once the registry editor window opens, clear its address bar.
Step 5: Copy the below line and paste it into the address bar and then press the Enter key.
HKEY_LOCAL_MACHINE\SYSTEM\CurrentControlSet\Services\Dnscache\Parameters
Step 6: After you have reached the registry key Parameters, select it on the left panel.
Step 7: Then on the right side, create a new DWORD (32-bit) Value by right-clicking on the empty area and navigating through New > DWORD (32-bit) Value from the context menu as shown in the below screenshot.

Step 8: Rename this DWORD value as MaxCacheTtl and open its edit window by double-clicking on it.

Step 9: Enter the value 86400 in the Value Data textbox and click OK.

Step 10: Next, create another DWORD value as explained in Step 7.

Step 11: Rename this another newly created DWORD value as MaxNegativeCacheTtl.
Step 12: Right-clicking on MaxNegativeCacheTtl and selecting Modify from the menu.

Step 13: Enter 5 in its Value data textbox and click OK to close the window.

Step 14: Close the registry editor and restart the system once.
Step 15: This should refresh the DNS cache after every few hours.
Hope this article helped you understand about this error and how to clear the DNS client cache on its own every few hours. You need not stop the DNS client service which is unfortunately disabled for all the user accounts and administrators.