Many users have encountered a problem where they are not able to open certain applications which were earlier working perfectly fine. They have reported seeing an error message related to Java stating that “The registry refers to a non-existent Java Runtime Environment installation or the runtime is corrupted”.
Basically, seeing this error can mean there are entries related to a previous installation of Java or the Java location has been changed manually after an installation which leads to bad entries in the Registry. If you are one of those users trying to fix this issue on your PC, then you have reached the right location. In this article, we have discussed some solutions that have helped other users to overcome this Java error.
Fix 1 – Delete Non-Existent Path Registry Entries
Most users have reported that deleting entries in the Registry for JavaHome and RuntimeLib if they direct to a location that doesn’t exist has helped fix this issue. These entries need to be manually removed from the Registry after checking the path’s existence in the File Explorer.
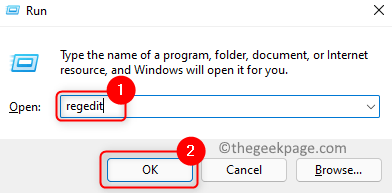
1. Open Run dialog using the Windows and R key combination on your keyboard.
2. Enter regedit and click on OK to open the Registry Editor.
3. If you are prompted by User Account Control then click on Yes.
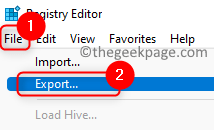
Note: Before doing any modifications to the Registry, create a backup of the Registry using the File –> Export option. While saving this file make sure to select the Range as All. This backup can later be imported in case you face issues after the changes to revert the Registry back to its previous state.
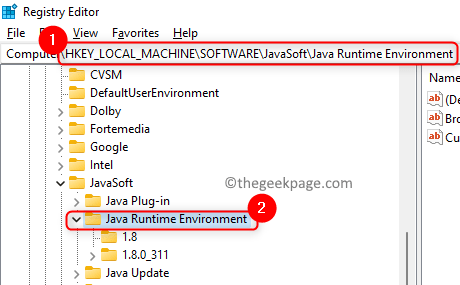
4. Copy and paste the location below in the address bar of the Registry Editor.
HKEY_LOCAL_MACHINE\SOFTWARE\JavaSoft\Java Runtime Environment
5. In the Java Runtime Environment folder, you will see different folders with Java version numbers.
6. Here click on the first folder of the Java version.
7. On the right, open the JavaHome String by double-clicking on it.
8. Select the path in the Value Data field and copy it using Ctrl + C.
9. Press Windows + E to open the File Explorer. Go to the navigation bar and press Ctrl + V to paste the above-copied path and hit Enter.
10. If your path opens up the folder location, then it is understood that the path for this variable exists. Else it is clear that the path does not exist and can be deleted.
11. If you are not taken to any location in the File Explorer, right-click on the JavaHome entry and select Delete to remove this entry.
12. In the same Java version folder on the right pane, double-click to open the RuntimeLib String.
13. Copy the complete path in the Value data field using the key combination Ctrl and C.
14. Same as in Step 9, open File Explorer and paste this copied path. Before hitting Enter make sure to remove jvm.dll at the end of the path.
15. If you see an error stating that the path is not available, then delete this entry. Right-click on the RuntimeLib entry and click on Delete.
16. After you have finished the manual check for the first folder under Java Runtime Environment, perform Steps 7 – 15 for all the remaining Java version folders.
17. Reboot your PC after you have completed manually checking and modifying the concerned entries in the Registry.
Check if the problem has been fixed after the system boots.
Fix 2 – Uninstall and Reinstall Java
1. Just use the Windows and R key combination to open Run.
2. In the Run dialog, enter appwiz.cpl and click on OK to open Programs & Features.
3. Here, order the applications in the list based on the publisher by clicking on the Publisher column.
4. Locate the applications with the publisher as Oracle Corporation.
5. Right-click on each item identified in Step 4 and choose Uninstall.
6. Follow the instructions and finish the uninstallation process. Perform this for all the items associated with the publisher Oracle Corporation.
7. Reboot your system.
8. Now open your browser and navigate to this link to download the Java JDK. Go to the Java Downloads.
9. Select the Windows tab. Click on the link associated with the type of file you wish to download.
10. Once the download completes, double-click and open the installer and complete the installation on your PC following the on-screen instructions.
11. After the installation, reboot your computer. Check if the error is resolved when you try to open the application which was throwing this error.
That’s it!
You must have been able to overcome the Java Runtime Environment error while launching the concerned application’s executable. Comment and let us know the fix that worked for you in this case.


