Since Windows 8 was launched, the versions of the operating system have been consistently facing issues with network connectivity. Earlier with Windows 8, the “Limited or no connectivity error” was a common issue. Microsoft tried working on these issues bettering the situation with every update. However, still plenty of users face issues with the network.
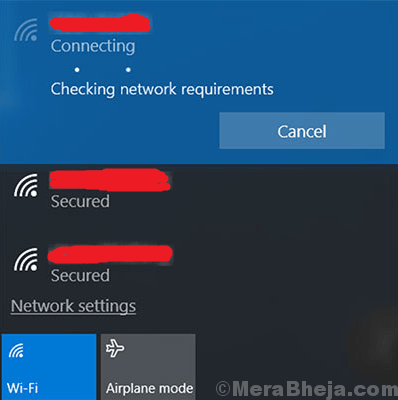
One of the most commonly reported network issue in Windows 10 and windows 11 is “Checking Network Requirements.”

This happens when the user tries to connect to the network, however, the system neither connects, nor gives the “Can’t connect to this network” error message. You could try restarting the system if it helps, but usually it doesn’t.
Try the following steps to resolve the issue:
Solution 1] Uninstall and reinstall drivers
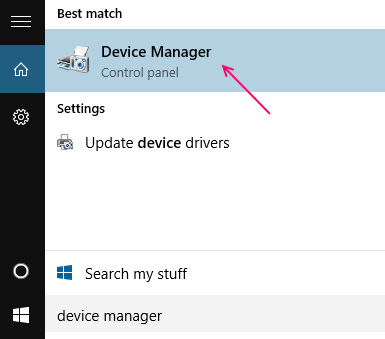
1. Search Device manager in Windows search box.
2. Now, Click on Device manager icon to open Device manager.

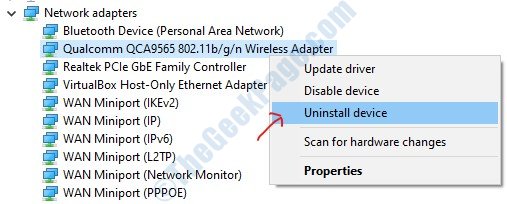
3. Now, Expand Network Adapters.
4. Right click on your wireless network adapter and click on uninstall.

5. Now, Click on Action and then click on Scan for hardware changes.

Solution 2] – Use Network commands in cmd
1 – Search cmd in windows search box located in taskbar.
2 – Now, just do a right click and then select run as administrator.

3 – Now, copy each command given below one by one and press enter key each time to run the commands
netsh winsock reset
netsh int ip reset
ipconfig /release
ipconfig /renew
ipconfig /flushdns
4 -After running all commands , close the cmd window.
Solution 3] Update Windows
Since Windows is aware that users are facing this issue, thus they would be trying to resolve the same. The resolution would be launched in form of an update. Thus, we need to keep Windows up to date.
Solution 4] Run the network troubleshooter
The in-built network troubleshooter could be of help for this issue.
1] Click on the Start button and then the gear-like symbol to open the Settings page.
2] Go to Updates and security and then to the Troubleshoot tab.
3] Choose the Network adapter troubleshooter.
4] Let it run and then restart the system.