Are you getting this “Something didn’t go as planned” error message on your Windows computer? This message may show up on your screen when a particular Windows Update component has failed to get into your system. Windows Update tends to fail sometime and this problem is quite common. We have analyzed the problem and provided some useful solutions for you to follow and fix the issue.
Fix 1 – Download the updates via Win11
Download the Windows 11 iso file and get the updates from there.
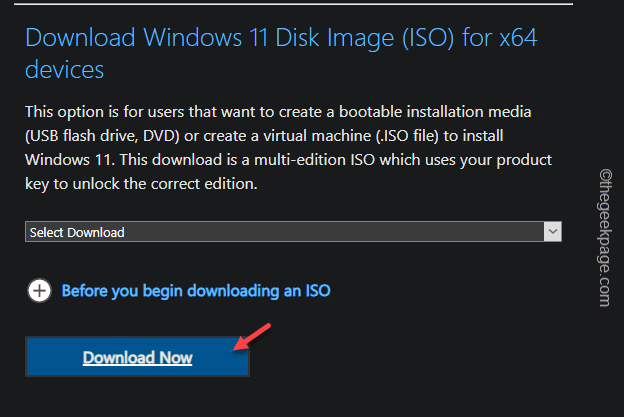
Step 1 – At first, go to the Windows 11 Downloads Center.
Step 2 – Scroll down to the Download Windows 11 Disk Image ISO for x64 device section.
Step 3 – Then, tap “Download Now” to download the ISO file on your computer.
Depending on the size of the ISO file, it can take a while.
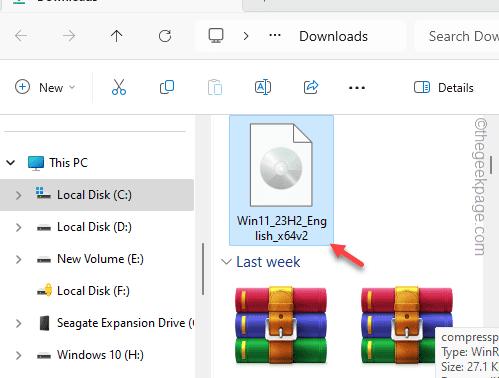
Step 4 – Once you have downloaded the ISO file, load the ISO file on your computer.
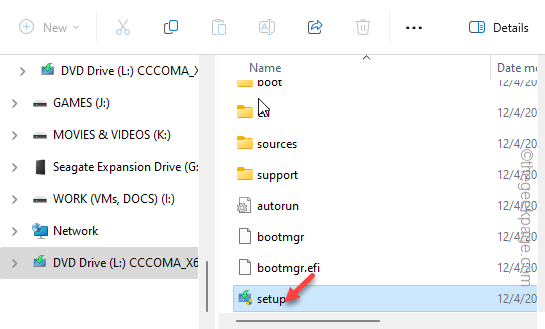
Step 5 – Go to the ISO file and run the “Setup” file to run the Windows 11 Setup process.
Step 6 – Breeze through the setup process until you reach the ‘Get updates, drivers and optional features’ panel. Then, choose the “Download updates, drivers and optional features (recommended)” feature.
Step 7 – Tap “Next” to proceed.

Your Windows 11 will now get updated to the latest version. Just wait for a few minutes.
Later, open the Settings and open the “Windows Update” section. Now, you shall see the update is installed on your system. Later, restart the computer.
Fix 2 – Rectify the correct ID for the system partition
Many affected users have fixed this correct ID for the system partition.
Step 1 – You have to do this from a terminal. So, write “cmd“.
Step 2 – Later, you can right-click “Command Prompt” and click “Run as administrator“.
Step 3 – Pass these codes to list the disks on your system.
diskpart
list disk
Step 4 – Now, you have to detect which is your system drive from the list of disks present. You can do this from the name/size of the disk.
Step 5 – Next, select the disk using this code.
select disk disknumber
[Replace the “disknumber” with the exact number associated with the disk.
Example – The preferred disk number in our case is Disk Number 1. So, the code is –
select disk 1
]
Step 6 – To view the drive’s partitions, use this code.
list partition
Step 7 – Find the system partition in the list of partitions from there. Note down “System” is assigned to which partition (partition number is important, here).
Step 8 – Next, select that partition using this code.
select partition partitionnumber
[
Here, the “partitionnumber” is the partition number you have noted before.
Example – In our case, the partition number is 2. So, the code will be –
select partition 2
]
Step 8 – Finally, once you have selected the System partition, run this code to reset the ID for the system partition.
SET ID=c12a7328-f81f-11d2-ba4b-00a0c93ec93b
Quit the Command Prompt and reboot the machine, once.
You won’t get the “Something didn’t go as planned” message again.
Fix 3 – Fix the Catroot folder
You should rectify the Catroot folder, stored locally on your system.
Step 1 – Start by pressing the Windows button and typing “powershell” in there.
Step 2 – Next, right-click the “Windows PowerShell” item and click “Run as administrator“.
Step 3 – Execute these sets of code on your computer. Just paste the codes one-by-one and hit Enter.
net stop wuauserv
net stop cryptSvc
net stop bits
net stop msiserver
ren C:\Windows\System32\catroot2 catroot2.old
net start wuauserv
net start cryptSvc
net start bits
net start msiserver
This is the entire process of resetting the Catroot folder on your device. Windows will automatically re-create a new Catroot folder at the next system restart.
Fix 4 – Make sure there is enough storage
Having enough storage space is a must-have requirement while updating your Windows device.
Step 1 – You can do this using the Disk Cleanup. Start by searching for “disk cleanup“.
Step 2 – Next, open the “Disk Cleanup” to open that up.
Step 3 – Choose the Windows drive in the drive selection panel.
Step 4 – Tap “OK“.
Step 5 – There should be multiple entries there. You should check these boxes –
Temporary Internet Files
Delivery Optimization Files
Recycle Bin
Step 6 – Click “OK“.
This will clear all the unnecessary files from the local drive. Retry updating your computer one more time.
This should have fixed the problem.


