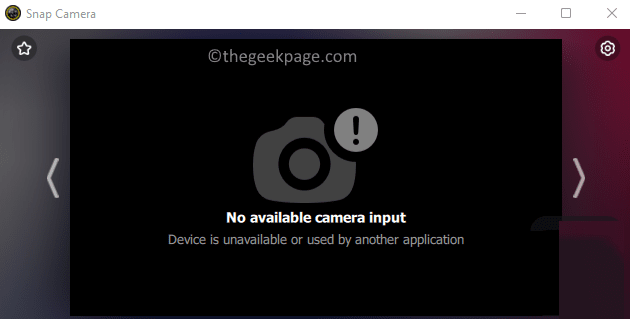
Snap Camera is a free interactive camera desktop application that allows users to apply the different camera filters/lenses to the image that is captured by the camera of the computer. It consists of all the famous Snapchat filters. The Snap Camera filters can be used in any third-party live streaming or video chat app. Recently, many users have reported that Snap Camera is not working and they are seeing the error No Available Camera Input while trying to use it for any video chat application like Google Meet or Zoom Meetings. Basically, this error indicates that Snap Camera is not recognized as an input source by your video chat app.
Possible causes for encountering this error while using the Snap Camera app are:
- Required permissions are not given to Snap Camera
- The Snap camera app is not updated to the latest version.
- Order of launching the video call and Snap Camera app
- Outdated camera drivers
- Corrupt cache files
Are you in a video call trying to use the Snap Camera app during a Google Meet/Zoom Meeting and you are seeing an error message? Then go ahead and read this post. In this article, we have curated a list of troubleshooting methods that can help you solve this No Available Camera Input Error with Snap Camera. Before moving ahead with the fixes, take a look at the workarounds mentioned.
Fix 1 – Turn off Snapcode Overlay
1. Start your Snap Camera app.
2. Select the gear icon (Settings) in the upper right corner.
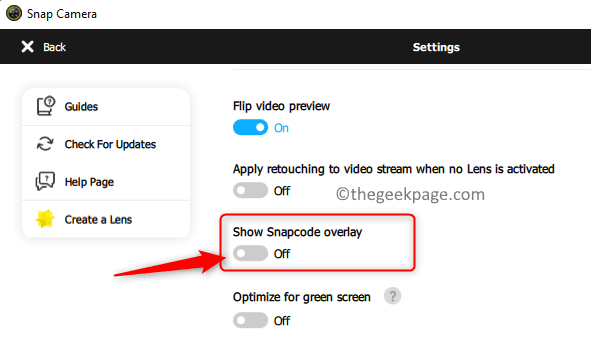
3. Turn off the toggle for the setting Show Snapcode Overlay.
4. Restart your app and check if Snap Camera works with your video call software.
If it Does Not work, do the steps below: –
Make sure you have selected the correct camera on the Snap Camera Settings page if you have multiple camera devices on your PC.
- Open the Snap Camera application. Click on the Gear icon (Settings) at the top right corner of the window.
- Select your camera using the drop-down box below the text Choose your camera.
6. Check if Snap Camera is chosen in the Camera Settings for the software being used for your current video call.
- Open your video call software (Zoom/Google Meet). We have used the Zoom app.
- Click on the Settings icon.
- In the Settings window, select the Video tab.
- In the drop-down below Camera, select the option Snap Camera.
Fix 2 – Force Restart Snap Camera App
1. Open Task Manager using the Ctrl + Shift + Esc key combination.
2. Locate Snap Camera in the list. Right-click on it and choose the option End task.
3. Look for your video call application and end the task as mentioned in step 2 above to force close it. Close your browser if you are using a web application for video calls.
4. Start the Snap Camera app and then the application for video calls.
5. Now you must be able to select Snap Camera in the app and overcome the error of No camera input.
Fix 3 – Allow Camera Permissions for Snap Camera
1. Just press and hold the Windows and R keys together to open the Run dialog.
2. Type ms-settings:privacy and click on OK to open the Privacy & Security Settings page.
3. Scroll down to App permissions.
4. Click on Camera in the list of apps to change the permissions.
5. Make sure that the Camera access for the device is turned on.
6. Turn on the toggle next to the option Let apps access your camera.
7. Check if the toggle associated with Let desktop apps access your camera is turned on. Below this section, you will see Snap Camera in the list of apps.
8. Check if your problem is solved.
Fix 4 – Modify Camera Resolution and Frame Rate
1. Open Snap Camera.
2. Click on the Settings icon.
3. Use the drop-down below Choose camera resolution and change the resolution and frame rate.
Note: Make sure to choose the resolution that is recommended and supported by your computer.
Fix 5 – Clear Snap Camera Cache Files
1. Hit the Windows key and type Snap in the search box.
2. Select the option Snap Camera in the result list.
3. At the upper-right corner of the app, click on Settings (gear icon).
4. On the Settings page, look for Cache & App Use.
5. Click on the View button below it.
6. Make sure to check all the boxes below the section Clear History.
7. Then, click on the Clear selected button.
8. Restart your Snap Camera as mentioned in Fix 1. Check if this helped resolve the error.
Fix 6 – Update Snap Camera App
1. Launch the Snap Camera application.
2. Click on the gear (Setting) icon at the top right corner.
3. On the Settings page, click on Check For Updates in the left pane.
4. You will see a message that says “Snap Camera is up to date” if it is updated to the latest version.
5. If there is any new update, then you need to follow the instructions to update the application.
6. Once your application is updated, open your Snap Camera and then the video call application and check if the issue is resolved.
Fix 7 – Update Webcam Drivers
1. Press Windows + R to open Run.
2. Type devmgmt.msc to and hit Enter to open the Device Manager.
3. Here, click on the arrow next to Cameras to expand it.
4. Right-click on Snap Camera in the list of cameras and choose Update driver.
5. Choose the option Search automatically for drivers.
6. If there is any update for the driver, follow the prompts and complete the driver update.
7. If there are no updates, you will see a message The best drivers for your device are already installed.
8. Check if this fixed the Snap Camera problem of not being recognized.
Fix 8 – Check for Windows Update
1. Open the Run dialog using Windows and R keys.
2. Type ms-settings:windowsupdate and hit Enter to open the Windows Update page.
3. Here, click on the Check for updates button.
4. If there are any new updates, then click on Download & install to perform the update.
5. Else, you will be shown that Windows is up to date.
6. Restart after the Windows update completes. Check if you are able to use Snap Camera in the video call app.
Fix 9 – Reinstall Snap Camera App
1. Press Windows + R and type ms-settings:appsfeatures to open the Apps & features page.
2. Type Snap camera in the text box under App list.
3. Click on the three vertical dots associated with Snap Camera and choose Uninstall.
4. In the confirmation that opens, click on Uninstall again.
 ‘
‘
Note: If it states that the application is currently running, then make sure to exit the app.
5. Wait for the Snap camera to be uninstalled. Follow the on-screen prompts to complete the process.
6. Tap the Windows key and type %localappdata% in the search box.
7. Select %localappdata% indicated as a File folder in the search result.
8. Locate the folder named Snap in the list of folders.
9. Open the Snap folder by double-clicking on it.
10. You will see the Snap Camera folder here. Select this folder and tap on the Delete (trash) icon at the top.
11. Again, hit the Windows key and type %appdata% in the search.
12. Select %appdata% File folder in the result.
13. Repeat the same steps 8 – 10 to remove the folder named Snap Camera.
14. Restart your computer.
15. Go to the official download page for Snap Camera.
16. Download the installer for your PC. Open this file and start the application installation.
17. Complete the app installation and then check if the issue is resolved.
Additional Tips
1. Make sure you have a stable network connection.
2. Use the Task Manager and end all the unrequired processes that are currently running on your system.
3. Make sure the applications are started in the proper order, Snap camera followed by the Google Meet/Zoom. So, close both the applications and restart them.
4. Reboot your computer and check if it helps clear the problem.
Thanks for reading.
You must now be able to use Snap Camera with your choice of video call software without seeing the error Snap Camera no available camera input. Did you find this article informative enough to resolve the error? Please let us know in the comments section which one out of the fixes mentioned in the article worked for you.

