Resolution is the total number of the pixels on a display counted vertically and horizontally. There is a limit to the highest resolution for every screen present. If a program tries to overscale a resolution (like tries to set 4k resolution to an FHD display) you may notice “Resolution not supported” error message at the time of booting up in windows 10 or windows 11 PC. To solve the issue, follow these fixes minutely.
Fix – Adjust resolution from Registry Editor
Adjusting the resolution in Registry Editor for all possible conditions will surely fix. Follow all the steps meticulously and the problem will be solved for sure.
STEP 1 – Open your device in Safe Mode-
NOTE–
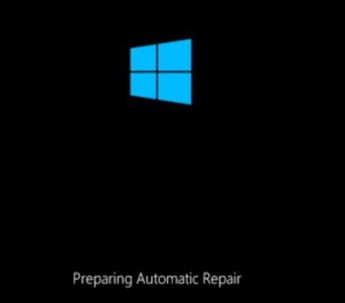
You will need to open the Automatic Repair window.
In this case, it should appear automatically. If the Automatic Repair window doesn’t pop up automatically you will need to open it up forcibly.
1. Turn off your system.
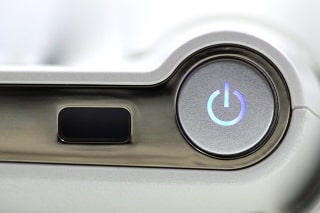
2. Now, start your computer with power button , wait for a while. As soon as you see the computer has turned ON, you will need to press-hold the power key for 3-4 seconds to shut down your device.

3. Switch on your computer again using power button.
4. Repeat this for 3 or 4 times and you will see diagnosing your PC message on screen.

5. After some time you will reach automatic repair screen. In the Automatic Repair window, click on “Advanced options“.

5. When the Choose an option window appears, click on “Troubleshoot“.

6. Similarly, when you see the Troubleshoot window has appeared, click on “Advanced options“.

7. Then, click on the “Startup Settings“.

8. To restart your computer in safe mode, click on “Restart“.

9. Now, you will see various special startup options.
10. Simply, press the “4” ( which is the ‘Enable Safe Mode’ option) key to open your system in Safe Mode.

Now, try to change the resolution to a recommended one and the one which works.
Next step – Rectify the resolution
Case 1 – If you are a Windows 10 User
As your computer booted in 800*600 resolution, you have to rectify it back to the highest possible resolution for your screen.
1. Press Windows key+I to open Settings.
2. In the Settings window, click on the “System“.

3. On the left-hand side, click on the “Display” settings.

4. Now, on the right-hand side, scroll down and then in under ‘Display resolution‘, click on the drop-down.

5. Now, from the list of the available resolutions, select the resolution which has “Recommended” beside it.
(Example– In this case, it is the 1920*1080 which has recommended beside it. So it is the highest resolution possible for this screen.)

Case 2 – If you are a Windows 11 User
11. Right click on any empty part of desktop and choose display settings.

12. Now, set your resolution which works for your PC.

Your problem will be solved
If it does not work , try changing the registry as shown in next method
Modify resolution from the Registry Editor
1. Now, press Windows key+R to launch the Run window.
2. When the Run window appears, type “regedit” and then hit Enter.

3. In the Registry Editor window, click on “Edit” on the menu-bar.
4. After that, click on the “Find“.

5. In ‘Find what:‘ box, type “yResolution” key.
6. Now, click on “Find Next“.

The registry editor will search for the ‘yresolution‘ key.
7. On the right-hand side, double click on the “DefaultSettings.VRefresh” key.

8. Now, click on the “Decimal“.
9. Next, set the ‘Value data:‘ to “60” and then click on “OK“.

10. Similarly, double click on the “DefaultSettings.XResolution” key.

11. Now, select the ‘Base:‘ as “Decimal“.
12. Then, set the ‘Value Data:‘ to “800” and then click on “OK“.

13. Finally, you will need to adjust the settings for “DefaultSettings.YResolution” key. Double click on it do so.

14. At first, alter the ‘Base:‘ to “Decimal“.
15. Modify the ‘Value data:‘ to “600” and then click on “OK“.

Now, you have to repeat all these steps for all other keys also. Follow these steps-
16. In the Registry Editor window, click on “Edit” on the menu-bar.
17. Now, click on the “Find Next“.

The registry editor will search for the next ‘yresolution‘ key.
18. On the right-hand side, double click on the “DefaultSettings.VRefresh” key.

19. Now, click on the “Decimal“.
20. Next, set the ‘Value data:‘ to “60” and then click on “OK“.

21. Similarly, double click on the “DefaultSettings.XResolution” key.

22. Now, select the ‘Base:‘ as “Decimal“.
23. Then, set the ‘Value Data:‘ to “800” and then click on “OK“.

24. Finally, you will need to adjust the settings for “DefaultSettings.YResolution” key. Double click on it do so.

25. At first, alter the ‘Base:‘ to “Decimal“.
26. Modify the ‘Value data:‘ to “600” and then click on “OK“.

This way, repeat the process to modify the resolution values for all the keys on Registry Editor.
After you have done so, close the Registry Editor window.
Shut down your computer. Now, start it again.
This time your computer will boot into 800*600 resolution.