Windows 11 has many hidden under-the-hood tweaks that improve the ease of use significantly. One of these hidden tweaks includes the alteration of the name of the network adapter. In this article, we are going to discuss how to rename the network adapter on your computer.
In Windows 10 you also could alter the name of the adapter. But, in the process of doing so, you had to open the Network and Sharing Center from the Control Panel. In Windows 11 you can easily do it from Settings.
How to change the name of the network adapter in Windows 11
If you want to alter the network adapter, just follow these steps.
1. Press the Windows key and the I keys together.
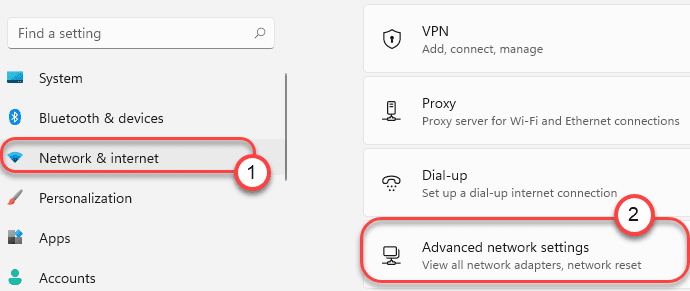
2. When the Settings window opens up, tap on the “Network & Internet“.
3. Now, on the right side of Settings you will different connectivity settings.
4. Tap on the “Advanced network settings” to access it.

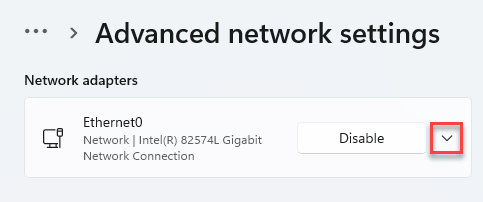
5. You will see the list of network adapters on the right side.
6. Just expand the network adapter.

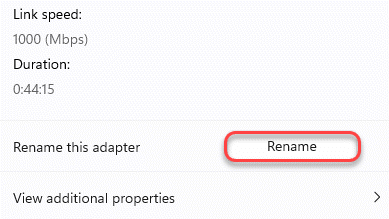
7. To rename the adapter, click on “Rename“.

8. Then, name the adapter as you like.
9. Finally, click on “Save” to save the modification.

This will change the name of the network adapter. Just scroll up on the same page of the Settings window, and you will see the name of the network adapter.

That’s it! It is so easy to rename your network adapter on the new Windows 11!