Is the wireless projection banner annoying you when you are trying to use a browser on your Windows 10 computer? Don’t worry. You can disable the wireless projection banner from popping up every time simply by following these easy steps-
Fix- Rename Miracast dll-
Renaming the Miracast dll file in the System32 folder will solve your issue. But, you need to take ownership of the file first.
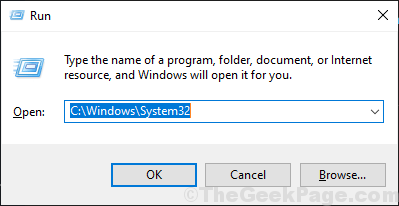
1. Press Windows key+R to open a Run window.
2. To open up the system folder, write this location and click on “OK“.
C:\Windows\System32

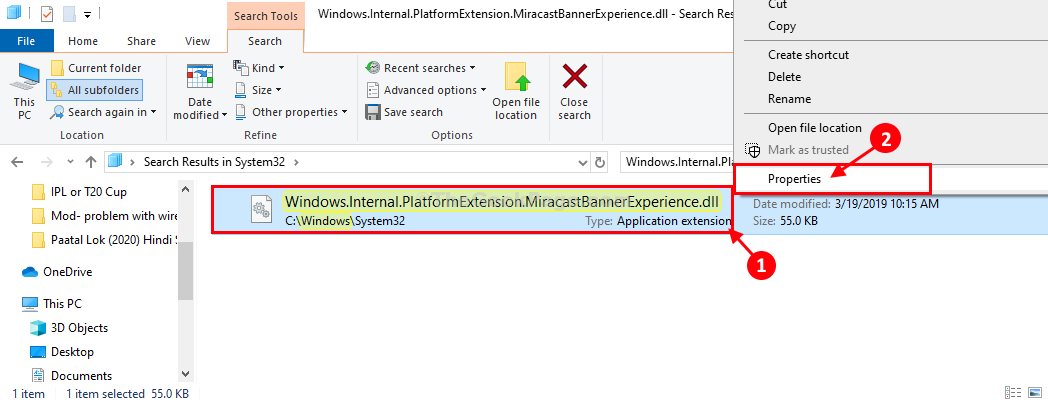
3. In System32 folder copy-paste this name of dll file in the search box and in the Search results ‘Windows.Internal.PlatformExtension.MiracastBannerExperience.dll’ will appear.
Windows.Internal.PlatformExtension.MiracastBannerExperience.dll

4. Now, right-click on “Windows.Internal.PlatformExtension.MiracastBannerExperience.dll” and then click on “Properties“.

5. In the Properties window, go to the “Security” tab.
6. Then, click on “Advanced“.

7. Besides, ‘Owner:‘ click on “Change“.

8. After that, click on “Advanced…“.

9. In Select User or Group window, click on “Find Now“.
10. Now, click on “Administrators” from the list of groups.
11. Click on “OK“.

12. Then you will notice “Administrators“.
13. Click on “OK” to save changes.

14. Finally, click on “Apply” and then click on “OK“.

15. Now, coming back to the search results page, right-click on the dll file and then click on “Rename“.

16. Add “.old” extension at the end of the name of the dll file.

17. Click on “Continue” to complete the name changing process.

Close File Explorer window.
Restart your computer. After rebooting your computer, you will not face the banner issue on your computer.
Your problem will be solved.