Most of us use our computers to store huge amounts of important data in an organized way. Periodic backup and updates of the data files in your system is a crucial task. Backing up saves you from experiencing a tragic loss of data when encountered with a system crash or hard drive failure. In Windows 10, the File History is an inbuilt feature that periodically backs up the data in your Desktop, Documents, Pictures, Videos, Music and the OneDrive, that are available offline.
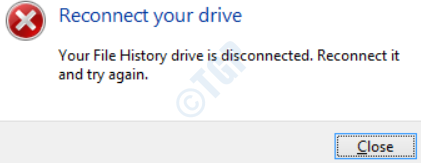
In some cases, you may find that this File History drive is disconnected. You may be getting an error ‘Reconnect your drive’ similar to the image below.

There can be a number of possible causes that might have led to this error.
- Your external hard drive may have actually been disconnected.
- You might have restricted permissions to access the File History drive, in case, you had connected it to another computer for backing up the files.
- If you had made changes to the File History Drive after the backup, the File History function may not be able to access this drive.
- The file system in the backup drive may have been disconnected.
If you are encountering the same, read through this entire article to know how to get out of this annoying error.
Method 1 : Turn Off the File History In Windows 10
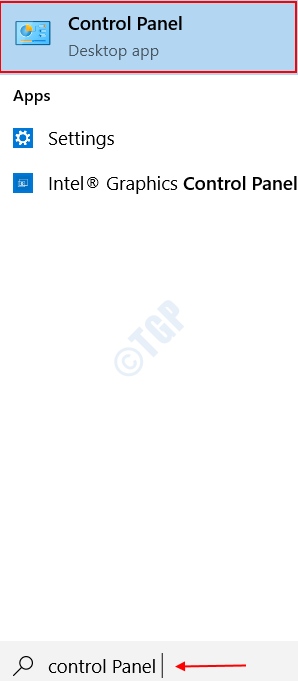
Step 1 : Open the Control Panel from Windows Start Menu by searching for it in the Search bar.

Step 2 : Choose the option System And Security in the landing page.

Step 3 : Select on the feature File History on the right pane of the System and Security page.

Step 4 : Choose the Turn Off option under File History is On. This will turn off the backing up of files done by file history.

In case you want to turn it on in the future, choose the option Turn On in the File History page, as shown below.

Method 2 : Stop using the Backup Drive
Step 1 : Go to Settings by searching for it from the Windows Start Menu.

Step 2 : In the landing page, Choose the option Update and Security as shown below.

Step 3 : Select Backup on the left pane. In the right pane, you will see More options under Automatically Back up My Files. Click on it.

Step 4 : Scroll down a bit on the Backup Options page you are in. You will see an option Stop using drive under Back up To A Different Drive. Select it.

This stops the backup drive from further backing up the files.
Method 3 : Reset the File History Config files.
You might also get this error if some of the configurations inside the File History has been messed up or overwritten. Before the reset process, make sure you are able to view hidden files in your system. To do so,
Step 1 : Open the File Explorer be searching for it in the Windows Search bar.

Step 2 : Open the View Tab under File Explorer. Now, Check the Hidden Items options in the Show Hide Tab.

Step 3 : Expand the Options Tab to the right and select Change Folder and Select options.

Step 4 : Navigate to the View tab by clicking on it and check the option Show Hidden Files, Folders and Drives under the Advanced Settings.

Step 5 : Click on Apply, followed by OK.

Once this is done, let us move on to Reset the File History configurations,
Step 1 : Open the Windows Explorer by searching for File Explorer in the Windows Search bar.

Step 2 : Navigate to the following path inside your C drive.
C:\Users\Username\AppData\Local\Microsoft\Windows\FileHistory\Configuration\
Replace the Username in the above path with your Windows Username.

Step 3 : Delete all the files inside the Configuration folder. To do this, Select All the files, Right Click and Click on Delete.

Next time the File History Drive backs up the data, it will use the default configuration.
Try out the above given methods and check if it solves your error. Please feel free to leave your comments in case of any queries.