The “Print Screen” key or the ‘PrtScn‘ key is widely used to take a quick screenshot of the screen. This powerful screen capture tool has become more advanced and more enhanced in the new Windows 11. On Windows 10, this ‘PrtScn‘ feature is pretty well integrated with the OneDrive, online cloud storage system, while using the ‘Snip & Sketch’ tool you can easily edit the screenshot before you use it. Windows 11 has all these existing features at its core and there are some new and exciting features to enhance the usage of the ‘PrtScn‘ key.
Different types of ‘Print Screen’ functions in Windows 11
We have discussed the various types of usage of the new ‘Print Screen’ feature. There are four major shortcut keys that enhance the usage of the Print Screen.
PrtScn key –
Simply pressing the ‘PrtScn’ key works as it does on Windows 10. It captures the full active screen you are working on. It captures the image in the clipboard for usage. You can paste the captured screenshot in a text processor any image processor like Paint.
With the clipboard sync enabled through all your devices, you can easily use this captured screen. This is one of the standard usages of the particular key.
Windows key + PrtScn key –
The problem of simply using the ‘PrtScn’ key is that it doesn’t automatically save the captured screen as an image file. This problem is eradicated with the introduction of a simple shortcut key.
Pressing the Windows key + PrtScn keys together will not only capture a full-screen image, but it will also automatically designate a certain name and save it in this location –
C:\%username%\Pictures\Screenshots
This decreases the hassle of pasting the image on an image processor, but it doesn’t let you capture a particular window. There is another shortcut key for the
Alt key + PrtScn key –
If you want to take a screenshot of a particular portion of your screen, this shortcut key is just for you.
1. Just click once on the active app screen with your mouse to select it.
2. Then, press the “Alt” key and the “PrtScr” keys together to capture the particular app screen where you have clicked earlier.
3. Now, you can paste the captured screenshot anywhere and save it accordingly. But what if you want to capture only a portion of a certain active window?
Windows key + Shift +S key –
You can use this shortcut key to capture a screenshot of almost any shape you want with this shortcut key.
1. At first, click on the app you want to take a screenshot of.
2. Then, press the Windows key + Shift + S keys together.
3. You will see a message – ‘Draw a shape to create a screen snip’. Simply, use your mouse cursor to draw a shape on your screen according to your need to create a new screenshot.*

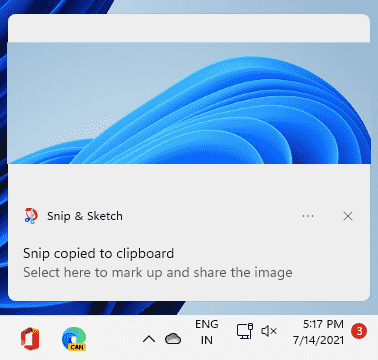
4. It will be stored in Snipping Tool. You will notice the captured screenshot in the notification shade.

[
*NOTE –
There many options to draw and take a screenshot of your screen. Once you use press the Windows key+Shift+S keys together, you will find four distinct options on the top –
Rectangular Snip– Standard rectangular shape which is the default shape in Windows 11.
Free form snip– The free form shape allows you to create any shape you want.
Window snip – This one allows you to snip a full window.
Full-screen snip – This allows to capture the full screen.

]
These are the different types of screen capture techniques.