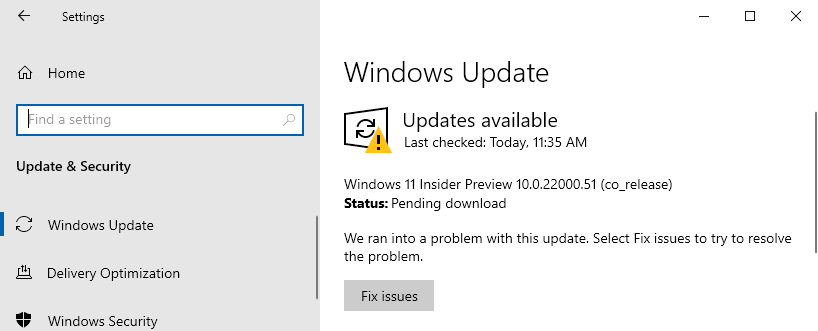
Windows 11 preview build has become downloadable for the users registered to the Windows Insider Program. This is allowing all the users to update their existing Windows 10 computer to Windows 11. But some of the users are complaining that the update process isn’t working and showing up errors.

If you don’t know how to upgrade your existing Windows 10 device to Windows 11, read the steps detailed in this article.
Fix 1 – Check the specifications
Windows 11 is not supported on every device out there. There are specific requirements to upgrade your machine to Windows 11.
The specific requirement of Windows 11 –
| Processor: | 1 gigahertz (GHz) or faster with 2 or more cores on a compatible 64-bit processor or System on a Chip (SoC). |
| RAM: | 4 gigabyte (GB) |
| Storage: | 64 GB or larger storage device
Note: See below under “More information on storage space to keep Windows 11 up-to-date” for more details. |
| System firmware: | UEFI, Secure Boot capable |
| TPM: | Trusted Platform Module (TPM) version 2.0 |
| Graphics card: | Compatible with DirectX 12 or later with WDDM 2.0 driver |
| Display: | High definition (720p) display |
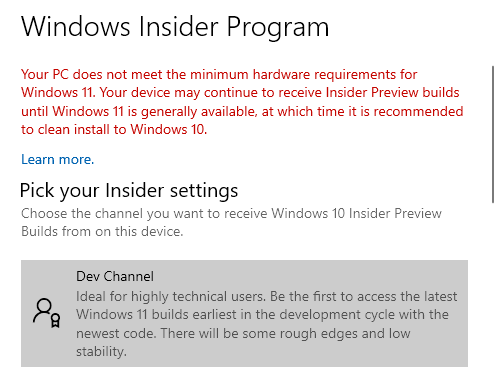
If your device lacks in any section of the above-mentioned requirements, you won’t be able to Windows 11. Even if you opt for the ‘Dev Channel’, you won’t receive the preview builds.

Fix 2 – Enable secure boot
In most cases, secure boot is disabled within the supported systems, which can stall the update process.
1. At first, press the Windows key+I to open the Settings page.
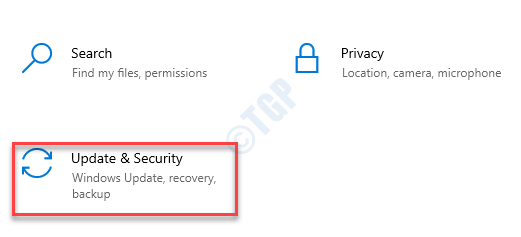
2. Then, tap on the “Updates & Security” settings.

3. On the left-hand side, go to the “Recovery” section.
4. Now, on the right-hand side, click on the “Advanced startup” to start up your computer in Recovery Environment.


5. Once your machine starts up, Then, click on the “Advanced options“.

6. After that, click on “Troubleshoot“.

7. Upon opening the Troubleshooting window, click on “Advanced options“.

6. In the Advanced options window, click on “UEFI Firmware Settings” to modify it.

7. Now, click on “Restart” to restart your computer into BIOS settings.

8. Once the computer boots up, press the “Delete“* key to open the bios setup on your computer.
* NOTE –
The actual key to open the boot settings on your computer may be different. Pay attention to the key to open the BIOS setup on your system.

9. Once the BIOS setup screen appears, go to the “Boot” tab with the arrow keys on your computer.
10. After that, go down to select “Secure Boot” and then press Enter.

11. Now, choose “Enabled” and then hit Enter to disable UEFI secure boot on your computer.
12. Now, press “F10” from your keyboard to save the settings on your computer.

13. Now, select “Yes” to finally save and exit the bios settings on your computer.

This should restart the computer on your computer.
When the computer starts up, try to update your computer once again.
Fix 3 – Check and Enable TPM 2.0
TPM or Trusted Platform Module is a chipset that will be a mandatory requirement for having Windows 11 on your setup. If you don’t have the TPM 2.0 on your motherboard, you won’t be able to upgrade your Windows 10 to Windows 11.
In case if you have this particular chip on your motherboard, it may not be activated. To check the status of the TPM, follow these steps –
a. At first, press the Windows key+R keys together.
2. Then, type “tpm.msc” in the Run terminal and hit Enter.


3. Here, click on “Status“.
4. Now, you will see the ‘TPM Management on Local Computer‘ message. In this case, you can install
It may show a ‘Compatible TPM cannot be found‘ error message. This can stop the update process.

So, you have to enable the TPM on your computer.
1. At first, turn off your system.
2. Switch it ON again.
3. While your system boots up, simply press the “Delete“* key from your keyboard to open the bios setup on your computer.
* NOTE– The actual key to access the BIOS settings may be different on your system. This key varies from manufacturer to manufacturer. These are the variety of keys-
Esc, F1, F2, F10, F11, F12 or Delete

9. When the BIOS setup opens up, navigate to the “Security” settings using the arrow keys on your keyboard.
10. In the Security settings, you will find several security parameters.
11. After that, select the “TPM settings” using the same navigational arrows. Next, just hit Enter key to tweak it.
12. Simply, select the “Enabled” option and hit Enter.
NOTE –
[
In some machines, you may find an alternate name for the “TPM Settings“. It might be tagged as “TPM Device“, “TPM Security” or any other name. This varies from one motherboard manufacturer to another.
If your laptop uses an Intel motherboard. you will find “PTT” or “Intel Trusted Platform Technology“.
If your machine has AMD processors at its core, you may have “AMD fTPM Switch” settings.
]
13. Once you have turned ON these particular settings, press the “F10” key to save the settings on your computer.

14. Now, select “Yes” to finally save and exit the bios settings on your computer.

This should restart the computer on your computer.
Again, try to update your computer to Windows 11. This should solve the problem you are facing.