The picture slideshow option was previously launched with Windows ME, where you could play a slideshow of the images saved in My Pictures folder. However, Windows 10 has changed things a bit and now it allows you to play picture slideshow via File Explorer. It’s an interesting thing to do, especially for those who want to view images in a slideshow. Let’s see how.
How to Play Picture Slideshow in Windows 10 from File Explorer
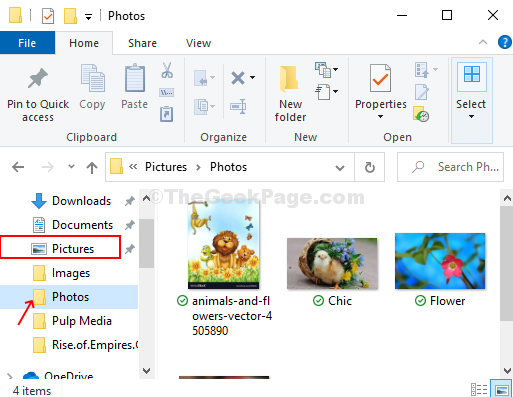
Step 1: Press the Windows key + E together on your keyboard to launch the File Explorer. Now, open any folder that contains your photos or images. Here we opened the Photos folder in Pictures.

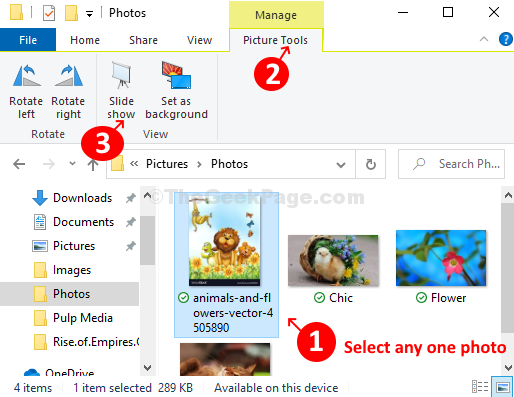
Step 2: Select any photo and on the top of the screen you will see an option called Pictures Tools located below Manage. This will open a sub-section under it with four options, one of them is Slideshow. Click on the Slideshow option and it will begin a slideshow with all your photos in the Photos folder.

*Note – You have to select any one photo and it will play all the photos in the folder in the slideshow. But if you don’t select any, it won’t play a slideshow.
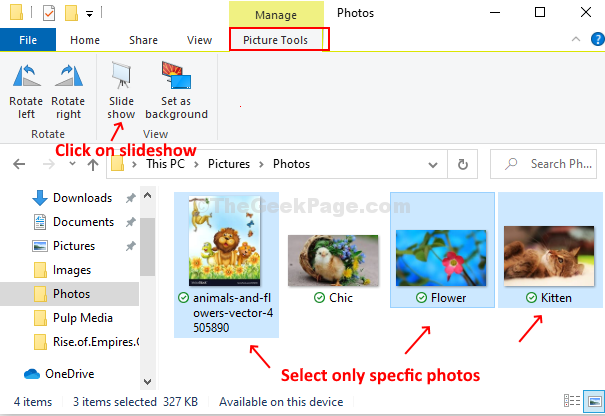
Step 3: But, if you want to play a slideshow with only specific photos or images in the folder, you can do that as well. Simply hold the Ctrl key on your keyboard and use your mouse to click and select the photos you want to use in the slideshow. It will again give the same Picture Tools option on the top of the page below Manage and the same four options with one of them being the Slideshow option. Click on the Slideshow option to start the slideshow with only the selected photos.

Step 4: As the slideshow starts playing, right-click on any of the displayed photos to control the playback speed, you can Pause the playback, go to Next photo, go Back, Shuffle, and even Exit.

Please note that you can only control static images through File Explorer.