A laptop touchpad is just like a mouse that allows you to scroll through, select, copy, paste, click, zoom, and more without requiring any extra plugins. It’s a built-in component replacing the physical mouse with wires. Although it’s a very useful component of a laptop, at times you would feel more comfortable using an external mouse. This is when you can completely turn off the touchpad support of your Windows 10 laptop. But, how do you do that? Let’s see how.
Method 1- Turn Off the Touchpad Support using Windows Settings
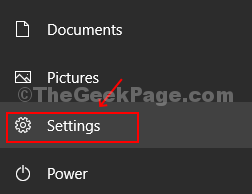
Step 1: Go to the Start icon and click on Settings located above the power button.

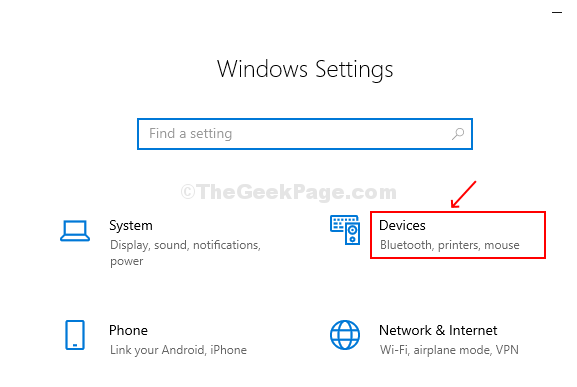
Step 2: Find the Devices option from the list and click on it.

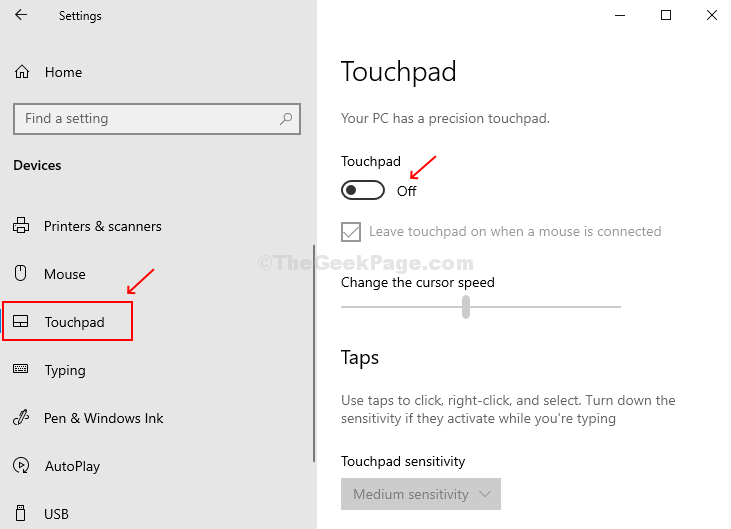
Step 3: Scroll down on the left-hand side of the window to find Touchpad, click on it. On the right-hand side of the window, you can see that it’s enabled by default. Toggle the button to turn it off.

Method 2 – Turn Off Touchpad using Windows 10 Device Manager
Step 1: Press Windows key + X together on your keyboard, click on Device Manager in the context menu.

Step 2: In Device Manager, find Human Interface Devices and click to expand. Find the HD-compliant touchpad option from the list and right-click on it. Click on Disable Device from the context menu. This will turn-off the touchpad.

Step 3. Click Yes to confirm the changes and the touchpad is disabled with immediate effect.

The above methods will help you to disable the touchpad support on your Windows 10 laptop easily. Other laptops may allow you to disable the touchpad support by pressing Fn + F3 key together, or via BIOS/UEFI firmware.