Windows lets you pause updates for five weeks. Then it un-pauses itself and installs everything anyway.
And if you try to pause again, it tells you the limit is reached and you must update first. So the pause button is really a snooze button.
Why This Happens
Microsoft doesn’t want unpatched machines on the internet. Fair enough, honestly. Security holes get exploited within days of being announced.
The pause dropdown exists for businesses. A company can’t have five thousand PCs restarting into a new Windows version on a Tuesday, so Microsoft gives administrators a way to pin a machine to a specific Windows version and defer feature updates for up to a year. That’s a supported, documented setting. It just isn’t in the Settings app.
Worth being clear about one thing. Feature updates and security updates are different animals. Feature updates are the big yearly ones that rearrange your Start menu. Security updates are the monthly ones that patch holes. You can safely postpone the first for a year. Blocking the second for months is how machines get taken over.
Everything below separates the two.
Method 1 – Use the Built-In Pause First
1 – Press Windows + I to open Settings.
2 – Click Windows Update at the bottom of the left sidebar.
3 – Find Pause updates and click the dropdown next to it.
4 – Pick the longest option — Pause for 5 weeks.
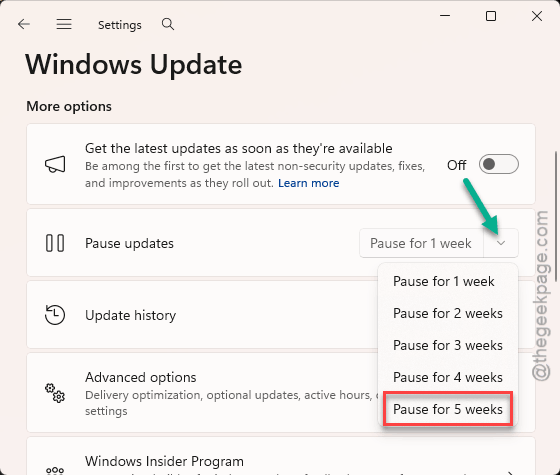
That’s your ceiling here. Five weeks, then it resumes on its own.
Method 2 – Reset the Pause Limit Error
“Pause limit reached” means Windows recorded that you already used your allowance. Those dates live in the registry, and clearing them gives you the dropdown back.
1 – Press Windows + R, type regedit, press Enter.
2 – Paste this into the address bar at the top and press Enter:
HKEY_LOCAL_MACHINE\SOFTWARE\Microsoft\WindowsUpdate\UX\Settings
3 – In the right-hand pane, look for values whose names start with Pause. You’ll see several, like PauseUpdatesExpiryTime and PauseFeatureUpdatesEndTime.
4 – Delete every value beginning with Pause. Right-click each one and choose Delete.
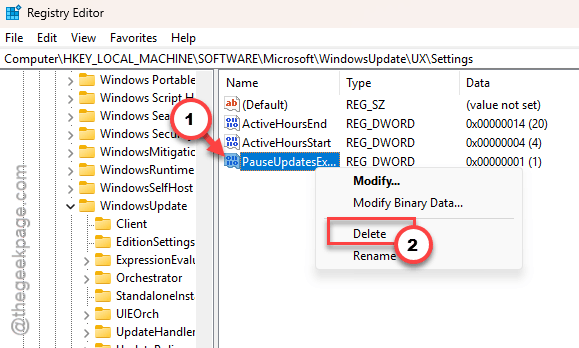
5 – Leave everything else in that key alone.
6 – Restart your PC.
Open the update settings again and the pause dropdown works. This buys you another five weeks, not months. For months, keep reading.
Method 3 – Pin Windows to Your Current Version
This is the real answer, and it’s a supported Microsoft setting. You tell Windows which version you want to stay on. It keeps delivering monthly security patches and stops offering the big version upgrades entirely.
First, find out what you’re running.
1 – Press Windows + R.
2 – Type winver , press Enter.
You’ll see something like Version 25H2. Write it down exactly.
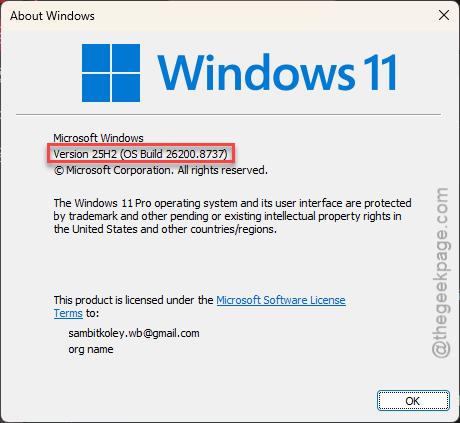
Now, once you have got the version details, you can follow these steps:
1 – Press Windows + R, type regedit, press Enter.
2 – Paste this into the address bar and press Enter:
HKEY_LOCAL_MACHINE\SOFTWARE\Policies\Microsoft\Windows\WindowsUpdate
3 – If that WindowsUpdate key doesn’t exist, right-click Windows, choose New, then Key, and name it WindowsUpdate.
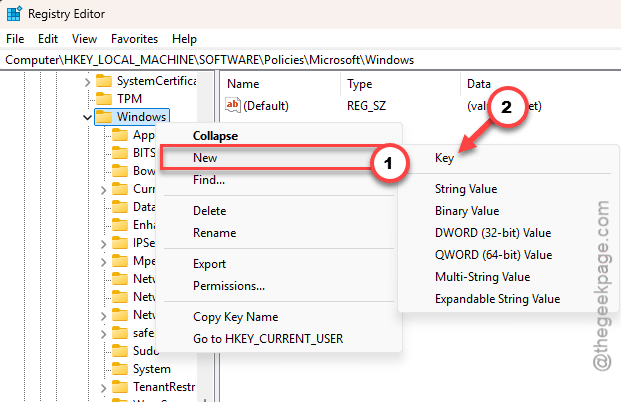
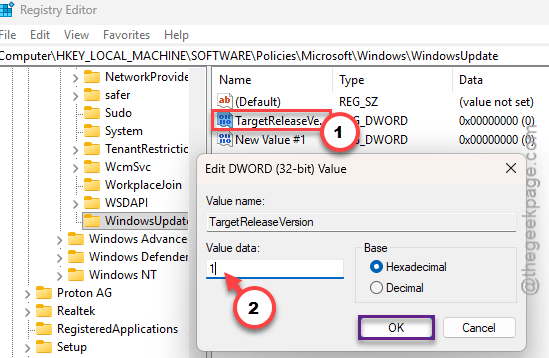
4 – Right-click the empty right pane. Choose New, then DWORD (32-bit) Value. Name it TargetReleaseVersion and set its value to 1.
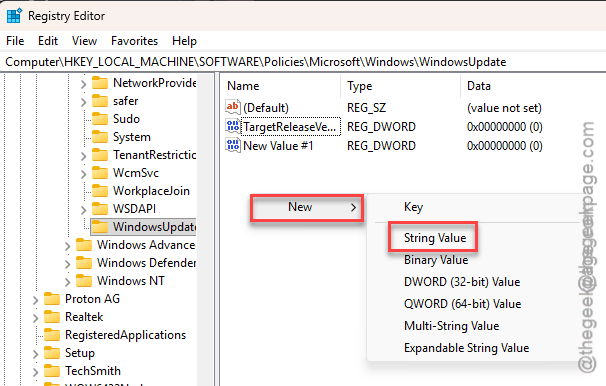
5 – Right-click again. Choose New, then String Value. Name it TargetReleaseVersionInfo.
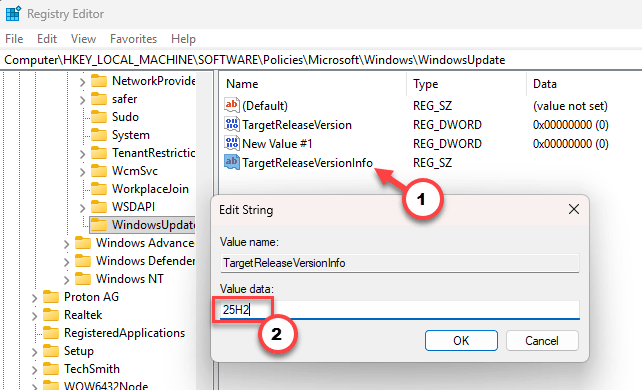
6 – Double-click it and type your version exactly as winver showed it, such as 25H2.
7 – Restart your PC.
Windows now stays on that version until it stops being supported, which is typically two years or more. Security updates keep arriving every month. That’s the combination most people actually want.
When support does run out, Windows overrides your pin and upgrades anyway. It has to — an unsupported version gets no patches at all.
Method 4 – If You Have Windows 11 Pro
Pro, Enterprise and Education have a friendlier front end for all this.
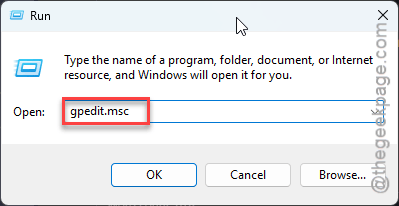
1 – Start by pressing Windows + R.
2 – Then, type gpedit.msc and press Enter.
2 – In the left pane, go this way –
Computer Configuration > Administrative Templates > Windows Components
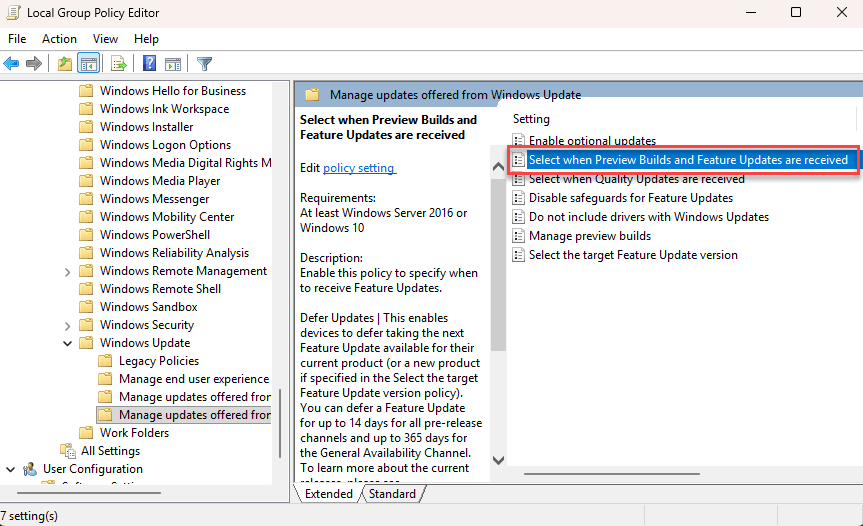
3 – Scroll down to Windows Update, then open Manage updates offered from Windows Update.
4 – Double-click Select when Preview Builds and Feature Updates are received.
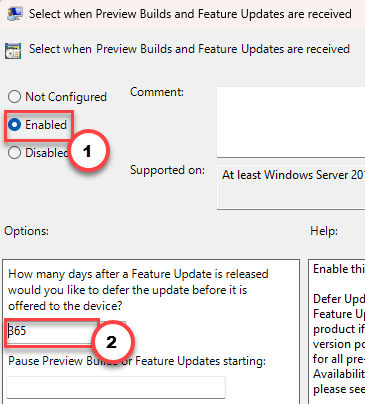
5 – Choose Enabled.
6 – In the box below, enter the number of days to defer 365 is the maximum.
7 – Click OK and restart.
There’s a matching policy for quality updates in the same folder, capped at 30 days. Those are your security patches. Think hard before deferring them at all.
Method 5 – Set Your Connection to Metered
A softer brake, useful during a new PC setup when you just want to get to the desktop without a 4GB download.
1 – Open Settings on your Windows machine.
2 – Then, click Network & internet.
3 – Go to the Wi-Fi settings. Then, click your network’s name.
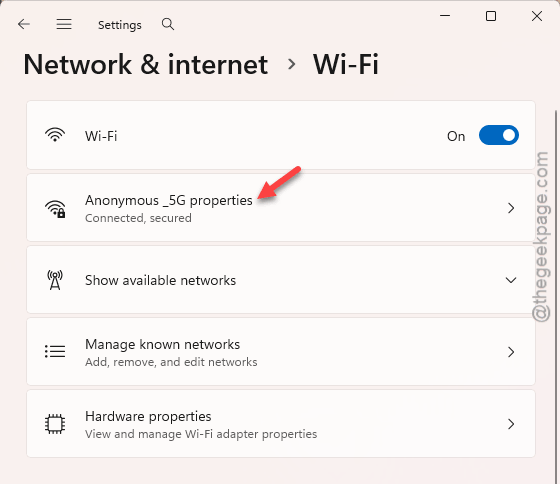
4 – Finally, and enable the Metered connection.
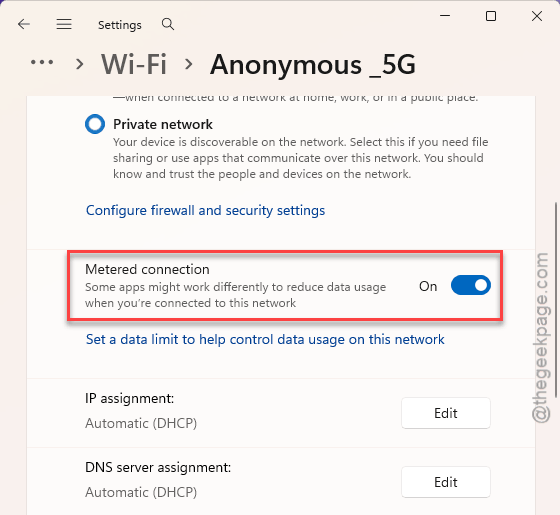
Windows treats the link as expensive and holds back most background downloads. Critical security updates still come through, which is exactly right.
Method 6 – Stop the Update Service Entirely
The blunt instrument. This blocks everything, security patches included, and Windows will fight to turn it back on.
1 – Press Windows + R, type services.msc, press Enter.
2 – Scroll down to Windows Update and double-click it.
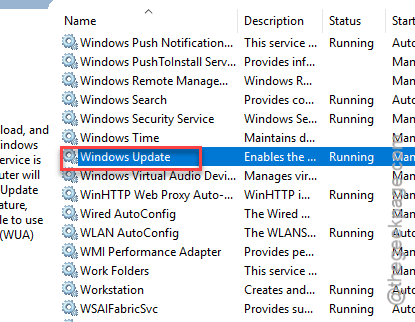
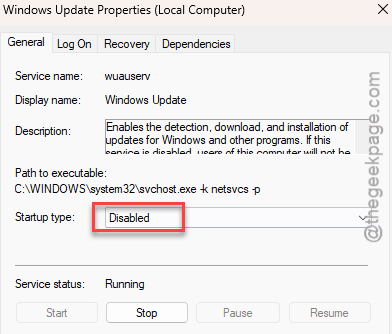
3 – Set Startup type to Disabled.
4 – Click Stop, then Apply.
5 – Click the Recovery tab at the top.
6 – Set First failure, Second failure and Subsequent failures all to Take No Action.
7 – Click OK and restart.
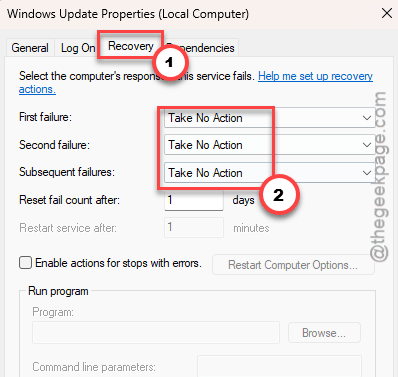
Without that Recovery tab step, Windows restarts the service within a day and you’ll wonder why it didn’t work.
To reverse it, set Startup type back to Manual and start the service. Then install everything you missed, in one go, and expect it to take a while.
How to Prevent This
– Pin your version with TargetReleaseVersion and leave security updates alone. It’s the one combination that’s both safe and genuinely long-term.
– Set active hours so updates never restart your PC mid-meeting. Settings, Windows Update, Advanced options. Fixes the real complaint for most people.
– Don’t disable the update service and forget about it. Put a reminder in your calendar. Six months of missed patches is a genuinely bad idea.
– Use a metered connection on laptops you rarely use. They’ll stop downloading a year of updates the moment you open them at the airport.
– Keep 20GB free on C: before you unpause. A big backlog needs room, and an update that runs out of space fails messily.
People Also Ask
Can I pause Windows 11 updates for more than 35 days?
Not through the Settings app — that dropdown stops at five weeks. But, there is a registry hack you can use to deter updates upto an year on your system.
Is it safe to stop Windows 11 updates?
Depends which ones. Postponing feature updates — the big yearly version changes — is fine and businesses do it routinely. Blocking monthly security updates for months is not fine, since most attacks target holes that were patched long ago. Pin the version, take the patches.