Many of the Windows 11 users have reported that in the windows update page, the option called Pause updates, is greyed out and they are not able to use this feature on their system. Generally, it is not recommended to skip the windows or any additional updates on your system because there might be any driver update release and it can help run the OS and other apps very smoothly. Also Windows by default, will check for updates automatically and then, downloads and installs it. But if any user wants to stop windows from downloading and installing the updates for a certain number of time, then you need to enable Pause updates option. But if this feature is greyed out on the windows updates page, then do not worry because we are going to guide you on how to fix the pause updates option grayed out in Windows 11.
How to Fix Pause Updates Option Grayed Out in Windows 11 Using Local Group Policy Editor
Step 1: Press Windows + R keys together on your keyboard to open Run dialog box.
Step 2: Type gpedit.msc in the run box and press the Enter key to open local group policy editor.
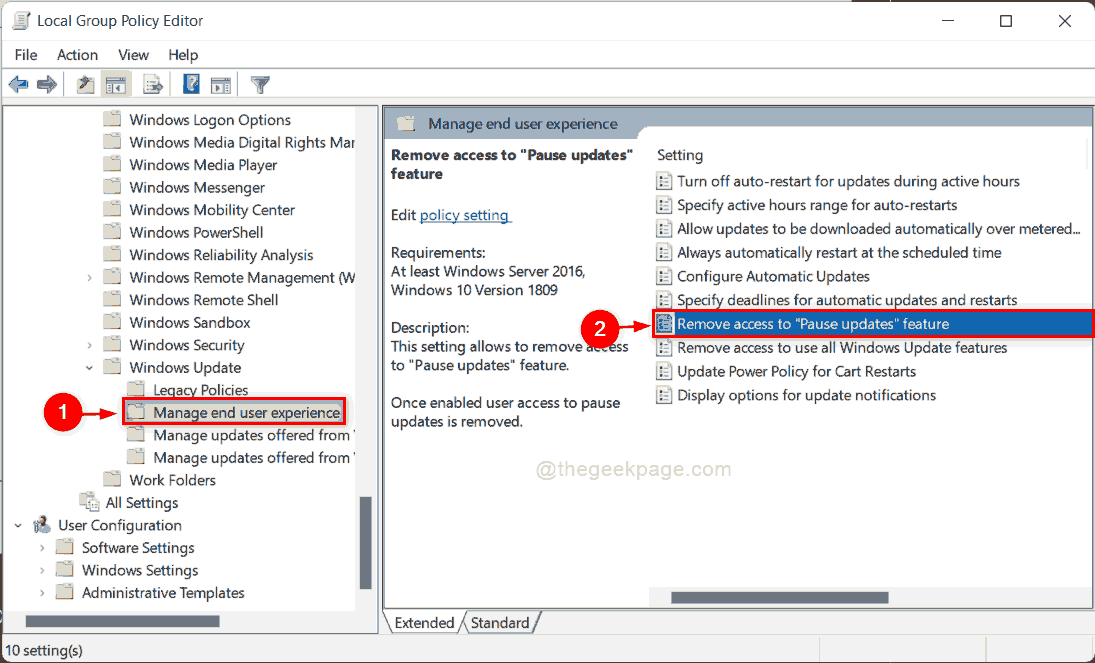
Step 3: Browse through the following path in the local group policy editor window as clearly given below.
Computer Configuration > Administrative Templates > Windows Components > Windows Update > Manage end user experience
Step 4: Once you have reached Manage end user experience, double click on Remove access to “Pause updates” feature to open its wizard.

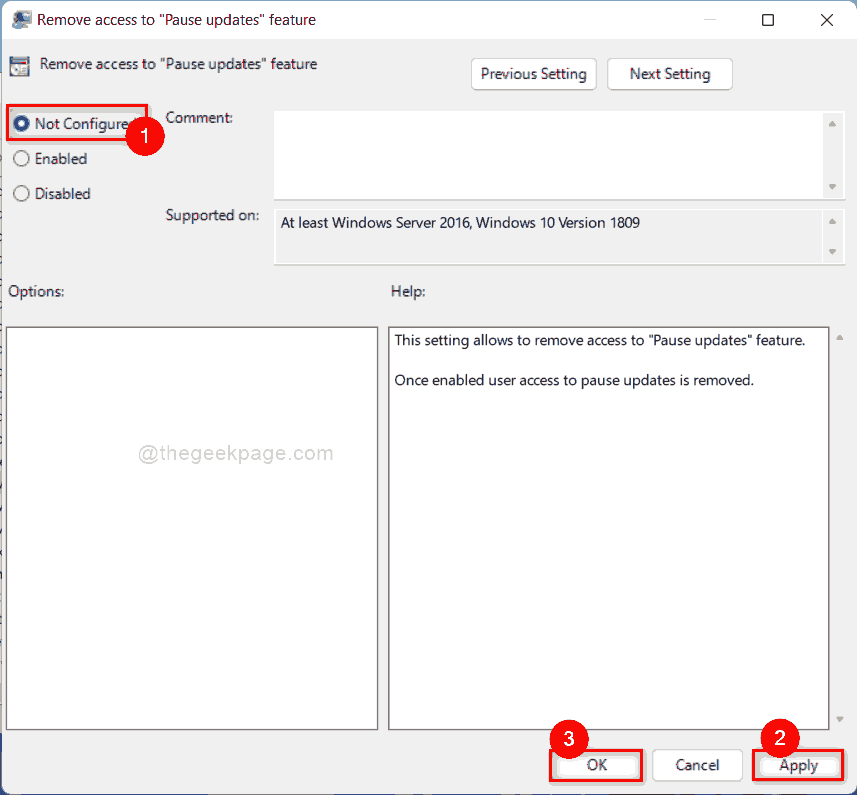
Step 5: Select Not configured option in the remove access to “pause updates” feature window and then, Click OK button as shown below.

Step 6: Then, Close the Local group policy editor window.
Step 7 : – Now, Open command prompt as admin.
Step 8 – Now, run the command given below once.
gpupdate /force
Step 9 – Close cmd window and try again.
Now if you go to Windows update page, you can see the Pause updates option is available on your system.
How to Fix Pause Updates Option Grayed Out in Windows 11 Using Registry Editor
Step 1: Press Windows + R keys together to open Run dialog box.
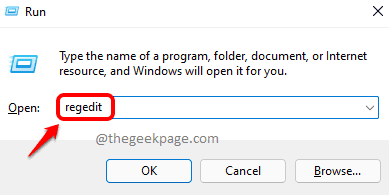
Step 2: Type regedit in the run box and hit the Enter key.
Step 3: Click Yes on the UAC prompt to continue.

Step 4: Copy and Paste the below path in the address bar of the registry editor window and press the Enter key.
HKEY_LOCAL_MACHINE\SOFTWARE\Policies\Microsoft\Windows\WindowsUpdate
Step 5: Once you reach the WindowsUpdate registry key on the left side of the registry editor, Select Windows Update key and right click on the SetDisablePauseUXAccess DWORD value and click Delete from the context menu as shown in the below image.

Step 6: Click Yes button on the Confirm Value Delete box to continue.

Step 7: Then, Close the Registry Editor window and restart your system.
Now you can see that the Pause updates option is available in the windows update page.
That’s it guys.
I hope this article was informative and helpful.
Please let us know in the comments section below.
Thank you for reading!