One of the most common issues that OneNote users face is the error –
One Note Needs a password to sync this Notebook.
On seeing this error, users try to Sign in to their account. But no matter what, they won’t be able to sync their notes to their account. This can be quite frustrating at times. Mostly this happens, when the OneNote application is open and the PC enters sleep mode. When the PC wakes up from sleep mode, this error message is seen.
Possible reasons to see the error are :
- Synchronization Conflicts.
- Corrupt Installation of MS Office Apps.
- Unexpected glitches in OneNote.
- Corrupt Cache Folder
In this article, we have listed some fixes that might help you fix the OneNote needs a Password to Sync this Notebook error.
Fix 1: Sign out and Sign-in to OneNote Application
Step 1: Open the One Note Application.
Step 2: From the top-right corner of the window, click on the user account.
Step 3: From the drop-down, click on Sign out.
Step 4: You will see a confirmation dialog popping up, click on Yes.
Step 5: From the top-right corner of the window, click on Sign in.
Step 6: You will be prompted to enter your Credentials. Enter your Username and Password.
Step 7: Once you are authenticated successfully, check if the error disappears.
Check if this helps.
Fix 2: Delete your account from Credential Manager
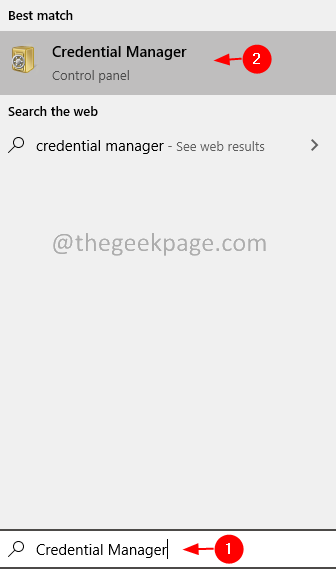
Step 1: Click on the windows icon. In the search bar, type Credential Manager
Step 2: Click on the Credential Manager
Step 3: Select Windows Credentials
Step 4: Under the Generic Credentials section, locate your Microsoft account and click on it.
Step 5: Click on the Remove option.
Step 6: You can see a delete confirmation dialog. Click on Yes.
Note that, once you delete this, all the applications using the Microsoft account must be signed in again.
Step 7: Restart the PC.
Step 8: Open the One Note application.
Step 9: On the top-right corner of the window, press Sign in.
Step 10: Enter your credentials again.
Check if this solves the error.
Fix 3: Repair MS Office
Step 1: Hold the buttons Windows+r together.
Step 2: In the Run window, type appwiz.cpl, and click on the Enter key.
Step 3: In the Program and Features window that opens, locate Microsoft 365. Right-click on it and select Change.
Step 4: If the UAC pops up asking for permissions, click on Yes.
Step 5: In the appearing dialog, click on Quick Repair.
Step 6: Click on the Repair button.
Step 7: Follow the instructions shown and repair the Office programs.
Step 8: If the issue is encountered due to a corrupted Office 365 application, this fix will resolve the issue.
Step 9: Restart the application and check if the issue has been fixed. If not, try choosing Online Repair (instead of Quick Repair as in Step 6) to repair the Office apps.
Step 10: Restart the application and check if the error has been fixed.
Fix 4: Disable or Uninstall any Proxy Servers or VPN Clients
Most of the users have reported that Disabling the Proxy Servers or VPN Clients in the system, has solved the issue. Try to Disable the Proxy Server and/or VPN Clients from the system. If you are not able to disable it, then try uninstalling the VPN Clients.
Step 1: Hold the buttons Windows+r together.
Step 2: In the Run window, type appwiz.cpl, and click on the Enter key.
Step 3: In the Program and Features window that opens, locate the VPN Client.Right-click on it and select Uninstall.
Step 4: Follow the instructions thoroughly and complete the uninstallation process.
Fix 5: Delete the contents from Cache Folder
Step 1: Open the Run Dialog using the keys Windows+R.
Step 2: In the opening window, type the below command and hit Enter.
%appdata%\Microsoft\OneNote
Step 3: Delete all the contents from this folder.
Check if this helps, if not try out the next fix.
Fix 6: Add the Share-point URL to the list of Trusted Sites
Step 1: Open the Run Dialog using the keys Windows+R.
Step 2: In the opening window, type the below command and hit Enter.
inetcpl.cpl
Step 3: In the opening window, click on the Security tab.
Step 4: Under Select a zone to view or change the security settings section, click on the Trusted Sites.
Step 5: Now, click on the Sites button as shown below.
Step 6: You can see the Trusted sites window opening.
Step 7: Under Add this website to the zone section, enter your companies-share point URL.
Step 8: Click on the Add button.
Step 9: Close the Trusted sites window.
Step 9: Finally, click on the Ok button in the Internet Properties window.
That’s All.
We hope this article has been informative. Thank you for Reading.
Kindly comment and let us know the fix that helped you solve the issue.


