If you have recently installed Microsoft Office on your Windows machine, you may have come across issues related to Microsoft Word. Everything works fine for some time until one day the Microsoft Word suddenly stops working and displays a message saying, “Microsoft Word has stopped working“.
This is one common issue reported by many users after they have installed Office Suite and when they try to open Word. This can be frustrating, especially if your work is based on MS Word. But, fortunately, there are a couple of ways through which you can fix this issue. Let’s see how.
Method 1: Using Quick Repair
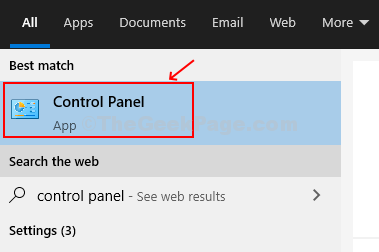
Step 1: Desktop > click on Start > type Control Panel in the search box > click on the result.

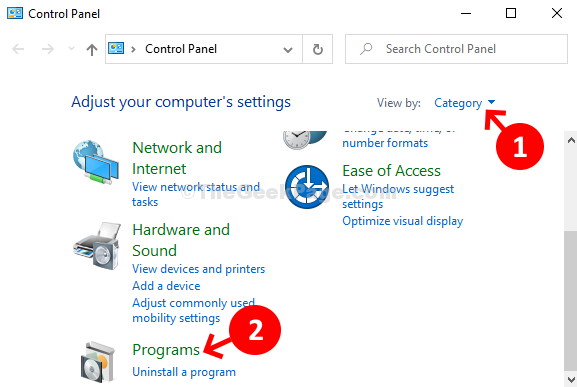
Step 2: In the Control Panel window > select View by – Category > select Programs.

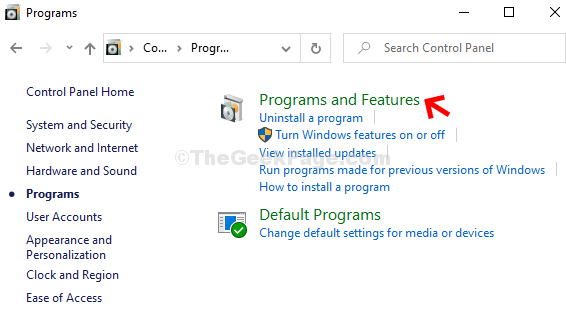
Step 3: Programs window > click on Programs and Features.

Step 4: Select the Microsoft Office package installed for your PC > Microsoft Office Home and Student 2016 > right-click > select Change.

Step 5: Next > select Quick Repair > click on the Repair button.

Step 6: Next > click Repair again.

Step 7: Next, it starts preparing Office programs and features. Let the repair complete.

Once completed you can close the prompt and now your MS Word should work fine. If the issue persists, try the 2nd method.
Method 2: Removing add ins
Step 1: Press the Windows key + R > Run box > type winword.exe /a in the search box > hit Enter.

Step 2: We are using the Microsoft Word 2016 version. Click on Options at the bottom left.

Step 3: In the Word Options window > select Add-ins on the left side of the pane > on the right side of the pane, go to Manage > let the COM Add-ins option remain unchanged > press GO.

Step 4: COM Add-ins window > uncheck all the Add-ins. Press OK.

That’s it! Now you can use your MS Word, as usual, however, if you still can’t open it, try Method 3.
Method 3: How To Fix “Microsoft Office Has Stopped Working” Error In Windows 10 Using Registry Editor
Step 1: Press the Windows key + R > Run box > type Regedit > Registry Editor.

Step 2: Registry Editor window > navigate to the below path:
HKEY_CURRENT_USER\Software\Microsoft\Office.0\Word\Data
Now, on the left side of the pane > Data > right-click > select Delete to delete the key.

*Note – the above path is for Microsoft Word 16. Simply replace the version field in the path for a different MS Office version. For instance, for MS Office 10, replace it with 10.0, for version 14 with 14, 0, and so on.
Word will recreate the data key as you start Word again. So, restart your PC and your MS Word should be working fine now.