Microsoft Teams not only comes preinstalled on every Windows 11 machine, but Microsoft has also gone one step ahead and placed the icon on the Taskbar by default. This makes the taskbar even more cluttered than it was ever before. In this article, we are going to discuss how to remove Teams from your new system. So, whether you are trying to disable Teams briefly, or just get rid of it – you got you covered.
How to disable Teams from starting up at boot
One of the basic issues with this Teams app is that it is pre-configured to autostart as your computer boots up. So, it will increase the booting time significantly.
1. At first, press the Windows key+I keys together.
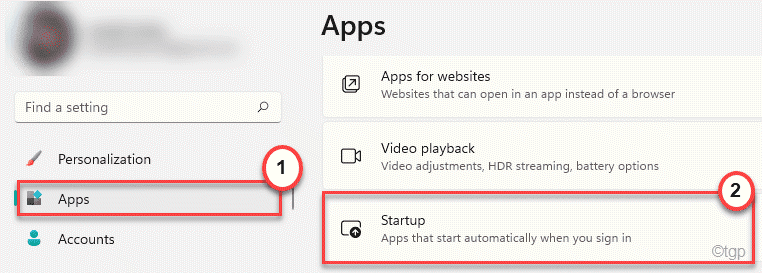
2. In the Settings window, tap on the “Apps” settings.
3. Now, scroll down and click on the “Startup Apps“.

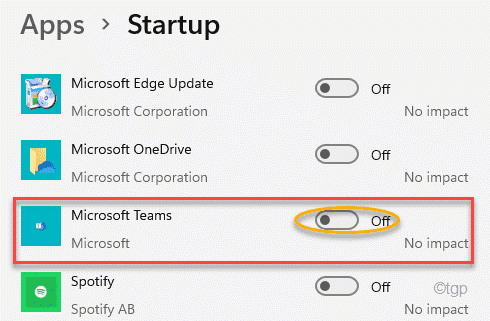
4. On the right-hand side, scroll down and locate the “Microsoft Teams“.
5. Make sure it is toggled to the “Off” setting.

After doing this, close the Settings window and restart your computer. Teams won’t be autostarting automatically.
Alternative way
There are other ways you can disable the autostart feature of Microsoft Teams.
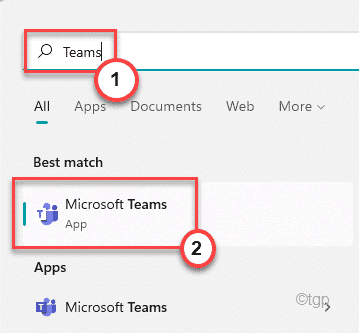
1. At first, type “Teams” in the search box.
2. Then, tap on “Microsoft Teams” in the search results.

3. When Teams appears, click on the three-dot menu and then click on “Settings“.

4. Make sure, the “Auto-start Teams” option is unchecked.

After that, close the Teams. Restart your computer and check again.
How to disable Teams without uninstalling it
There is a setting you can use to disable Teams from the taskbar without even uninstalling it.
1. At first, open the Settings window.
2. Then, tap on the “Personalization” on the left-hand side.
3. On the right-hand side, click on the “Taskbar” to open it.

4. On the same side of the screen, make sure the “Chat” option is turned “Off“.

After that, close the Settings. This will disable the Teams app from the taskbar.
How to uninstall Teams from Windows 11
If nothing is working out for you, the final solution is to uninstall Teams from Windows 11 machine.
1. At first, press the Windows key+I keys together.
2. Then, click on the “Apps“.
3. On the right-hand side, tap on the “Apps & Features“.

4. Scroll down to find the “Microsoft Teams” app from the list.
5. Then, click on the three-dot menu and tap on the “Uninstall“.

6. Confirm your action with a click on “Uninstall” once more.

This will uninstall Teams from your computer. Don’t forget to restart your device after this.
Alternative Approach –
If you are facing some issues uninstalling the Teams from your computer using the Settings, you can do it from the Program & Features utility.
1. At first, press the Windows key+R keys together.
2. Then, type “appwiz.cpl” and click on “OK“.

3. Search Microsoft Teams in the search box.
4. Just right-click on three vertical dots and tap on “Uninstall” to uninstall it.

Now, follow the on-screen instructions to completely remove it from your computer.
That’s it! This way, you can disable or uninstall the Teams from your computer.