Missing DLLs are a common issue in Windows 10 or Windows 11 causing plenty of issues in your PC. Whether you are trying to open a program or start your computer you may see a message saying, “The program can’t start because mfc110u.dll is missing from your computer”.
The error shows up when the Mfc110u.dll file is missing. It’s a DLL file related to the Microsoft’s Visual Studio especially designed for the Windows platform. This issue arises, when some parts of the Visual Studio get damaged or corrupted.
The good thing is, it can be resolved quite easily. Let’s see how.
Method 1: By installing the Visual C++ Redistributable for Visual Studio 2012 Update 4
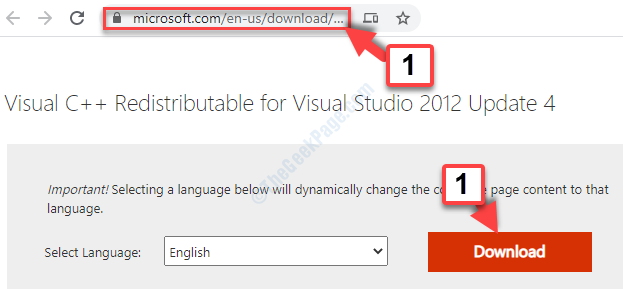
Step 1: Open your browser, and copy and paste the below link into the address bar. Hit Enter to reach the Microsoft download page for Visual C++ Redistributable for Visual Studio 2012 Update 4.
https://www.microsoft.com/en-us/download/details.aspx?id=30679
Press the red colored Download button.

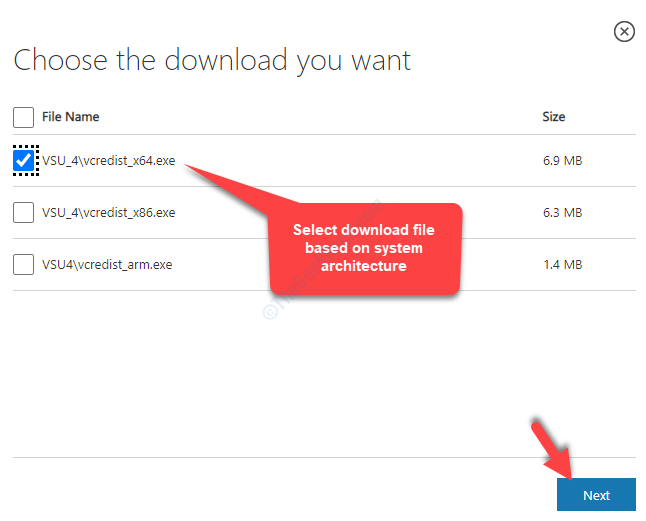
Step 2: Now, select the download file based on your system architecture. For instance, so I selected the 1st download file for 64-bit.

Step 3 – So, now once you have downloaded the Visual C++ Redistributable for Visual Studio 2012 Update 4 based on your system type, follow the instructions to complete the setup.
Now that the missing DLL file is added to the system, you should not see the error anymore. But, if you still see the error, try the 2nd method.
How to Know your system type to select the exe to download in step 2 above
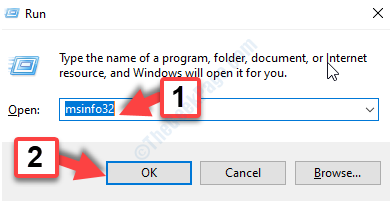
Step 1: To know if it’s a 32-bit or 64-bit system architecture on your Windows 10 or windows 11 system, press the Win + R keys on your keyboard to open the Run command. Now, type msinfo32 in the search box and press the OK button.

Step 2: In the System Information window, on the right side, find System Type. This is where you will get the system architecture. In my case, it’s 64-bit.

Note: – If your system type is X64-based PC, then in Step 2 select X64 based exe file, otherwise, if it is X86 based PC, then select X86 based exe file instead of X64 based exe file.
Method 2: By Downloading MFC110U.DLL
Step 1: Go to your preferred browser, and paste the below link into the address bar and hit Enter.

Step 2: In the MFC110U.DLL download page, scroll down til the list of download files. Click on Download based on your system architecture.

Step 3: Open the downloaded Zip folder in File Explorer. Now, select the dll file, right-click on it and choose Copy from the right click menu.

Step 4: Now, click on This PC shortcut on the left and select the C drive on the right side of the window.

Step 5: Now, navigate to the below path to reach the System32 folder if your System is 64 bit PC.
C:\Windows\System32
Note: – If your System type is 32 bit PC, then go to
C:\Windows\SysWOW64

Step 6: Now, paste the copied DLL file in this System32 folder. A prompt will show up asking for administrator permission. Simply press the Continue button.

That’s all. Once the dll file gets pasted in the folder, restart your PC and you can now open the programs easily, without any errors.