Link State Power Management is a very important power options setting in your Control Panel. It lets you control the way how your system consumes power during plugged and unplugged states. This setting is especially useful if you have a laptop as a laptop on battery power needs to save its power to last longer hours. Link State Power Management has 3 modes; one is off, the other is Moderate power savings and the last one is Maximum power savings.
Read on, to learn how you can enable or disable this feature in your Windows 11.
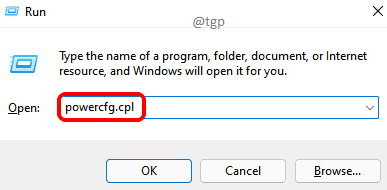
Step 1: Launch the Run window by pressing the keys Win and R at the same time.
Type in powercfg.cpl and hit OK button.
powercfg.cpl
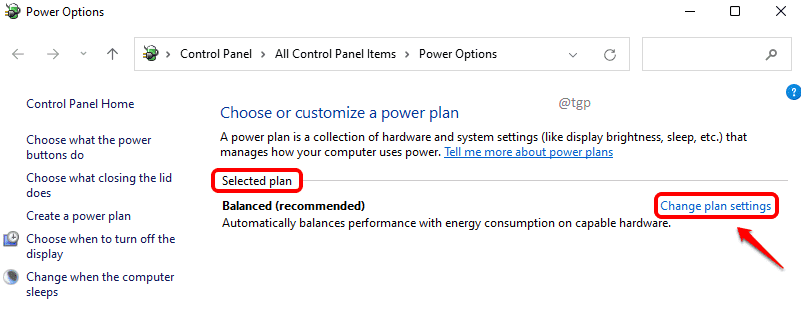
Step 2: When the Power Options window launches, click on the link Change plan settings against the Selected plan.
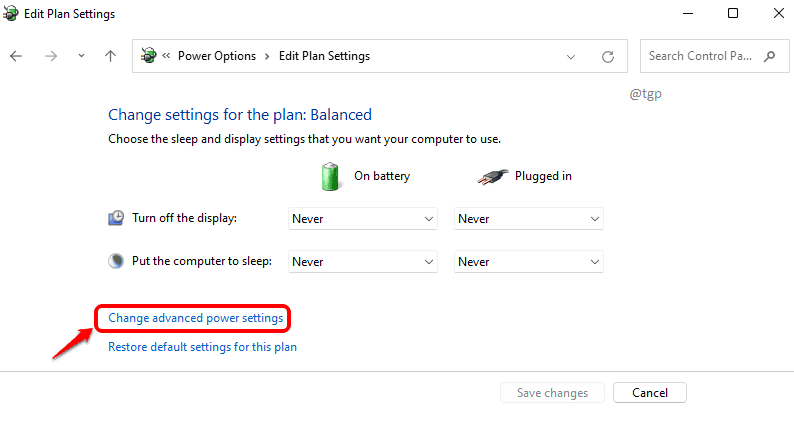
Step 3: As next, click on the link that says Change advanced power settings.
Step 4: In the Power settings window, you will be under the tab Advanced settings.
First, expand the PCI Express settings.
Next, expand the Link State Power Management settings.
You now have the option to choose from Off, Moderate power savings and Maximum power savings against On battery and Plugged in settings. Choose as per your requirements.
Once you are all done, hit Apply and then OK buttons.
Note: Off means Link State Power Management is disabled. That is, there will not be any saving of power. Moderate power savings means the power savings will be less, and the time taken by the computer to wake up from sleep will also be less. For Maximum power savings, the power savings will be very high, but the time taken by the computer to wake up from sleep would also be high.
Hope you found the article useful.


