GPU or in other terms, the Graphics card is the foundation of a gaming computer or any computer that requires heavy graphics usage. Graphics cards are useful for streaming HD videos, certain applications like SETI@Home, Adobe Creative Suite, mining cryptocurrencies (Bitcoin, etc.) and more.
But, there may be a time when the performance of your graphics card starts depleting. This is the time when you may need to upgrade your Graphics card. But, before you do so, you must know which graphics card your computer currently has. This information will save you from spending on a random graphics card that may not be useful after all.
Here’s how to check which GPU or Graphics Card model is used currently in your Windows 10 PC.
Method 1: Find Out the GPU and Graphics Card Model of your Windows 10 PC using Task Manager
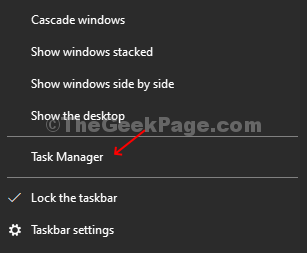
Step 1: Right-click on the Taskbar and click on Task Manager from the context menu.

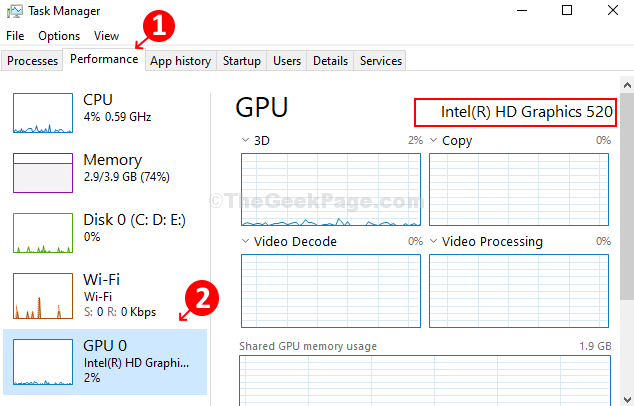
Step 2: In the Task Manager window, click on the Performance tab, click on the GPU option on the bottom left of the pane and view the Graphics Card model on the top right. In this case, it is Intel(R) HD Graphics 520.

Method 2: Find Out the GPU and Graphics Card Model of your Windows 10 PC using Dxdiag
Step 1: Click on the windows icon, type Dxdiag in the search box, and click on the result to open the Dxdiag diagnostic tool.
![]()
Step 2: Under the Dxdiag Diagnostic Tool dialog box, click on the Display tab and it displays the Graphics Card details under the Device option on the upper left.

Method 3: Find Out the GPU and Graphics Card Model of your Windows 10 PC using Device Manager
Step 1: Press Windows + X keys together on the keyboard to open the context menu, and click on Device Manager.

Step 2: In the Device Manager window, go to the Display adapters option, expand it and it shows the Graphics Card Model.

So, that’s how to can find the Graphics card Model name to be able to upgrade your outdated model to a new and compatible one.