While updating Java on your computer or installing a newer version of Java SDK on your PC you may see this error message – ‘Java install did not complete- Error Code 1603‘. If you are seeing this error message, try these fixes to solve the problem on your computer.
Workarounds–
1. Disable the antivirus on your computer and try the installation/ update process once again.
2. Restart your computer and check the installation once again.
Fix 1 – Uninstall the old Java version
Sometimes the existing version may conflict with the newer version. Uninstall the old version first then install the newer version.
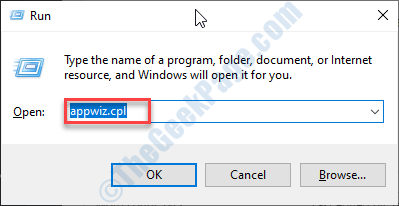
1. You need to press the Windows key+R keys to open the Run window.
2. In the Run window, write and then hit Enter.
appwiz.cpl

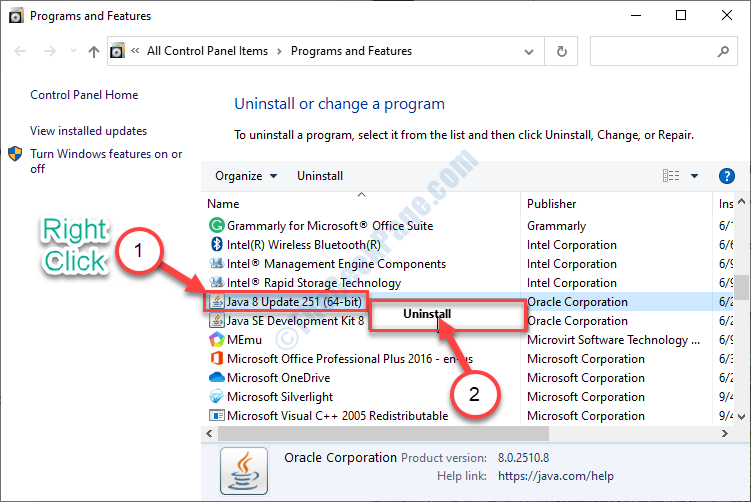
3. Then right-click on any application related to Java in the list and then click on “Uninstall“.

4. Now, click on “Yes” if a box appears to uninstall Java from your computer.

5. You need to repeat the same thing for any other Java-related application on that list.
Once done, close the Program and Features window.
Restart your computer.
After that, you have to install the latest version of Java on your computer.
Check if this fix has worked for you or not.
Fix 2 – Disable Java content in the browser
Disabling the Java content in the browser should fix the issue on your computer.
1. Type ‘Control Panel‘ in the search box.
2. After that, click on the “Control Panel” in the search result.

3. In the Control Panel, click on the drop-down beside ‘View by:‘.
4. Then you have to select the “Small icons” option.

5. Now you have to click on “Java” to open the Java Configure.

6. Go to the “Security” tab.
7. Here, uncheck the option “Enable Java content for browser and Web start applications“.

8. Don’t forget to save the changes by clicking on “Apply” and “OK“.

This is the way you can disable Java on your computer.
Fix 3 – Add the correct environmental variable
Adding a new environmental variable may fix this issue.
Step 1 – Install Java in a new folder
At first, install Java in a new folder.
1. Go to the Oracle website.
2. Click on “Java Download” to download the installer on your computer.

3. Double click on the installer to start the installation process.

4. You have to check the “Change destination folder“.
5. Then, click on “Install“.

6. After this you have to click on “Change” to change the destination folder.

7. Choose a location on your computer.
8. Then, click on “Make New Folder“.
9. After that, click on “OK“.

Wait for the installation process to finish.
Step 2 – Add a new variable
1. To open the File Explorer window, simply press Windows key+E keys together.
2. Now, right-click on “This PC” and after that, click on the “Properties“.

3. Then, click on the “Advanced system settings“.

4. In the System Properties window, click on the”Advanced“.
5. Just click on the “Environment Variables” to add a variable.

6. After this, click on “New…“.

7. As the first step, you have to set the ‘Variable name:‘ as “Java“.
8. Then, click on the “Browse files…“.

9. Navigate to the location you have just installed the Java.
10. In the bin folder of installation directory, you will see “java.exe” among the list of other applications.
11. Select it and click on “Open“.

12. Click on “OK” to add the variable.

13. You need to click on “Apply” and then on “OK“.

Close File Explorer window.
Reboot your computer and try to access Java again. It will work just fine.