FTDI chip (Future Technology Devices International Ltd.) is a popular IC that is used to interface devices like Arduino with your PC using a USB cable. Basically, the work of this chip is to convert a USB signal into a UART signal that is understood by microcontrollers.
By default, Windows does not have the FTDI driver software installed on them. When you plug in your FTDI, you will notice that it will be seen in the Device Manager with an exclamation mark inside a yellow triangle. It means that the drivers for the FTDI device connected to your PC are not installed. Many users have tried to install the drivers automatically using the Windows automatic driver installer and have found that it does not work for them.
Read this article to find the steps that can help you manually install the FTDI drivers on your Windows PC.
Download and Extract the FTDI Driver for Windows
Step 1. Click on this FTDI-Drivers link to download the driver for Windows.
Step 2. Save it in a folder on your system from where it can be easily accessed.
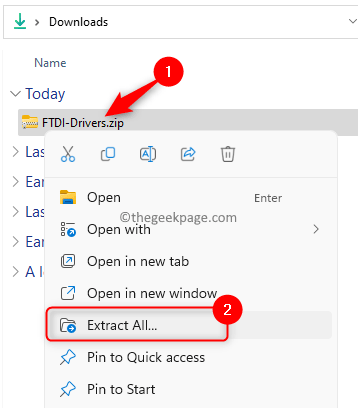
Step 3. Go to the folder where the downloaded zip file is saved.
Step 4. Right-click on this zip file and select Extract All… in the context menu.
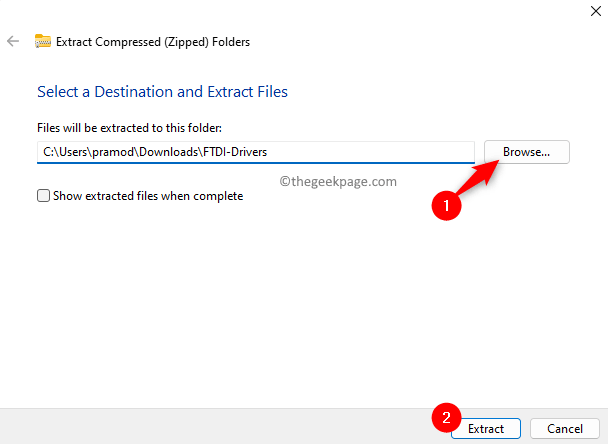
Step 5. In the window that appears, choose a location to save the extracted files using the Browse button.
Step 6. Finally, click on the Extract button to extract the files into the selected folder.
Check if FTDI is Detected and Install the Drivers
Step 1. Now, you need to have the FTDI device connected to the computer.
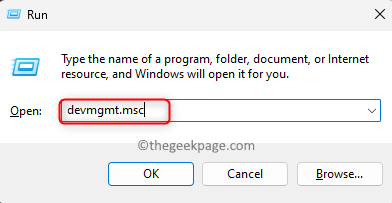
Step 2. Press Windows + R to open the Run dialog.
Type devmgmt.msc and hit Enter to open the Device Manager.
Step 3. In the Device Manager, if you expand the Other devices section you will see a device with the name FT232R USB UART.
Step 4. Now, right-click on the FTDI device and select Update driver in the context menu.
Step 5. In the Update Drivers window, click on the option Browse my computer for drivers to install the driver manually.
Step 6. Browse and go to the main folder that contains the extracted driver files. Select the main folder and click on OK.
Step 7. Make sure that you check the box next to Include subfolders.
Step 8. Click on Next.
Wait for some time till the drivers are installed.
Step 9. Remove the FTDI device and connect it back again to your computer.
Now, in the Device Manager, the FTDI device will be seen as USB Serial Port under Other devices along with an exclamation mark.
Step 10. Again, right-click on USB Serial Port and choose Update driver.
Step 11. Perform Steps 5 to 8 above to browse the system for drivers and install the second set of drivers manually.
Step 12. Once the FTDI drivers are installed, you will be able to use your FTDI device without any issues.
That’s it!
Thanks for reading.
We hope the steps in this article have been helpful to you in installing the FTDI drivers manually on your Windows PC. Did you find this article informative? Please comment and let us know your thoughts and opinions.


