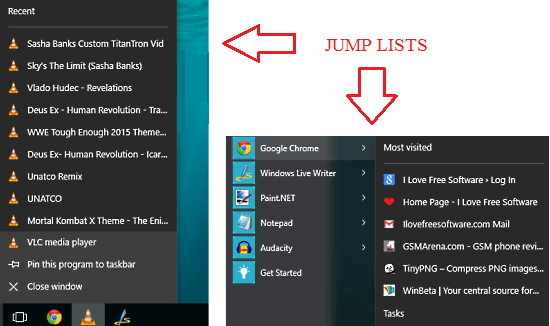
How To Increase The Number Of Items In Windows 10 Jump Lists:- One of the super cool features that Windows 10 offers for its users is the Jump Lists feature. All those files that you open recently or frequently get stored on Windows 10 jump lists such that you can access them with a single click at a later point of time. This is quite convenient and often helps you save a lot of time. By default, a Jump List in Windows 10 can hold upto 15 items. But you might be surprised to know that there are no straight cut methods to increase the number of items that a Jump List can contain. Well, there indeed happens to be a not so straight method. You can easily increase the number of items that a jump list can contain by making a couple of changes to the registry editor. Since we are going to mess up a bit with the registry editors, it is highly recommended that you create a system restore point before heading onto the article.
Also read: – How to delete the Jump List all at once
STEP 1
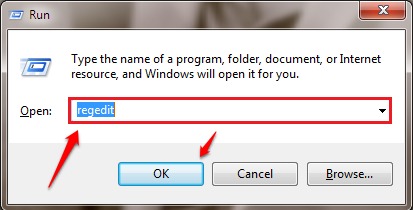
- Press WIN+R keys together to open the Run dialog box. Once it opens up, type in regedit and hit OK button.
STEP 2
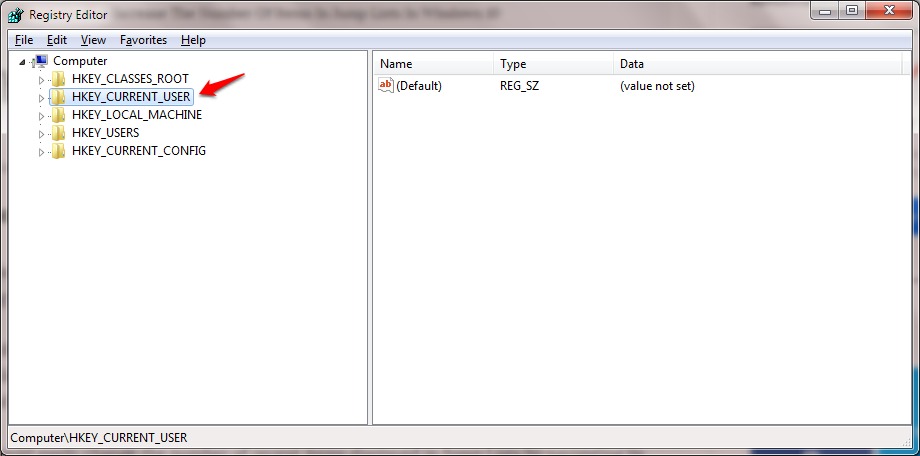
- A separate window named Registry Editor opens up. You need to navigate along the following path.
HKEY_CURRENT_USER\Software\Microsoft\Windows\CurrentVersion\Explorer\Advanced
For that, click on the key named HKEY_CURRENT_USER in the left pane of the window.
STEP 3
- As next, click on the subkey named Software.
STEP 4
- Then click on Microsoft as shown in the screenshot given below.
STEP 5
- Click on Windows next, then on CurrentVersion, then on Explorer and finally on Advanced.
STEP 6
- Now in the right window pane, you will able to see many entries. You have to look for an entry named JumpListItems_Maximum. Don’t worry if you cannot find it. Simply right click on an empty space in the right window pane and then click on New and then on DWORD (32 bit) Value.
STEP 7
- You have to name the newly created DWORD Value as JumpListItems_Maximum.
STEP 8
- Now double click on JumpListItems_Maximum. An edit window will pop open. Now edit the Value data field. You can set the Value data a number of your choice. I have chosen it to be 25.
So what are you waiting for? Try out this trick today itself to increase the number of items on your jump list to access the files and folders on your system a lot quicker and easier. Don’t forget to share this new piece of information with your friends as well. Hope you had fun reading the article.


