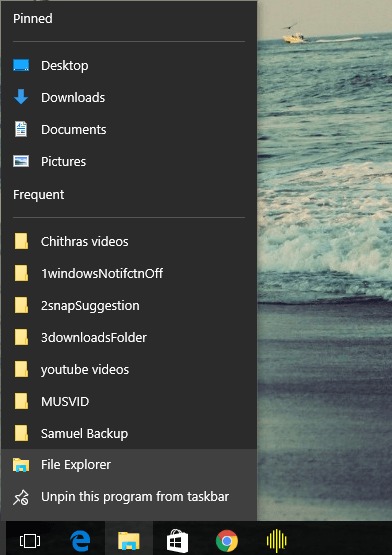
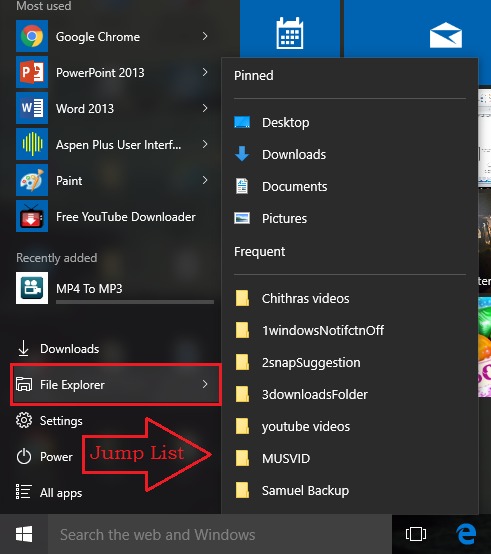
Let me start by telling you what a jump list actually is. Windows keeps track of all your exploring activities. That is if you open your file explorer and go to your movies folder, this activity of yours gets saved somewhere by windows. If you play a song in your media player, that also gets saved somewhere. So where is this somewhere? Where do you get to see all these saved information? That’s the very purpose of our jump lists. To see the jump list associated with an app, simply right-click on the icon of the app whose jump list that you want to see from taskbar as shown in the screenshot.
See also : How to clear and declutter your windows 10 Taskbar
Or you can just click on the Start menu icon and find the app whose jump list that you want to see and click on the side arrow associated with it. This also lets you see the jump list associated with a particular app.
Well, this feature is in no way designed to invade into your personal privacy or anything of that sort. This feature is actually designed to improve the user experience. With jump lists, one can easily go to the recently opened files and folders without too much navigation. But yes, some users could indeed find this an invasion into personal privacy. Well, don’t worry, just dive into the rest of the article to efficiently pack up this little problem of yours.
STEP 1
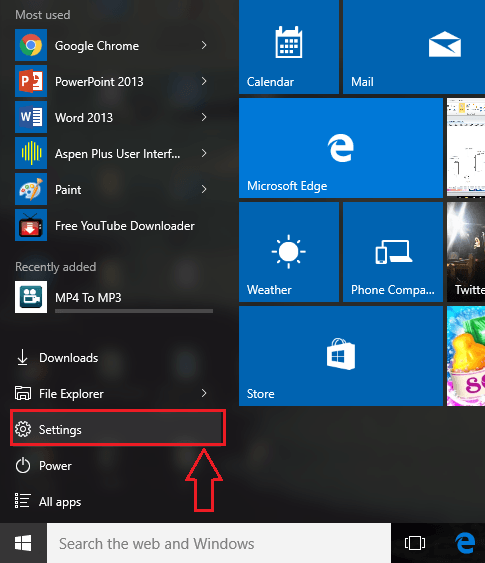
- First of all, launch the Settings app from the expanded Start menu options.
STEP 2
- Once the Settings app opens up before you successfully, click on the option named Personalization.
STEP 3
- A new window for Personalization opens up. There will be a number of sections in the left window pane. Find the one named Start.
STEP 4
- Click on the Start section as shown in the screenshot. Now, in the right window pane, look for the toggle button that says Show recently opened items in Jump Lists on Start or the taskbar. Simply turn it off. This will clear the jump lists associated with different apps in your system.
STEP 5
- Now if you want to have your system keep track of every recently opened file from then on, simply turn the toggle button on as shown in the screenshot. This will re-enable your jump lists.
STEP 6
- That’s it. Now let’s check whether it works. Oh yes, it does!
So that’s how easy you can clear off all your jump lists at once and re-enable them if you prefer so. Try out this trick today itself. Hope you found the article useful.


