Suppose you want to work on an application such that, you want to simultaneously monitor and also do some backend work or if you want to work on multiple things parallelly, Microsoft has come up with a useful feature called Split-Screen wherein you can view multiple sections of a document or any different application at the same time. It becomes easy for a person to work on and he need not search and switch tabs often. This functionality is included from Windows 7 onwards. Let us see how to use the Split-Screen feature.
Enable And Use The Split-Screen Feature On Windows 10
The Split-Screen feature is also called as Snap feature in Windows. This feature is enabled by default in Windows but it is always good to know how to do it or check it ourselves. Here, let us see how can we enable and use this feature in Windows 10.
Step 1: Open the Windows Settings by clicking on the (Windows key + I) simultaneously or you can also click on the Windows start button and then click on settings.
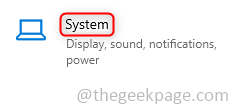
Step 2: Click on System and scroll down on the left pane till you see the Multitasking option. Click on Multitasking.
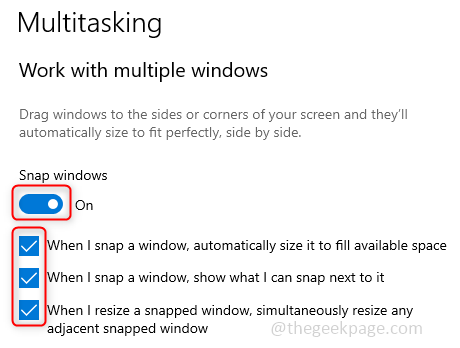
Step 3: On the right pane enable the Snap windows by clicking on the toggle bar. Also, click on the three checkboxes present below. Now the feature is enabled.
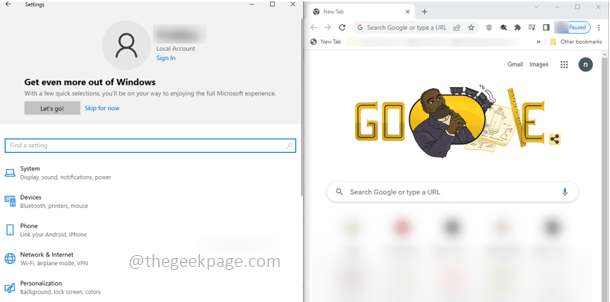
Step 4: If you need to split the window into two sections, then the most common method is to drag the window onto the left corner or to the right corner as per your need or comfort. Once done it will cover half of the screen and there appear other opened tabs on the other side where you can select any one window by clicking on it. This covers the other half of the screen.
Step 5: You can also use shortcut keys for re-sizing the screen. To split the window into two sections use the Windows key and left arrowed or right arrowed key simultaneously. (Win + >) or (Win + < )
Step 6: To split the selected window such that it appears at the corner edge, use the Windows key and left arrowed or right arrowed key simultaneously, this splits the screen into equal halves, and then use the Windows key along with the up arrowed or down arrowed key for corner view.
Step 7: You can also further adjust the size and have three split screens by using the Windows key and left arrowed or right arrowed key simultaneously first and then use Windows + up arrowed key thrice.
Step 8: To get a fullscreen back, click on the Windows key and up arrowed key simultaneously until you see the full screen.
Enable and Use the Split-Screen feature on Windows 11
Enabling the split-screen feature is almost the same in Windows 11 as well, but the usage here is made simpler. Let us see how to enable and use the split-screen feature in Windows 11.
Step 1: Open the Windows Settings by clicking on the (Windows key + I) simultaneously or you can also click on the Windows start button and then click on settings.
Step 2: Click on System and on the right pane click on the Multitasking option.
Step 3: On the right pane enable the Snap windows by clicking on the toggle bar. Also, enable all the checkboxes.
Step 4: Now it is been enabled. The usage is simple, hover on the maximize button at the upper right corner of the window. You can see different types of split-screen options. Select the one you prefer.
Step 5: Suppose you need a two-panel window, hover on the maximize button, select the two-panel option and the current window will appear on the selected side and you will get other open window options on the opposite side. Select the one to fill the other half.
Step 6: If you need a three-panel window, hover on the maximize button, select the three-panel option, and the current window appears at the space you initially selected and it will prompt you to select other open windows to fill the other sides of the screen.
Step 7: Similarly with the four-panel window.
Step 8: You can also re-arrange the screens by clicking on the menu bar of each window and moving them to desired positions or also use shortcut keys.
Use Microsoft PowerToys For Customizing Windows.
In case you need to customize the Windows-like snap the screen further and change color etc, you can use this utility called PowerToys provided by Microsoft.
Step 1: Download the PowerToys. Click on the .exe file. Once downloaded, execute the .exe file in administrator mode and follow the installation prompts.
Step 2: Select FancyZones from the left pane and click on Enable FancyZones toggle bar on the right pane. FancyZone is used to snap windows efficiently.
Step 3: Click on Launch layout editor at the right pane.
Step 4: There appear different templates for snapping windows. You can select the one convenient for your work.
That’s it! Hope this article was helpful and made your work easy. Thank you!!


