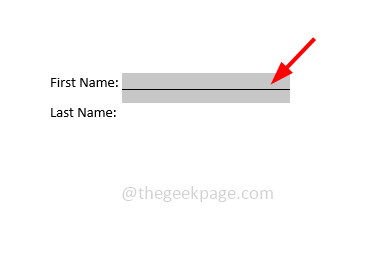
Have you tried typing over a line before and felt difficult? Typing a word and then underlining it is easy but have you tried typing a word over an existing line? Are you searching for different techniques on how to do it? Then here is the correct place where you will find different methods to achieve it. In this article let us see how to type over a line in a Microsoft Word document.
Method 1: Type Over A Line Using The Underline And Tab Options
Step 1: Open the Microsoft Word document
Step 2: Navigate to the place where you want to type over a line
Step 3: Press the tab key from your keyboard multiple times
Step 4: Select that particular tab-spaced area that you just created
Step 5: Then press Ctrl + U keys from your keyboard and an underline appears in the selected area
Instead of the Ctrl + U keys, you can also click on the Underline (U) option that is at the top of the word document in the font option. Here in the underline drop-down, you can choose the desired line format
Step 6: Now you can type over a line in the document.
Method 2: Type Over A Line Using The Line Tool
Step 1: Open the Microsoft Word document
Step 2: Click on the insert tab that is at the top of the document
Step 3: Go to the Shapes drop-down and click on it
Step 4: In the Lines section select a line format and draw a straight line in the word document. To make it straight hold the shift and draw the line
Step 5: You can also drag the line and move it
Step 6: Now you can type over the line
Method 3: Type Over A Line Using The Table Cell Format
Step 1: Open the Microsoft Word document
Step 2: Click on the insert tab that is at the top of the document
Step 3: Click on the table drop-down and select the table size. For example, here I will select a 2 x 2 table
Step 4: If you want to adjust or edit the cell spacing you can do it. And now you can type over the lines inside the table cells
Step 5: Then edit the table borders, to do that when you hover on the table at the left top corner there will be a plus mark, click on it
Step 6: Go to the table design section at the top of the word document
Step 7: Click on the borders drop-down and select No border
Step 8: Select each cell from the table
Step 9: In the table design section click on the borders drop-down and choose the bottom border and it is done
Step 10: But note that you will have to repeat it for each cell.
That’s it! I hope the above information is helpful. Thank you!!


