Sometimes your folders could get so cluttered with all sorts of file types in the world. One major example is the Downloads folder where you download and download and never care to organize. Would it be nice if you get to double click somewhere and then automatically all your messy files will be neatly sorted and moved onto their respective folders based on their respective extensions? Well, get ready to embrace the nice then! We are here to guide you on how you can accomplish this very trick with the help of a simple batch script.
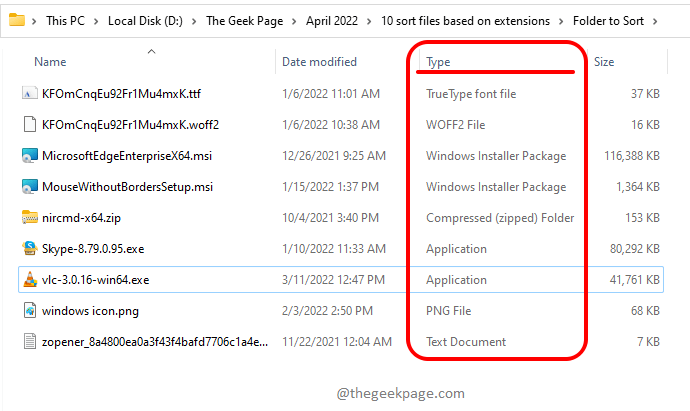
Step 1: Navigate to the parent folder which has all the files that need to be sorted and moved. This can be any folder of your choice, including the Downloads folder.
In the example below, in my parent folder, I have many files with various extensions.
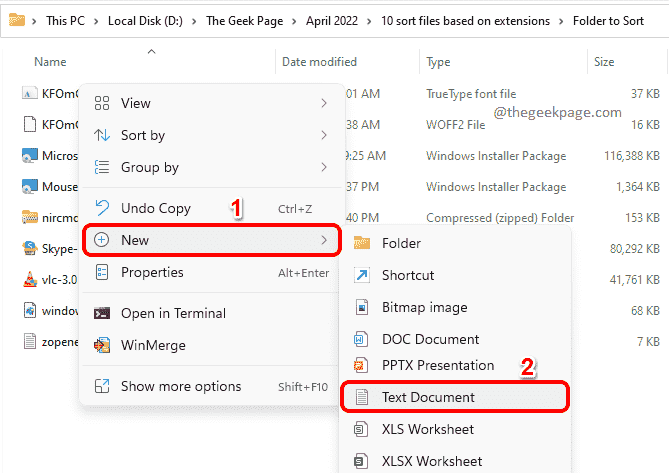
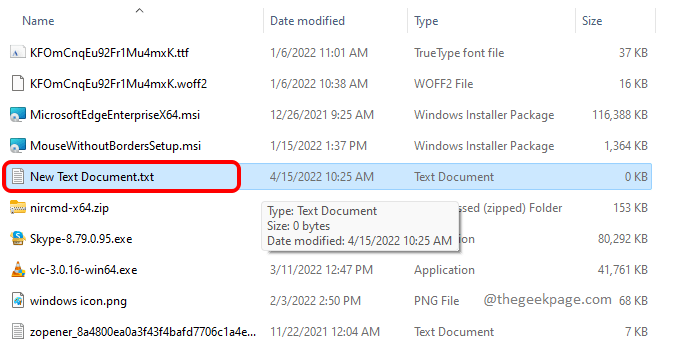
Step 2: As next, right click on an empty space, click on the New option and then click on the Text Document option.
Step 3: You now need to double click on the new text document that you just created. This will open up the newly created text document in your Notepad for editing.
Step 4: When Notepad launches open, copy and paste the following script onto it.
@echo off

rem thegeekpage.com

for %%a in (".\*") do (
      if "%%~xa" NEQ "" if "%%~dpxa" NEQ "%~dpx0" (
            if not exist "%%~xa" mkdir "%%~xa" (
                   move "%%a" "%%~dpa%%~xa\"
            )
       )
)
Once you have copied the above script, press the keys CTRL + S together to save the file. You can close the file once it is saved.
Explanation:
- The script iterates through all the files in your parent folder. The batch script we created is ignored and it is not considered for sorting and moving.
- The Script takes each file and checks its extension.
- The script then checks whether a folder with the same name as the extension of the current file is present in the parent folder or not. If there is no folder, it is created.
- Once the folder is created or found to be existing, then the file is moved into that folder.
- Steps 2 to 5 are repeated till all the files are checked and moved if required.
Step 5: After that, come back to the parent folder, click on the saved text file and press the key F2 to rename it. You can give any name as per your choice, but make sure you give the extension of the file as bat, after the . (dot). Click somewhere else once you are done with the naming.
Note: Giving the extension as bat is the most important part.
Step 6: When you click somewhere else, you will get the following Rename confirmation window. Click on the Yes button to proceed.
Step 7: As next, you can double click on the batch file to execute it. Be careful with this step, it cannot be reverted.
Step 8: Viola! You can now see that all the files in your parent folder are now neatly sorted and moved into their respective folders based on their extensions. Enjoy!
Please tell us in the comments section whether you found the article useful.


