Sharing files in Windows 7 or Windows 8 provided the means of using different PC’s connected to a network. If other home PC’s were to be connected together, they would require a homegroup network. With the help of homegroup network, they would browse and search files on other PC’s or Share printers and other devices.
In the case of Windows 10, sharing files have become a lot easier. For a user to share files located in any of the hard drives, he/she has to click on the file explorer and use a suitable sharing method.
In this article, we’ll get to know the methods of sharing files via mail app in Windows 10:
Method 1: Using Share
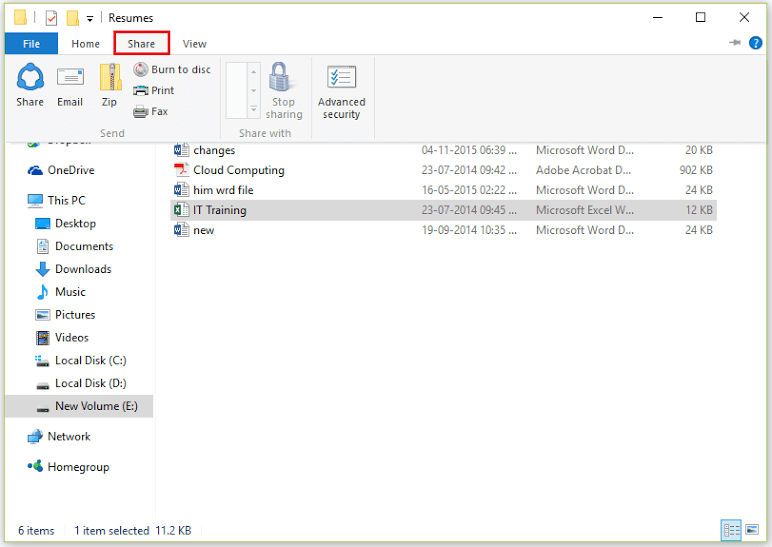
The “Share” feature is the simplest of all sharing options in Windows 10. To use the “Share” feature, select any file located in a hard drive then click on the “Share” tab located at the top of the screen.

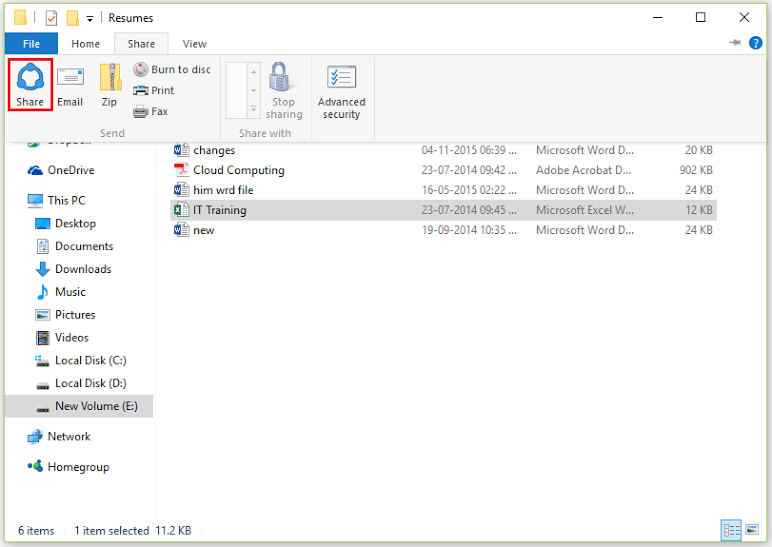
Now, click on the “Share” icon provided at the bottom of the Share tab.

Now, the PC will display all apps which exhibit the sharing feature. You can select the suitable app for sharing.
Method 2: Using Email

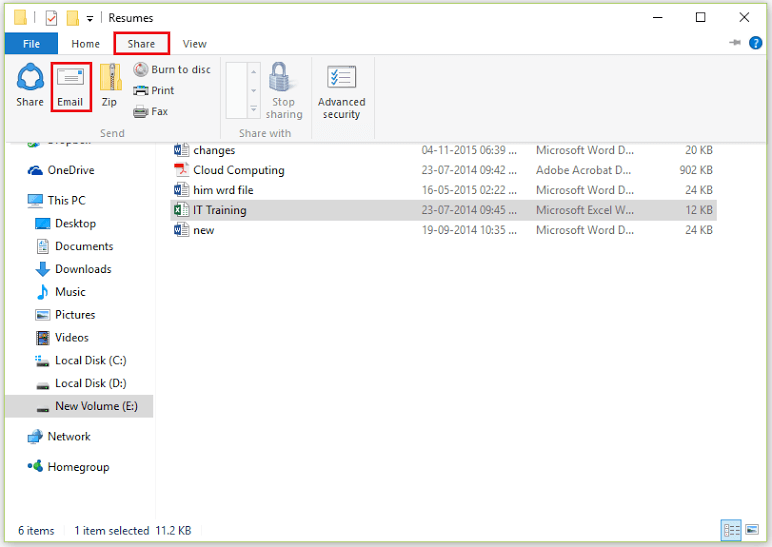
The “Email” feature is used to attach the files in an email. This feature can be used effectively with the help of Email Clients like Microsoft Outlook, Mozilla Thunderbird etc. To use the above method, click on “Share” tab in the file explorer and then click on “Email”.

If the file size is large
The “Zip” feature compresses a file into a .zip file with a rename option. This feature is very handy in cases where the files size is large. To use the “Zip” feature, click on the “Share” tab in the file explorer and then click on “Zip”.
The same file with .zip extension is created which can be shared easily.