OneDrive application on your system stores all the files and folders on cloud. But sometimes the user does not want some of the files or folders to be stored and occupy the OneDrive space which is limited to 5 GB without subscription. To do so, there is a setting in the OneDrive application which will allow the user to select the files or folders to be synced on cloud. If you are also looking for this, then this post will help you in selecting the folders or files to sync in OneDrive in Windows 11 system.
How to Select Certain Folders to Sync in OneDrive in Windows 11
NOTE: Make sure OneDrive app is connected and synced.
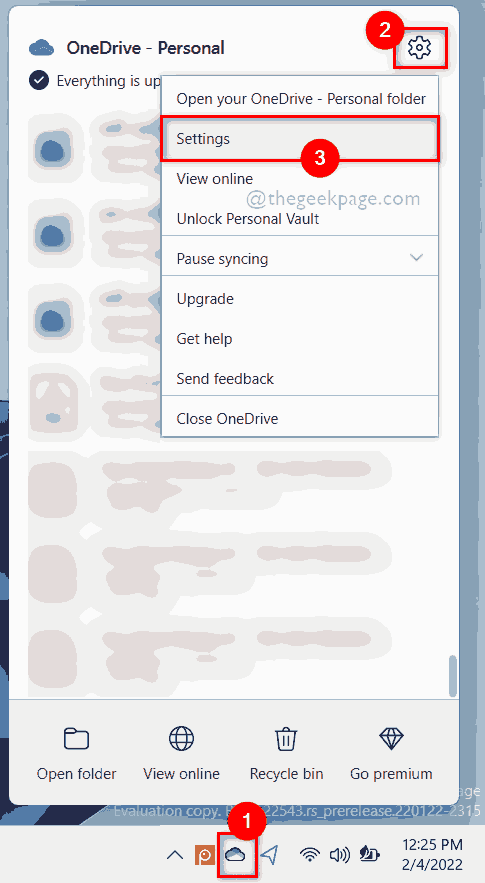
Step 1: Click OneDrive app icon in the taskbar once.
Step 2: Then, Click Help & Settings icon at the top of OneDrive app.
Step 3: After that, Select Settings option from the list as shown in the below screenshot.

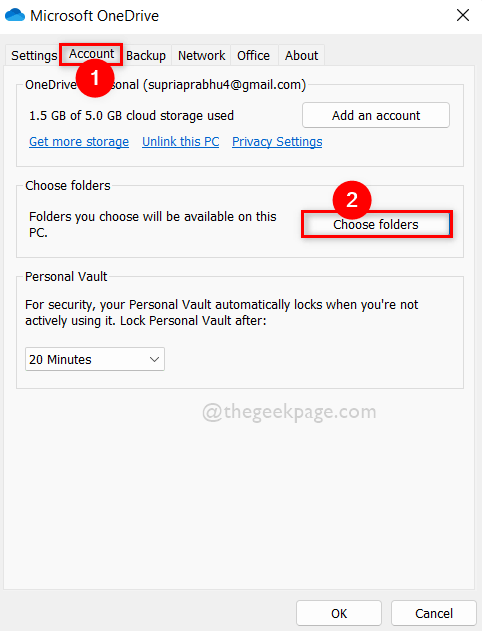
Step 4: In the Settings window, Click on Account tab.
Step 5: Then, Click Choose folders button under Choose folders section in the Account tab as shown in the below screenshot.

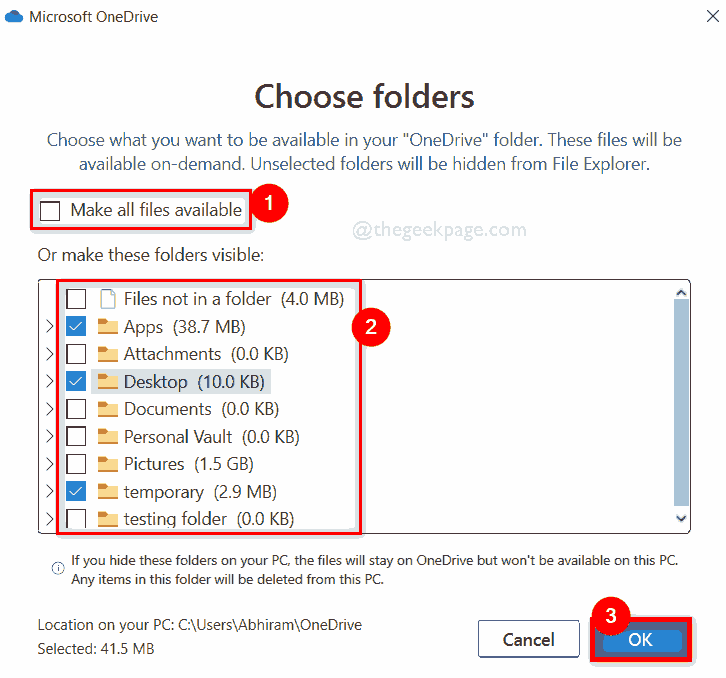
Step 6: In the choose folders window that appears, Uncheck the Make all files available checkbox as shown below.
Step 7: Then, Select the folders by checking under make these folders visible section and click OK to apply changes.
Step 8: This will sync only those folders selected here.

Step 9: If you want to make all the folders to sync in future, you can check the Make all files available checkbox as shown below.
Step 10: Once done, Click OK to close it.

Step 11: After choosing the folders to sync, Click OK in the Settings window to make changes and close it.

That’s all.
Hope this post was informative and helpful.
Please let us know in the comments section below.
Thank you for reading!