How To Remove The Write Protection From A USB Drive:- Sometimes when you try to write something onto a USB drive, you will see an alert box saying that the USB drive that you are trying to write to, is write protected. Or let’s say you want to format your USB drive. Then also, if the drive is write protected, you will receive the same alert. In such cases, you might want to remove the write protection from the drive. Here we have explained the simplest and quickest solution for this issue in a very few number of steps. Check it out!
STEP 1
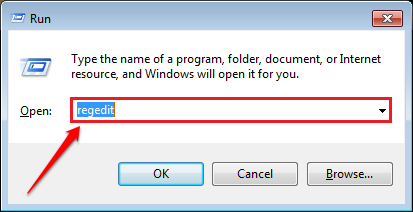
- Press the WIN+R keys together to launch the Run dialog box. When it opens up, type in regedit and hit the enter key.
STEP 2
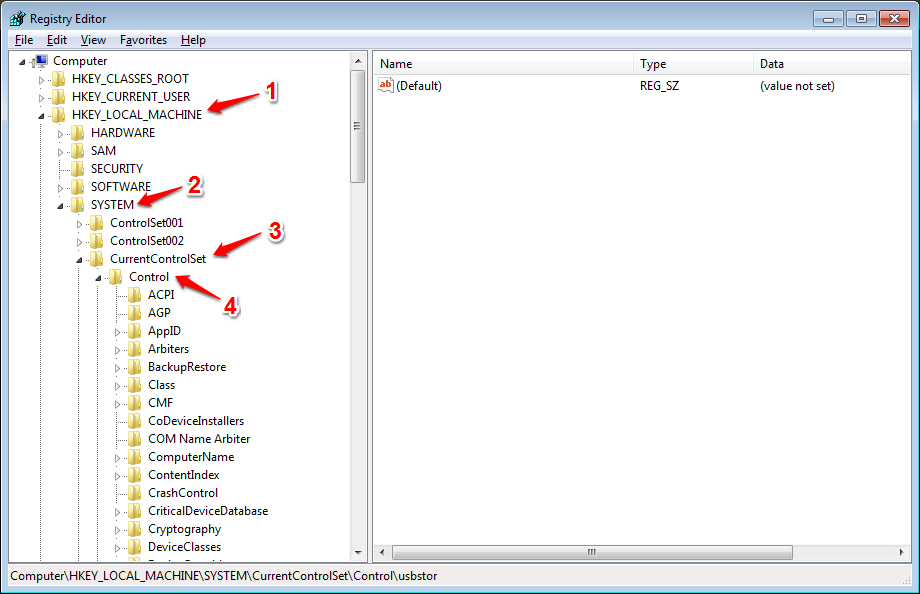
- As next, you need to navigate to the following path as shown in the screenshot given below:
HKEY_LOCAL_MACHINE -> SYSTEM -> CurrentControlSet -> Control
STEP 3
- Now, under the Control key, you need to look for a key named StorageDevicePolicies.
- If there is one already, you can go straight away to step 5.
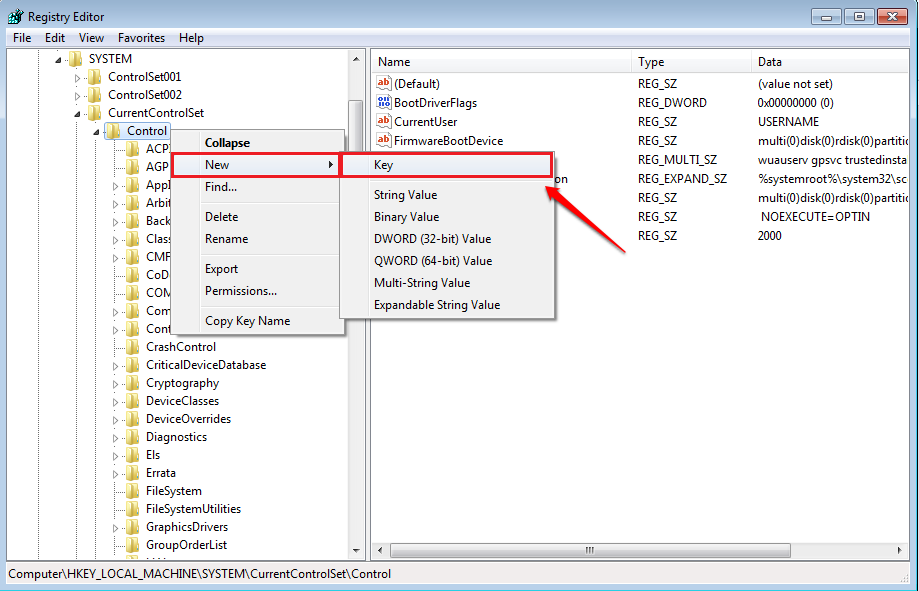
- Else, right click on the key Control, click on New and then on Key.
STEP 4
- Name the newly created key as StorageDevicePolicies.
STEP 5
- Click on the newly created StorageDevicePolicies key in the left window pane, and in the right window pane, you need to create a new 32-bit DWORD value. For that, right click anywhere on an empty space in the right window pane, click on New, and then on DWORD (32-bit) value.
STEP 6
- Give the newly created DWORD value the name WriteProtect and double click on it to edit its value data. To disable the write protection from the USB drive, set the value in the Value data field to 0.
That is it. Now the write protection on your USB is disabled.
Note: – Don’t worry about formatting your write protected USB drive anymore. Thank you for taking your time on reading the article.


