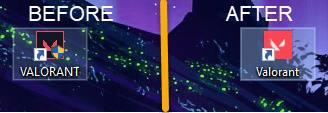
Are all the application icons borrowing a shield at the bottom-right side of your desktop? If you are seeing these shields on your icons, then there is a chance you are seeing a continuation prompt every time you are trying to access the application on your computer. Just follow these easy fixes to omit the shield from the icon.

Fix 1 – Uncheck the run as admin
The shield icon is actually the sign of administrative rights while launching the application.
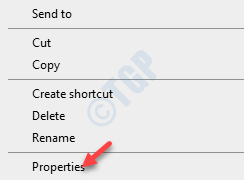
1. Right-click on the desktop icon and click on “Properties” again.

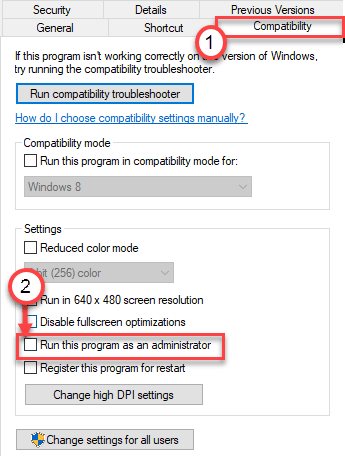
2. Once the Properties opens up, click on the “Compatibility” tab.
3. Thereafter, uncheck the option “Run as administrator“.

4. Don’t forget to click on “Apply” and “OK“.

Once you have done this, check the icon again.
Fix 2 – Create a New Shortcut
1- Right-click on the shortcut causing issue and click on Properties.

2- Click the Open File Location button.

3 – Now, Create a copy of the original shortcut.

4 – Now, copy this renamed shortcut to desktop.
5 – Now, delete the issue causing shortcut and rename this copied shortcut to Original name.
Fix 3 – Delete iconcache.db
1 – Search cmd in Search box located in Windows taskbar
2 – Now, Right click on command prompt and then click run as administrator
taskkill /f /im explorer.exe
3 – Now, run the commands given below one by one in command prompt window
CD /d %userprofile%\AppData\Local
DEL IconCache.db /a
EXIT
4 – Now,Open Task manager by pressing CTRL + SHIFT + Esc keys together
5 – Click on File and the click on New Task.
6 – Now, write explorer.exe and click OK.

Fix 4 – Use Task Scheduler process
1. Press the Windows key+S keys together.
2. Type “Task Scheduler” in the search box and click on “Task Scheduler“.

3. Once it opened up, click on the “Create Task...”.

4. Go to the “General” tab.
5. Set the name of the program according to the icon you are trying to change.

6. After that, you need to check the “Run with highest privileges“.
7. Next, in Configure for drop-down option, select Windows 10.
Note: -If you are on Windows 11 Just select Windows 11.
8. Click on OK.

9. Go to the “Actions” window.
10. Thereafter, click on “New“.

11. In the New Action window, click on browse.

12. Browse to the target location of the program.
13. Select the program and click on “Open“.

NOTE–
In case if you don’t’ know what is the exact location of the application (of the icon) follow these steps.
a. Right-click on the icon you are trying to change on the desktop.
b. Then, click on the “Properties“.

c. Now, note the ‘Target’ location of the application. It is the actual location of the application on your computer.

14. Now, click OK.

15. After that click on the “Conditions” tab.
16. You need to uncheck the Power options to “Start the task only if the computer is on AC power”.
17. To save the task, click on “OK“.

18. Now, right-click on Desktop anywhere and choose new and then click on the shortcut.

19. In the Type the location of the item section, modify this way –
schtasks /run /tn name of program
NOTE–
Change the “name of the program” to the name of the program of which the shortcut you are creating. Example- Like if you are doing this for ‘Valorant’, then the code will be –
schtasks /run /tn Valorant
20. Click on “Next“.

21. Name the shortcut as your original program name.
22. After that, click on “Finish” to finish the shortcut.

That’s it! Now, all you need to do is to change the icon of the new shortcut. To do so, follow these sets of steps –
1. Now, right-click on the new shortcut you have created (In this case, the shortcut is “Valorant”) and click on “Properties“.

2. Once the Properties window appears, go to the “Shortcut” tab.
3. Here, click on “Change Icon…” to change the icon of the shortcut.

4. If there is an error message, click on “OK“.
5. After that, click on “Browse” to browse the location of the original application.

6. Select the application with the desired icon you want to imply. (For our example, it is “VALORANT”)
7. Then, click on “Open” to import the icon.

8. Finally, select the program icon.
9. Then, click on “OK“.

This will put the icon on the new shortcut. From now on, whenever you are trying to access the application, double click on the new shortcut.
Fix 5 – Change the UAC settings
Lowering the UAC settings may help your case.
1. Just search for “User accounts” in the search box.
2. After that, click on the “Change User Account Control settings“.

3. After that, slide the slider down to “Never notify“.
4. Click on “OK” to save this change.

This should stop the annoying prompt you were having while trying to launch the application.