Inserting horizontal lines is very useful when it comes to Microsoft Word. You can separate different sections using it. But many users do not know how to go about inserting horizontal lines in Microsoft Word. Many are still confused whether it’s a shape or something else. Well, the horizontal line that separates different sections in Word is actually a paragraph breaker.
In this article, let’s see how you can easily insert horizontal lines and how to remove them as well. Hope you enjoy reading the article.
Section 1: How to Insert Horizontal Line in Microsoft Word
Inserting a horizontal line is so easy in Microsoft Word that it can be done in just 2 steps. Let’s see what those 2 steps are!
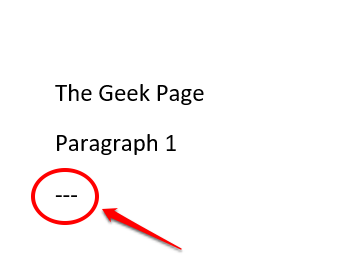
Step 1: Firstly, click where you want to insert the horizontal line and then press the hyphen key on your keyboard 3 times (—).
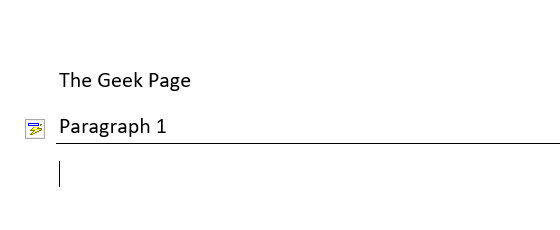
Step 2: Upon hitting the Enter key, you will see a beautiful horizontal line inserted onto your Word document. Enjoy!
Section 2: How to Remove Horizontal Line in Microsoft Word
Though inserting a horizontal line is sweet, you might not find deleting the line part very sweet. You can definitely press the CTRL + Z keys together to undo inserting the line. But this can be done only if you haven’t made many changes to your document after inserting the line. If you have made many changes, CTRL + Z might not be affordable for you. Well, don’t worry, we have the perfect solution for you right here.
In Microsoft Word, when you insert a horizontal line, it’s not actually considered as a horizontal line. It is, in effect, a paragraph breaker. So if you can somehow remove the borders from your paragraph, then you can get rid of the horizontal line that you inserted. Wondering how to do it? Well, read on then.
Step 1: Firstly select the text right above your horizontal line. If you want to remove multiple horizontal lines at once, simply press the CTRL key down and keep selecting the texts.
Once the selections are made, hit the HOME tab at the top.
Now look for the section named Paragraph.
Under the Paragraph options, click on the border settings icon.
Step 2: Now from the list of options that get expanded out, click on the one that says No Border.
Step 3: That’s it. If you now look at your Word document, you can see that line breaks are all gone! Yes, it cannot get simpler than this, we agree too!
Hope you found the article useful. Don’t forget to share it with your friends and family.
Stay tuned for more amazing technical tips, tricks, and how-tos.


