Google Docs is one of the most popular word processor that makes for a great free alternative to the MS Word. Moreover, it’s advanced features like smart editor, the styling tools and the ability to share documents with others, makes it more than just a word document. The Google Docs is part of the Google Doc editor package, that also includes, Google Sheets, Google Forms, Google Slides and more.
However, the Google Docs also comes with its set of issues, like, missing Google Docs toolbar. While this could be a settings related issue, if you are new to this, you may not know how to get back the toolbar. But fortunately, we know a few hacks that may help you to get the missing toolbar back in Google Docs. Let’s see how.
Method 1: Use the Shortcut
Those who do not have the Compact controls feature, can take advantage of the shortcut keys. There are times when you may want to hide the toolbar because you want to clear the mess from the document or when it simply got missing accidentally. Let’s see how to enable or disable the Google Docs toolbar:
Step 1: Open Google Docs / Sheets and press the Ctrl + Shift + F together on your keyboard to enable or disable the Toolbar.
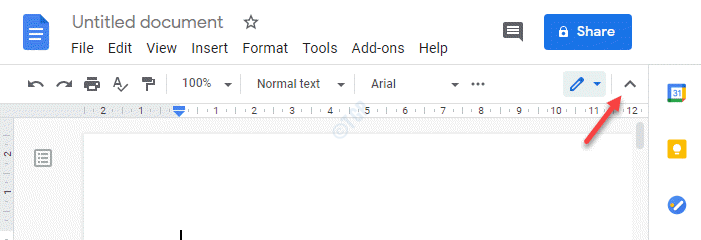
Step 2: You can also simply go to the upper right hand side of the document and click on the small arrow sign to hide or unhide the toolbar in Google Docs.
*Note – When you see an upward arrow, it means that the toolbar is visible and when you see a downward arrow, it means, the toolbar is hidden.

Step 3: Alternatively, you can also simply press the Fn + Esc keys together on your keyboard to unhide the toolbar or for some computers, simply press the Esc key to unhide the missing toolbar.
Method 2 – Click on Show the Menus icon on top right
1 -Open Google Docs, Google sheets etc.
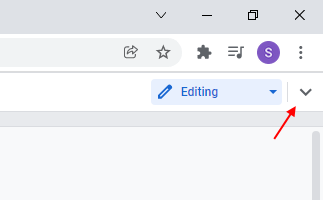
2 – Now, Look closely at the top right in Google Docs.
3 – Now, click once on the arrow styled icon.

Method 3: Enable Compact Controls
The Compact Controls tool may or may not be available on all version of Google Docs. However, if available, it can be a great option to get your toolbar back in Google Docs. Let’s see how.
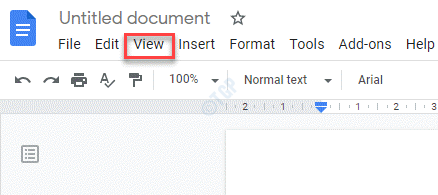
Step 1: Launch Google Docs or Google Sheets and go to the View tab on the upper left side of the document.

Step 2: From the menu, select Compact controls.
This will enable the feature and will show you the toolbar that was missing all this while.
Method 4: Edit Permissions
However, if instead of the missing toolbar you see that toolbar is grayed out and not working, it means, you do not have access to it since the owner of the document has not allowed you to edit the document. In such a case, you must request the owner of the Google Docs file to grant permission to edit the file. Let’s see how:
How to raise a request for Google Docs edit permission
Step 1: Launch Google Docs and open the file.
Step 2: Those files having only view permissions, will show a Request edit access button on the upper right corner of the document.

Step 3: It will open a box that says Ask owner to be an editor.
Write your request message and press Send to send your request.

Once the owner receives it and grans permission, the toolbar will be enabled you will have edit permission for the Google Docs file.
How to Grant Edit Permission for Google Docs
Step 1: Open the Google Docs file and click on blue Share link on the upper right corner of the document.

Step 2: It opens the Share with people and groups window.
Go to the Get link section below and click on Change.

Step 3: Now, navigate to the Anyone with the link (Anyone on the internet with this link can view) option and click on the arrow next to Viewer to expand the section.

Step 4: From the drop-down, select Editor.
This will change the permission to Anyone with the link (Anyone on the internet with this link can edit).
Click on Done and you have successfully granted edit permission for your Google Docs file.

Step 5: If you want to share the file with a specific user who can edit the file, you can simply copy the link by clicking on the Copy link button on the right and share it via email directly.
Click on Done.

Step 6: Alternatively, you can simply add the email address of the concerned user/receiver under Share with people and groups field.
Click on Done and now, the concerned user can edit your file.

Now, that you or the concerned user has the permission to edit the document in Google Doc, the toolbar will be enabled and accessible.