You have a folder inside which there are hundreds of files. You need to get the list of names of all these files, that too, you need to get that list to be populated on an Excel file. Well, obviously there is the manual way and then there is the Geek Page way. The manual way would be to copy the name of each file and paste them onto an Excel file, taking ages to complete the task, with many human errors. The Geek Page way would definitely be performing some steps initially to automate the entire process with the help of a single click. Sounds exciting? We feel so, too!
In this article, we explain how you can easily generate a list with the names of files present inside a specified folder, that too, with the help of nothing but some pure Excel formulae. Hope you enjoy reading!
Example Scenario
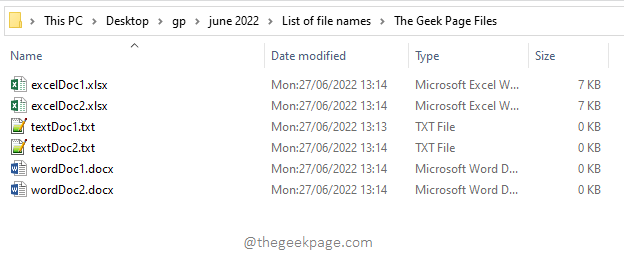
Let’s say you have the following folder with files of different types, say xlsx, txt, docx, etc. Now the requirement is to have this list of file names in an Excel file without manually copy-pasting each file name, as the number of files in the folder could be quite huge. Let’s see how this can be easily done.
Section 1: How to Get the List of All File Names Inside a Folder
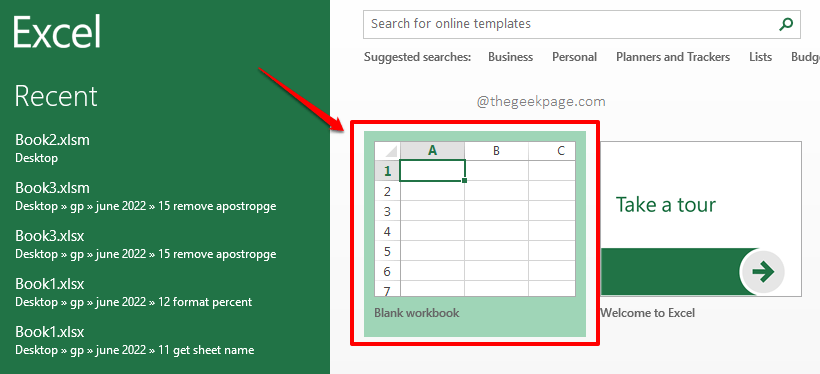
Step 1: Firstly, launch Microsoft Excel. When it does, click on the Blank workbook option.
Step 2: Let’s go ahead and save the document first, as the steps listed in this article require the document to be saved, for them to work.
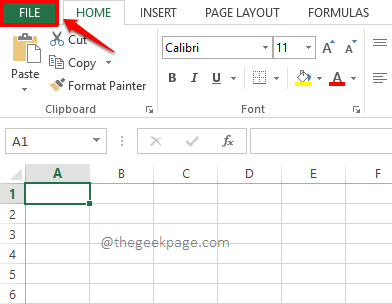
To save the document, click on the FILE tab at the top.
Step 3: Now on the left window pane, click on the Save As option. Then on the right window pane, click on the Browse button.
Step 4: Once you are at the Save As window, do the following steps.
- Navigate to the exact location where your files are present, that is, the location mentioned in the Example Scenario section of this article.
- As next, give a name to your automation file under the File name field. In the example below, I have given the name as theGeekPageAutomation.xlsx.
- By default, the extension would be chosen. But if it is not, choose the extension as Excel Workbook (*.xlsx) from the dropdown menu associated with the Save as type option.
- Hit the Save button once you are all done.
Step 5: Now, on the File Explorer, open the location where your files are present. This is the same location where you have saved your automation file also, in Step 4.
Click on the file explorer navigation bar and copy the entire location by selecting the location and then by pressing the keys CTRL + C together.
Step 6: Now come back to the Excel file that you saved, in my case theGeekPageAutomation.xlsx, and then double click on the very first cell, which is, A1. You can choose other cells as well. But since the entire process is lengthy, you could get confused if you choose a different cell. So, we recommend you choose cell A1 itself.
Now, simply press the keys CTRL + V at the same time to paste the location that you copied on Step 5.
Manually add \* (backslash + asterisk) at the end of the copied location. This is very important. It basically translates to, everything that is present at the location specified.
Step 7: If you could correctly paste the location of the folder where your files are present, you can skip this step. Else if you are facing any difficulties, following is a one-step solution, try it.
This step simply details another easy method using which you can get the location of the folder where your files are present. For that, you need to copy and paste the following formula onto cell A1 as shown in the screenshot below.
=SUBSTITUTE(CELL("filename"),RIGHT(CELL("filename"),LEN(CELL("filename"))-FIND("@",SUBSTITUTE(CELL("filename"),"\","@",LEN(CELL("filename"))-LEN(SUBSTITUTE(CELL("filename"),"\",""))),1)),"*")
Note: Please note that you don’t have to add \* manually at the end of the location if you are using this formula. That part is already handled in the formula.
Step 8: Now if you hit the Enter key, you can see the location of the folder where your files are present.
Once you have the folder location ready with \* at the end, hit the FORMULAS tab at the top.
As next, under the FORMULAS tab, hit the Define Name button.
Step 9: Now, firstly, give a name to your new name range. I have given the name as GeekPageList.
Now under the Refers to field, type in =FILES( and then finally click on the A1 cell to auto-populate the FILES() formula.
=FILES(
Step 10: Once you click on cell A1, it will be referred to in the FILES() formula automatically.
Close the FILES() formula by typing in a closing brace, ). Remember, this is an important step.
Hit the OK button.
Step 11: Now you have successfully created a named range that has the names of all the files inside the folder whose location you have mentioned on cell A1.
Now your new named range GeekPageList is like an array and it has all the file names of the folder specified. The only pending job we have now is to successfully extract the names of the files one by one from this array.
To successfully extract the first file name from the array GeekPageList, simply double click on any cell, we recommend cell B1 as this is the cell used in the example screenshots, and copy-paste the following formula.
=INDEX(GeekPageList,1)
Note: If you have given a different name to your name range at Step 9, you need to replace GeekPageList name with the name you gave.
Also note that the INDEX function takes in the array passed to it, as its first argument and returns the element present at the index number passed to it, as its second argument. In this case, INDEX function returns the first file present inside the folder location present on cell A1.
Step 12: If you hit the Enter key now, you can see that the name of the first file is successfully extracted from GeekPageList.
Step 13: Similarly, you can extract the name of the second file using the INDEX function as follows.
=INDEX(GeekPageList,2)
Step 14: Likewise, the third file name can be extracted by passing the index number as 3.
=INDEX(GeekPageList,3)
As long as the number of files inside the folder is limited, you can, maybe, keep substituting the index number of files as shown in the steps above. But what if there are many files? Well definitely then we need some way using which we can automate the population of the second argument of the INDEX function. Let’s see how this can be done in the coming steps.
Step 15: To automate the population of the second argument of the INDEX function, let’s use the ROWS function. Please replace the formula you have in cell B1 with the one below.
=INDEX(GeekPageList,ROWS(A1:A1))
Step 16: If you hit the Enter key, you can see that the second argument got correctly populated and that the name of the first file is successfully retrieved.
If you now drag the formula down to apply it across the column, you will observe that the name of the first file is repeating and that we are not getting the names of the other files present in the folder. Well, some more minor modifications are required to obtain all the file names.
Step 17: Simply click on the first argument of the ROWS function, which is A1, inside the INDEX function, and then hit the F4 key.
This would lock the first argument of the ROWS function. Your formula, at this stage, should look as follows.
=INDEX(GeekPageList,ROWS($A$1:A1))
Step 18: Now let’s try dragging the formula down. For that, click on the small green square shape at the right corner of the cell and drag it down.
Step 19: Now, you can see that the formula is correctly applied and all the file names are coming, instead of repeating the first one over and over.
But if you look at the end of the highlighted region, you can see that #REF! error has come. This is because the array has run out of range. Yes, if we drag the formula further down, exceeding the actual number of files in our folder, which is the number of elements in our array, then we can get the #REF! error, indicating that we got an array overflow error. Don’t worry, this can also be overcome fast and easy.
Step 20: To handle the #REF error, let’s add the IFERROR function. The IFERROR() function, as defined below, would return a blank value if there is an error in the value returned by the inner formula. Your formula with the error handling should be as follows.
=IFERROR(INDEX(GeekPageList,ROWS($A$1:A1)),"")
Step 21: That’s it. The error is now perfectly handled. You’ll no longer get any value errors in your list of file names. Enjoy!
Note: Please note that the automation file, theGeekPageAutomation.xlsx, also gets included in the list of files as it is in the same location. You can manually delete the automation file’s name from the list if you do not want it present in the list of file names.
Section 2: How to Get the List of File Names with Specific Extensions Inside a Folder
Now, let’s say you want only the list of file names with a specific extension. In that case, all you need is a small tweak, let’s see what it is in the coming steps.
Please note that before you go ahead, make sure you have completed all the steps mentioned in Section 1.
Step 1: If you need only the docx file names’ list, then in the A1 cell, instead of putting a simple asterisk sign, *, you need to put *docx*. Refer to the screenshot below.
Yes, that would be all. Simply hit the Enter key and in column B, you will have the list of docx files only.
Step 2: Likewise, if you need only the text files’ list, then in the A1 cell, in the end, type *txt* instead of a single asterisk. Hit the Enter key to view the results on column B.
Step 3: Similarly, if you want only xlsx files, type down *xlsx* after the \ on the A1 cell.
You can generate the list of file names of any specific extension type like JPEG, PNG, etc in the same fashion. Have fun!
Please tell us in the comments section if you are stuck at any of the steps, we are always happy to help! Also, do share the article with your friends and family if you found it helpful.
Stay tuned for more mind-blowing tips, tricks, and how-to articles!


