Imagine you are looking for something on your system but not sure which app to open or select. This is where the Live Tiles feature comes into the picture. Live Tiles for any supported applications can be added on the Desktop or the Start Menu of Windows system, whose tiles change often.
Live Tiles makes the app widget come alive and it is so pleasing. Not only for its appearance, but even for convenience. Say you use a whatsapp or facebook app on your system, wouldn’t it be convenient if the number of notifications be displayed on the app icon? This is possible if any such supported app is added as a live tiles.
Let us see how this can be done on the windows system. If you are also finding a way how to get live tiles on desktop and start menu in Windows 11, then please continue reading this article to know more.
How to Get Live Tiles on Desktop and Start Menu in Windows 11
First of all, to get the live tiles on a Windows 11 system, you need to install the Live Tiles Anywhere app which can be downloaded and installed from the Microsoft Store. Follow the steps below on how to download and install Live Tiles Anywhere.
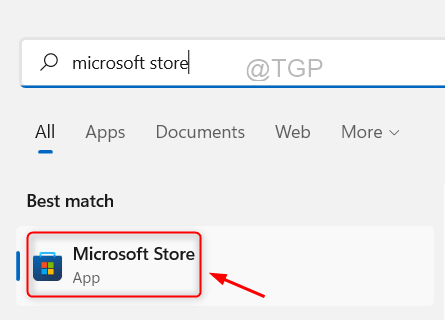
Step 1: Firstly, you need to open the Microsoft Store app on your system. To do so, press the Windows key and type microsoft store.
Step 2: Then, select the Microsoft Store app from the search results as shown below.

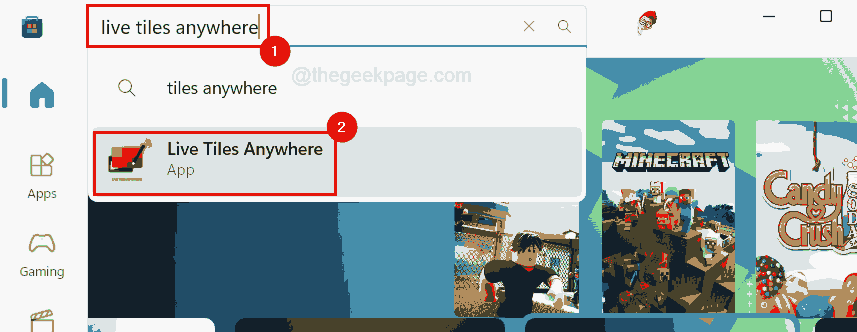
Step 3: Once the Microsoft Store app window opens on your system, type live tiles anywhere in the search bar and select the Live Tiles Anywhere app from the search list by clicking on it as shown below.

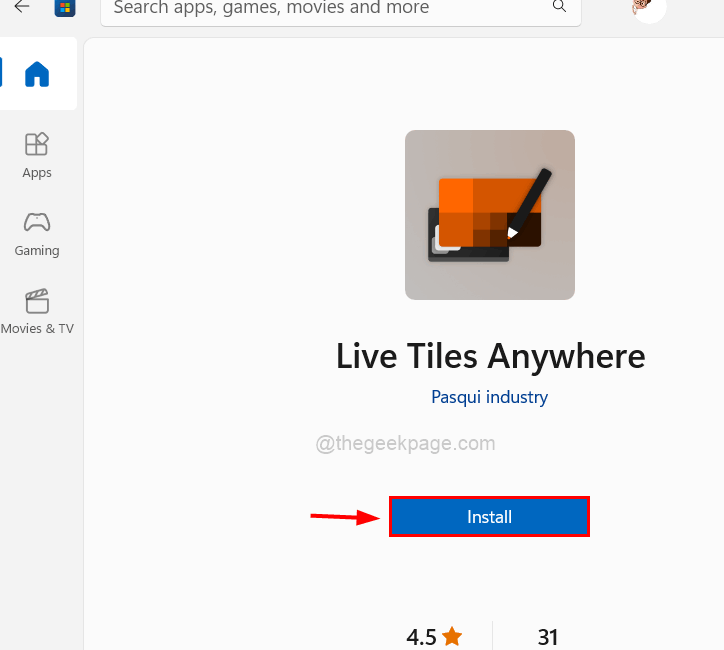
Step 4: In the Live tiles Anywhere app page, click Install and it soon starts downloading and then installs it on your system as shown below.

Step 5: After it is done installing, you will get to see a button called Open on the app page.
Step 6: To launch the app, you should either click Open OR press the Windows key, type live tiles anywhere and hit the Enter key.

Step 7: After the app gets opened, you should click ALL APPS on the top menu bar of the app window as shown below.
Step 8: Here all the apps from your system that are installed, will be listed.
Step 9: Now if you want to add any app (For eg. Photos, Notepad, Weather, etc.) to be added on the desktop or start menu as a widget, then find the app first and right-click on it.

Step 10: Click Create a widget from the context menu.

Step 11: Next if you want to pin it to the Start menu, then right-click on the app and select the Pin to the Start menu option from the contextual menu as shown below.

NOTE: Please accept the confirm dialog box by clicking Yes to continue pinning this to Start.

Step 12: Now the newly created widget will be present at the top left corner of the screen. You have to drag it to anywhere you like on the desktop screen.

Step 13: Now all the apps that you had created a widget, will be there under the CUSTOM TILES tab.

Step 14: If you want to remove these apps from the Custom Tiles, then right-click on the app and select Delete and un-pin from the menu.

Step 15: Under the Custom Tiles tab, you can close the widget by right-clicking on the app and clicking the Close widget from the context menu as shown below.

Step 16: You can also close the widget directly from the desktop by right-clicking on the widget and selecting the Close option from the menu.

Step 17: To change the size or dimension of the widget on your desktop screen, please right-click on the widget you created (Eg. Weather).

Step 18: Then select the dimension range from the top bar of the context menu as shown below.
We have chosen the biggest dimension possible. You can choose any of them you want.

Step 19: As soon as you click it, the widget dimension gets changed to the selected one as shown in the below image.
