Do you want the classic Windows Photo Viewer experience back in your Windows 10 computer? Actually, Microsoft replaced the old Windows Photo Viewer with newer Photos app. Many users appreciate the classic look of Windows Photo Viewer and they want it back. If you want to set the ‘Windows Photo Viewer‘ as the default photo viewer on your computer, follow these steps to do it.
Method-1 Run a registry script-
You have to run a registry script on your computer and the problem will be fixed.
Now, follow these steps to download and run the script.
1. Download “Restore Windows Photo Viewer on Windows 10“.
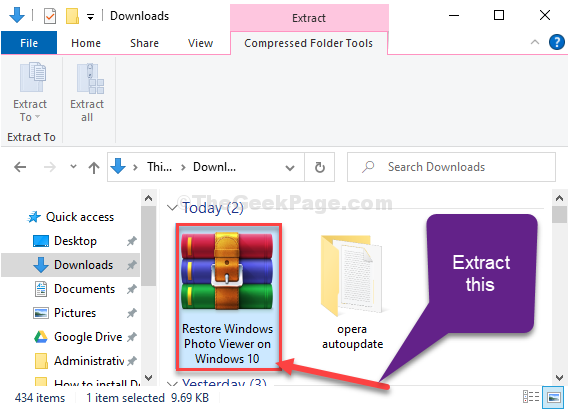
2. Go to download location on your computer.
3. Extract the “Restore Windows Photo Viewer on Windows 10” files on at a favorable location of your choice.

4. Go to the location where you have extracted the files.
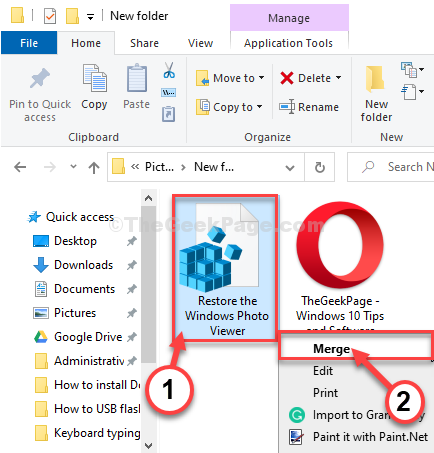
5. Right-click on “Restore the Windows Photo Viewer” registry file and then click on “Merge“.

The registry script will be run on your computer.
6. If there is a warning message, click on “Yes“.

You have re-enabled the Windows Photo Viewer on your computer.
All you have to do is that set the Windows Photo Viewer as a default application on your computer. To do so, follow these simple steps-
1. At first, type “default apps” in the search box.
2. Now, click on “Default apps” in the elevated search result.

3. In the Settings window, on the right-hand side, scroll down and under ‘Photo viewer‘ click on “Photos“.
4. Now, from the list of apps click on “Windows Photo Viewer” to set it as default on your computer.

Whenever you will open an image it will be opened in the Windows Photo Viewer app.
Method-2 Use Windows Photo Viewer-
Download this software on your computer and you will able to use Windows Photo Viewer again on your computer.
1. Download the Restore Windows Photo Viewer. Just click on download to download this software.
2. Go to the download location on your computer.
3. Double click on “RestoreWindowsPhotoViewerSetup” to run the setup on your computer.

4. In the setup window, click on “Next“.

5. Now, click on “Install” to start the installation process.

6. Finally, click on “Finish” to finish the process.

Restore Windows Photo Viewer will be opened automatically.
7. Now, in Restore Windows Photo Viewer 1.22 window, click on “Restore Windows Photo Viewer“.

8. You will be directed to the Settings window automatically. Now, click on “Photo Viewer” and then select “Windows Photo Viewer” in the list of the applications.

Close all the application windows.
That’s it! From now on whenever you will double click on a photo or an image it will be opened in Windows Photo Viewer.