Windows 10 now offers a great feature that allows you to select which GPU you want to use for your game or app. Usually, a PC comes with two graphics cards of which one is the integrated graphics card (the default one) and the other is the Dedicated graphics card. The integrated card is normally an Intel chip and the Dedicated card is from manufacturers like AMD and Nvidia.
Therefore, if you are an avid gamer or use high-quality video editing programs, the Dedicated GPU is of great use. But, given that your Windows 10 PC has two graphics cards, you don’t know which one is in use. So, if you have downloaded a new game or app and want it to run using the Dedicated GPU, this is how you can do it.
Method 1: Using Graphics Settings
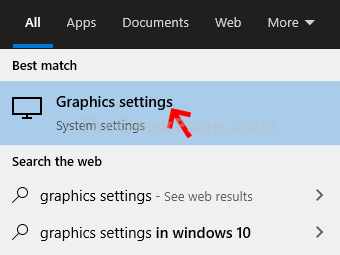
Step 1: Desktop > click on the Start button > type Graphics Settings > click on the result.

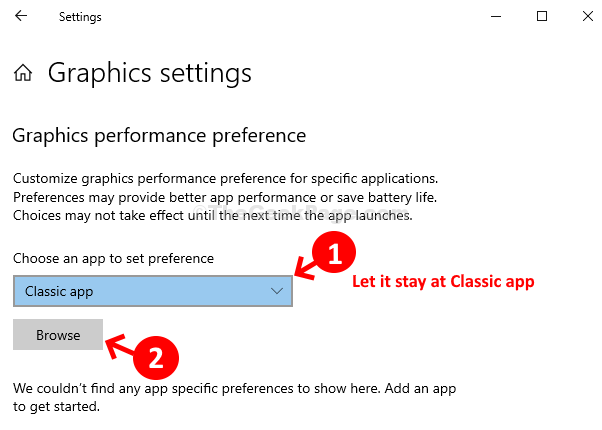
Step 2: Graphics Settings window > Choose an app to set preference > let it stay at the Classic app in the drop-down > click on the Browse button.

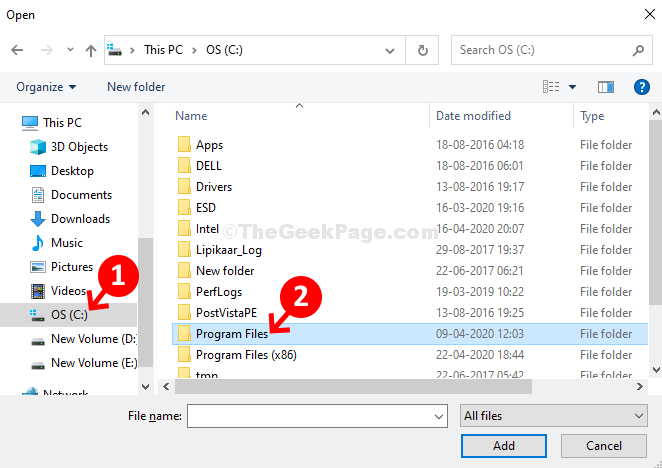
Step 3: It opens the File explorer > click on the drive > OS (C:) shortcut on the left side of the window > Now go to the app that you want to force to use the dedicated GPU. Check if it’s located in the Program Files or in the Program Files (x86) folder based on its a 64-bit version or 32-bit version.
*Note – Program Files is for the 64-bit versions and the Program Files (x86) is for 32-bit versions.
In our case, we selected paint.net which is located in the Program Files.

Step 4: Now, select Next, select paint.net

Step 5: Select PaintDotNet app > click on the Add button at the bottom of the File Explorer.

Step 6: Now, as the paint.net app gets added to the Classic App list > click on the app > click on the Options button.

Step 7: Now, in the list of graphics preferences > by default set to System default (computer decides which GPU to use) > select High Performance > it uses the Dedicated graphics > click Save.

That’s about it! You have now successfully changed the GPU preference allowing your app to use the Dedicated graphics.