Your C: drive was fine last month. Now it’s red, and you haven’t installed anything.
You open Storage settings and there it is. Tens of gigabytes filed under System, or Temporary files, or nothing at all. No warning. No explanation.
Why This Happens
Windows Update is a hoarder. It keeps everything, just in case.
Every update it downloads gets stored in a folder called SoftwareDistribution. It’s supposed to clear that out afterwards. Often it doesn’t, especially if an update failed partway and it plans to retry.
Then there’s Delivery Optimization, which uses your PC to share update files with other PCs on the internet. Your drive is the warehouse. Those files linger.
Windows also sets aside about 7GB permanently, calls it Reserved Storage, and refuses to let you use it. And after a big feature update, it keeps your entire old copy of Windows in a folder called Windows.old — that’s 20 to 30GB on its own, so you can roll back if you hate the new version.
Add a broken update stuck in a retry loop, redownloading itself night after night. That’s how you get to 99GB.
None of this is malware. It’s Windows being cautious, without ever mentioning it to you.
Fix 1 – Run Disk Cleanup as Administrator
Start here. The ordinary Disk Cleanup can’t touch update files. Run it as administrator and it unlocks a whole extra category, which is usually where the bulk of your missing space is sitting.
1 – Press the Windows key and type Disk Cleanup.
2 – Right-click the result and choose Run as administrator. This part matters. Left-clicking gets you the limited version.
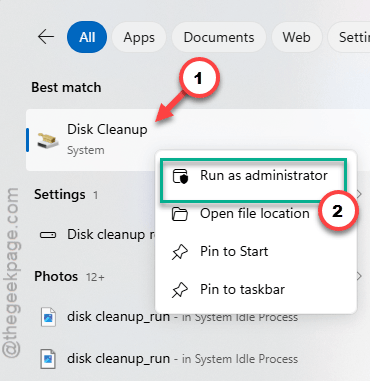
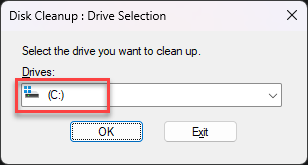
3 – Pick your C: drive from the dropdown and click OK.
4 – Click the Clean up system files button near the bottom left.
5 – Choose C: again and wait while it scans. On a badly clogged drive this takes several minutes and looks stuck. Let it finish.
NOTE – You may not see this option on newer Windows 11 versions. In that case, skip the 4th and 5th step.
6 – Tick Windows Update Cleanup. Also tick Previous Windows installation(s) and Delivery Optimization Files if you see them.
7 – Click OK, then Delete Files.
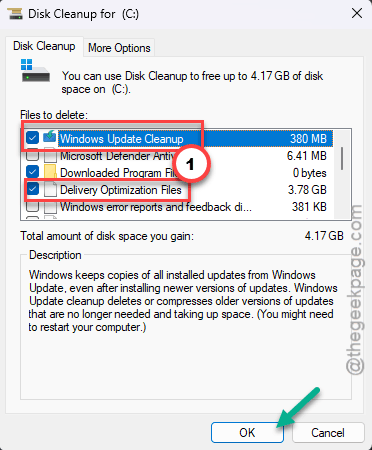
It can take twenty minutes, and the progress bar barely moves for the first ten. Some of the deleting finishes on your next restart, so don’t be alarmed if the space appears late.
Fix 2 – Empty the Update Download Folder
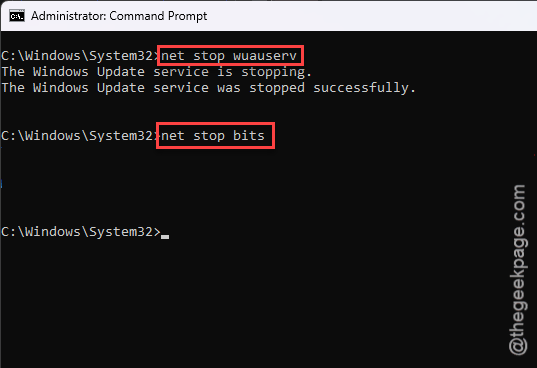
1 – Press the Windows key, type cmd, right-click Command Prompt, choose Run as administrator.
2 – Run this:
net stop wuauserv
3 – Then run this:
net stop bits
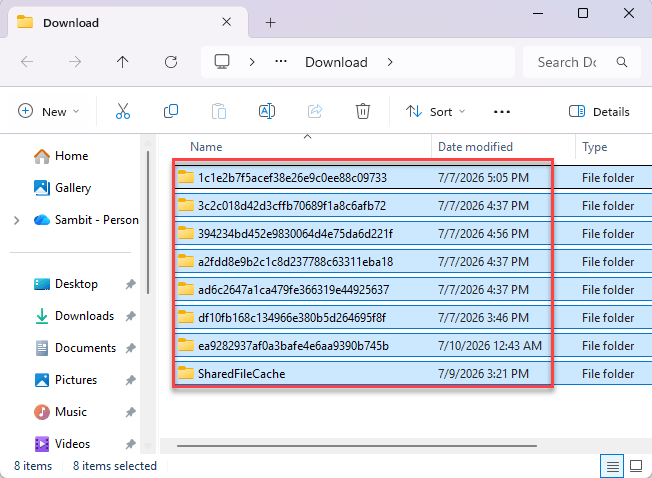
4 – Open File Explorer and go to
C:\Windows\SoftwareDistribution\Download
5 – Select everything inside and delete it.
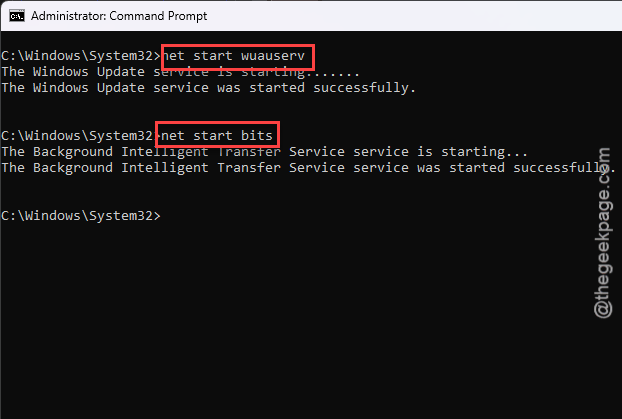
6 – Back in Command Prompt, run net start wuauserv and then net start bits.
Windows recreates whatever it genuinely needs. Nothing here is precious.
Fix 3 – Stop Your PC Seeding Updates to Strangers
Delivery Optimization turns your computer into a mini update server for other people’s PCs. Off by default? No. On by default, and it keeps a cache to share from.
1 – Press Windows + I for Settings.
2 – Click Windows Update at the bottom of the left sidebar.
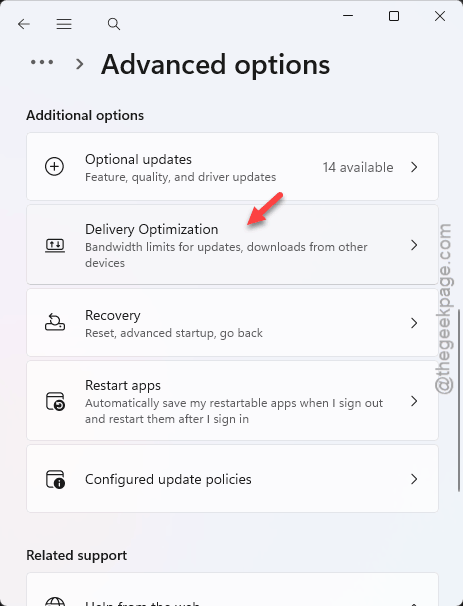
3 – Click Advanced options.
4 – Scroll down and click Delivery Optimization.
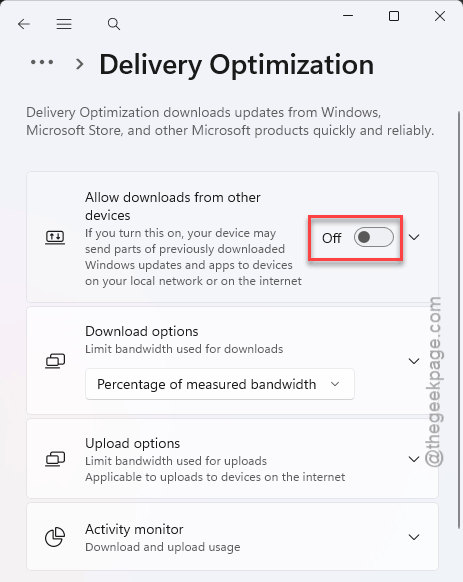
5 – Turn off Allow downloads from other PCs.
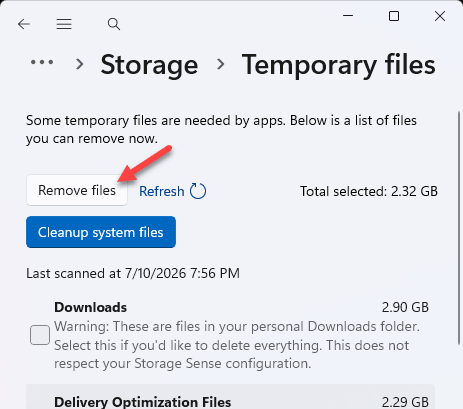
Now clear what it already cached. Open Settings, click System, then Storage, then Temporary files, and tick Delivery Optimization Files. Click Remove files.
Fix 4 – Reclaim the 7GB Windows Reserved for Itself
Reserved Storage is space Windows fences off so updates always have room to work. Sensible on a big drive. Painful on a 128GB laptop.
There’s a proper command for this. Use it before you go anywhere near the registry.
1 – Open Command Prompt as administrator.
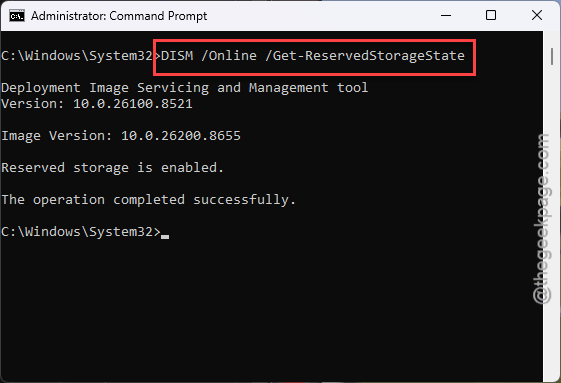
2 – Run this to see if reserved storage is even on:
DISM /Online /Get-ReservedStorageState
3 – If it says enabled, turn it off with:
DISM /Online /Set-ReservedStorageState /State:Disabled
4 – Restart your PC.
Windows sometimes refuses, saying an update is in progress. Finish or cancel any pending update, restart, and try again.
Still refusing? Then the registry route.
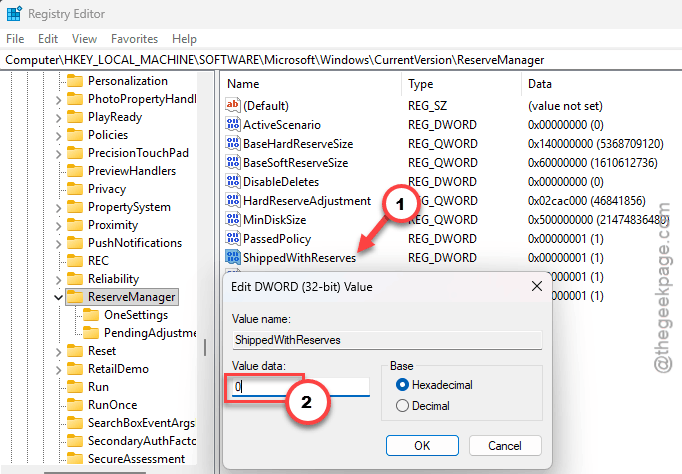
Press Windows + R, type regedit, press Enter.
Go to
HKEY_LOCAL_MACHINE\SOFTWARE\Microsoft\Windows\CurrentVersion\ReserveManager
Double-click ShippedWithReserves and set it to 0. Do the same for ActiveWithReserves.
Restart.
Understand what you’re giving up. Future feature updates now have no guaranteed workspace, and they’ll fail on a full drive rather than making room. Keep 15GB free yourself.
Fix 5 – Delete Your Old Windows Installation
If you updated to a new version of Windows in the last month, this is almost certainly where your 99GB went.
Read this before you do it: deleting Windows.old means you can never roll back to the old version. If the new one is behaving, that’s fine. If you’re still not sure about it, wait.
1 – Press Windows + I, click System, then Storage.
2 – Click Temporary files.
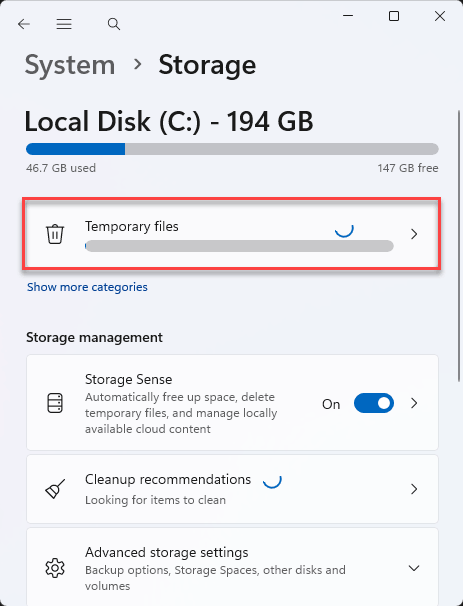
3 – Tick Previous Windows installation(s).
4 – Tick Windows Update Cleanup while you’re there.
5 – Click Remove files.
Windows deletes this by itself after ten days anyway. You’re just not waiting.
Fix 6 – Shrink the Component Store
The WinSxS folder holds every version of every system file Windows has ever installed. It grows forever. Open an administrator Command Prompt and run DISM /Online /Cleanup-Image /StartComponentCleanup /ResetBase.
Expect fifteen to thirty minutes. The /ResetBase part is the aggressive bit — it throws away the older copies of updated files, which typically frees several gigabytes. The cost is that you can no longer uninstall individual updates afterwards. Don’t run it while an update is pending.
Fix 7 – Break the Retry Loop
One failing update, redownloading itself every night, is a slow leak. Install it by hand and the loop ends.
1 – Open Settings, click Windows Update, then Update history. Find the update that keeps failing and note its KB number.
2 – Go to catalog.update.microsoft.com and search that number.
3 – Download the x64 version, or ARM64 on a Snapdragon machine.
4 – Double-click the .msu file and let it install.
5 – Restart.
6 – Run Fix 2 afterwards to clear out the copies it left behind.
How to Prevent This
– Turn on Storage Sense. It’s in Settings under System, then Storage. It cleans temporary files automatically and you never think about it again.
– Set your Wi-Fi to metered if space is tight. Settings, Network & internet, Wi-Fi, your network’s properties, then flip Metered connection on. Windows stops pulling down optional downloads in the background.
– Leave Delivery Optimization off. You gain nothing from seeding updates to the internet.
– Check Update history every couple of months. A quietly failing update is a slow storage leak.
– Keep 20GB free on C:. Windows needs elbow room, and an update that runs out of space fails in far uglier ways than this.
People Also Ask
Why is my Windows 11 update stuck at 99%?
It usually isn’t stuck — the last percent covers file work that reports no progress. Give it an hour before doing anything. Still frozen after that? Free up 20GB, run the Windows Update troubleshooter, and clear C:\Windows\SoftwareDistribution\Download. Never force a shutdown mid-update if you can avoid it.
How to update to Windows 11 without enough storage?
Plug in a USB stick with 10GB or more free. The Windows installer will offer to use it as temporary workspace. Before that, run Disk Cleanup as administrator and tick Windows Update Cleanup, and delete Windows.old if it’s there. That usually finds more than enough on its own.
Which Windows 11 is killing SSD?
You’re thinking of the 24H2 update reports from 2024, where some drives dropped out during large writes. Those were firmware bugs on specific SSD controllers, and the drive makers patched them. The storage disappearing here is a different thing entirely — that’s just Windows Update keeping files it doesn’t need.